If you’re passionate about sewing and looking for a small, creative project that brings both charm and function to your kitchen, a String Block Quilted Potholder – Pattern is the perfect starting point. This versatile and beginner-friendly design allows you to use up fabric scraps, experiment with color combinations, and sharpen your quilting skills while creating something useful and decorative.
The String Block Quilted Potholder – Pattern offers endless possibilities for customization. Whether you’re working with bright, bold fabrics or soft, vintage tones, this project gives your scrap bin new life. The technique of using string blocks—narrow strips of fabric sewn together—adds texture and a handcrafted feel to your kitchen essentials. It’s an enjoyable, quick project ideal for gifting or personal use.
In this article, we’ll walk through everything you need to know to get started with your own String Block Quilted Potholder – Pattern. From choosing your materials to assembly tips and quilting techniques, you’ll find all the inspiration and instruction you need to confidently complete this fun sewing project.
1. What Is a String Block Quilted Potholder?
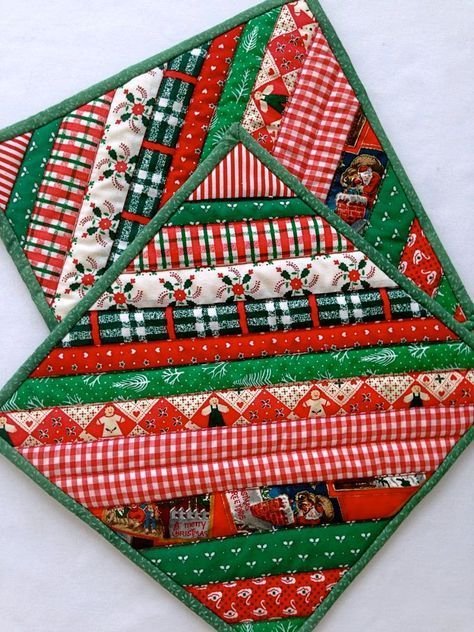
A String Block Quilted Potholder – Pattern is a sewing design that incorporates narrow strips of fabric, called “strings,” which are pieced together diagonally or vertically to form a block. These blocks are then quilted and assembled into potholders.
This style of potholder has a unique patchwork appearance. The strings create dynamic lines and textures that can be tailored to match any kitchen decor. It’s a fantastic scrap-busting project, making it a favorite among quilters and sewists.
Unlike traditional quilting blocks, string blocks allow for more freedom. There’s no strict pattern or color requirement—just creativity and a good mix of fabric strips. That freedom is what makes it appealing to both new and experienced crafters.
The potholder itself is not only visually striking but also practical. With added heat-resistant batting or layers of cotton batting, it becomes fully functional for handling hot pots and pans.
This type of quilted potholder is also a fantastic gift idea. Personalizing it with specific colors or themed fabrics gives it a thoughtful, homemade touch that anyone would appreciate.
Whether you’re looking to improve your quilting skills or just need a weekend project, this String Block Quilted Potholder – Pattern checks all the boxes.
2. Materials Needed to Make a String Block Quilted Potholder
Before you begin creating your String Block Quilted Potholder – Pattern, it’s essential to gather all the right materials. Using quality materials will ensure your potholder is not only attractive but also safe and durable.
You’ll need a mix of cotton fabric scraps in various colors and prints. Try to stick with 100% cotton fabrics, as they are safe for heat and easy to sew. The strings should vary in width—between 1” and 2.5”—for the best effect.
Next, you’ll need a base fabric for the foundation of your string blocks. Lightweight muslin or scrap fabric works well for this purpose. It acts as a stabilizer and helps maintain the shape of your block.
Batting is crucial for insulation. You can use two layers of cotton batting or one layer of insulated batting (like Insul-Bright) sandwiched between cotton layers. This keeps your hands protected from heat.
A backing fabric is also required. Choose something that complements your string block design and is also cotton. This fabric will be the back of your finished potholder.
Don’t forget essential notions like thread, pins, scissors, rotary cutter, ruler, and sewing machine. You’ll also want an iron for pressing your seams flat, which makes the finished potholder more polished.
Lastly, consider adding a loop for hanging your potholder. A small strip of bias tape or fabric folded and sewn works perfectly for this detail.
3. How to Sew a String Block for Your Potholder
Creating the string block is the most creative and enjoyable part of making your String Block Quilted Potholder – Pattern. Start by cutting your foundation square—typically 8″ x 8″—from muslin or another base fabric.
Choose your first fabric string and place it right side up diagonally across the foundation square. Then place a second strip right side down on top of the first strip, aligning raw edges.
Sew the strips using a ¼” seam allowance. After stitching, flip the top strip over and press it flat. Continue adding strips on either side of the center string, alternating fabrics and pressing after each one.
Trim the edges of your string block to match the foundation square. This ensures all your blocks are uniform in size and ready for assembly.
Once your block is complete, layer it with batting and backing fabric. Baste or pin the layers together to prepare for quilting. This step is important to avoid shifting during sewing.
You can quilt using straight lines, diagonal lines, or free-motion quilting. Keep the design simple to highlight the string block’s natural beauty.
With your quilt sandwich complete and quilted, your string block is now ready to be trimmed and sewn into a finished potholder.
4. Assembling and Finishing the Potholder
Now that your string block is quilted, it’s time to finish the String Block Quilted Potholder – Pattern. Start by trimming the quilted block to an even square—usually around 7.5″ x 7.5″—so the edges are clean and square.
Prepare your binding strips. You can use store-bought bias tape or make your own from coordinating fabric. Cut strips 2.5” wide, join them end to end, and press in half lengthwise.
Attach the binding to the front of the potholder using a ¼” seam allowance. Miter the corners for a professional look, then wrap the binding around to the back and stitch it down.
If you’re adding a loop for hanging, fold a small piece of fabric or ribbon into a loop and tuck it into one corner before sewing the binding in place. Secure it firmly to ensure durability.
Give your potholder a final press with the iron. This step helps set the stitches and gives the finished product a crisp, polished look.
Your String Block Quilted Potholder – Pattern is now complete! Admire your work, and don’t be surprised if you want to make more—they’re fast, fun, and a great way to use up fabric scraps.
FAQ: String Block Quilted Potholder – Pattern
Q1: What size should my potholder be?
A common size is 7.5″ x 7.5″ or 8″ x 8″, but you can adjust based on your needs. Just make sure it’s large enough to protect your hands from heat.
Q2: Can I use polyester fabric or batting?
It’s not recommended. Polyester can melt under high heat. Always use 100% cotton fabric and batting, or insulated batting made for heat resistance.
Q3: Do I need a sewing machine to make this?
While it’s possible to sew it by hand, a sewing machine makes the process much faster and gives a more durable result.
Q4: How do I wash quilted potholders?
Machine wash on a gentle cycle in cold water. Air dry or tumble dry low. Press with an iron if needed to restore shape.
Q5: Can beginners make this project?
Absolutely! The String Block Quilted Potholder – Pattern is beginner-friendly and a great way to practice basic quilting techniques.
Q6: Where can I find patterns or inspiration?
Pinterest, quilting blogs, and YouTube are full of free patterns and ideas. You can also draft your own using scraps you already have.
Conclusion
The String Block Quilted Potholder – Pattern is a charming and practical sewing project that brings joy and color into everyday life. It’s a fantastic way to repurpose fabric scraps, explore creative color combinations, and improve your quilting skills without committing to a large quilt.
With just a few basic materials and some time, you can create a beautiful, handcrafted potholder that reflects your style and makes a great gift. From choosing your strings to quilting the layers, each step is rewarding and beginner-friendly.
We hope this guide has inspired you to dive into your own String Block Quilted Potholder – Pattern project. If you’ve enjoyed this article or have tips and experiences to share, please leave a sincere opinion below and share your suggestions—we’d love to hear from you!