Stunning Quilted Edges Tutorial – Pattern is a captivating and rewarding technique for quilters who want to elevate the beauty and finish of their handmade projects. By starting with the keyword Stunning Quilted Edges Tutorial – Pattern, we strengthen SEO while setting the stage for a creative, educational, and accessible guide. This type of quilting technique focuses on completing quilts, table runners, placemats, and decorative sewing projects with polished, eye-catching edges that truly stand out. Whether you are an enthusiastic beginner or an experienced quilter seeking new inspiration, learning how to craft quilted edges beautifully can transform your work.
The appeal of the Stunning Quilted Edges Tutorial – Pattern lies in its combination of functionality and artistry. While edges serve as the finishing touch that holds a project together, they also provide an opportunity to add personality, dimension, and style. Quilters often love exploring techniques such as scalloped edges, binding with contrasting fabric, prairie points, wavy borders, and embroidered or decorative stitching. These methods not only enhance the appearance of a quilt but also showcase craftsmanship and attention to detail.
Additionally, this pattern is wonderfully adaptable. Whether your quilting style leans toward modern minimalism or traditional charm, the Stunning Quilted Edges Tutorial – Pattern allows you to choose techniques that align with your design goals. You can mix colors, textures, shapes, and stitching styles to create a finish that complements your overall quilt. Below, you will find a deeply detailed guide structured to help you understand edge design, prepare materials, sew beautiful edges, and personalize them with creative touches.
1. Understanding the Foundations of the Stunning Quilted Edges Tutorial – Pattern
The first step in mastering the Stunning Quilted Edges Tutorial – Pattern is understanding why edge finishing matters so much. Edges not only frame your quilt but also contribute to its durability and visual appeal. A well-constructed edge prevents fraying, stabilizes the quilt layers, and provides a clean, cohesive finish that elevates the entire project.
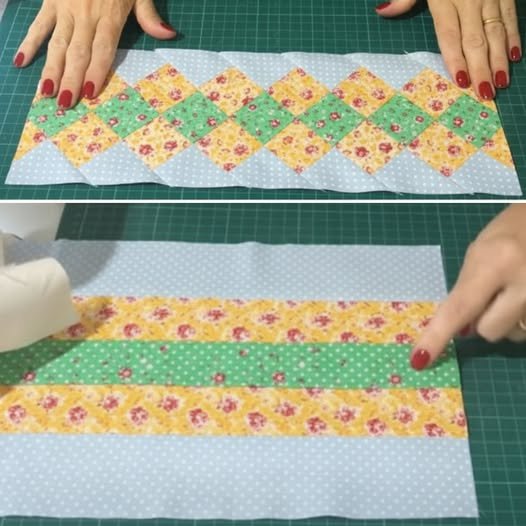
Various edge styles bring different benefits. Straight-cut edges with traditional binding are classic and clean, making them ideal for everyday quilts. Scalloped or wavy edges add softness and whimsy, giving projects a more decorative and unique quality. Prairie points create a striking, geometric border that adds texture and playfulness, especially for baby quilts or wall hangings.
Each style of edge requires specific preparation and cutting techniques. For example, if you plan to add curved edges, you’ll need to mark your curves carefully using templates or rulers. Straight edges depend on crisp 90-degree corners and accurate trimming. Attention to detail during the planning stage ensures that the finishing process goes smoothly.
Another important foundation is choosing the right backing and batting. Your quilt’s edge stitching will look cleaner and smoother if the layers are evenly trimmed and pressed. The thickness of your batting can affect the techniques you choose; for example, thinner batting works best for sharp, crisp edges, while thicker batting can provide a softer, rounder finish.
Understanding these foundations also helps you plan ahead. Before you begin quilting, think about the final edge design so your quilting lines complement the border style. This foresight is a key aspect of the Stunning Quilted Edges Tutorial – Pattern, helping you achieve a harmonious and professional result.
2. Materials and Tools Needed for the Stunning Quilted Edges Tutorial – Pattern
To follow the Stunning Quilted Edges Tutorial – Pattern, you will need a few essential quilting supplies. Start with high-quality quilting cotton for both your quilt top and binding. Sturdy, tightly woven fabrics are ideal because they resist fraying and provide strong durability along the edges.
A rotary cutter, quilting ruler, and self-healing cutting mat are required for accurate trimming. Precision is crucial, as uneven cuts can affect binding alignment. You may also want templates for scalloped edges or specialty rulers for wavy or angled designs. These tools help you achieve consistency across your border.
For stitching, your sewing machine should be equipped with a reliable straight stitch and preferably a walking foot. A walking foot assists in feeding all quilt layers evenly, preventing shifting while sewing binding or decorative stitching. A quarter-inch foot is also helpful for achieving perfect seam allowances.
High-quality thread in a coordinating or contrasting color is essential. If you plan to use decorative stitching along the edges, choose threads that highlight the design. Some quilters use variegated thread for added visual interest.
Pressing tools such as an iron, pressing board, and seam roller contribute to a clean and crisp finish. Proper pressing reduces bulk and helps edges lie flat, which is especially important for scalloped or curved designs.
Additional supplies include binding clips, pins, hand-sewing needles, and fabric marking tools. These items make the Stunning Quilted Edges Tutorial – Pattern easier to follow and help ensure that your edge finishing looks neat and polished.
3. Step-by-Step Instructions for Sewing Stunning Quilted Edges
To begin sewing the Stunning Quilted Edges Tutorial – Pattern, start by trimming your quilt squarely and evenly. Smooth, straight edges ensure that your binding or decorative edging attaches seamlessly. Take your time during this step—precision here sets the foundation for a flawless finish.
If you are applying traditional binding, cut strips of fabric typically 2.25″ or 2.5″ wide, depending on your preferred thickness. Sew the strips together at diagonal angles to prevent bulky seams. Press the binding in half lengthwise with wrong sides together. This folded strip will wrap around the quilt’s raw edge cleanly and securely.
Next, attach the binding to the quilt’s front side using a quarter-inch seam allowance. Start sewing midway along one edge to allow for joining the ends later. Mitered corners require slowing down and folding the binding properly to achieve sharp points. This technique enhances the clean lines associated with the Stunning Quilted Edges Tutorial – Pattern.
After sewing, fold the binding over to the back of the quilt and secure it with clips. You can hand-sew the binding for an invisible finish or machine-sew it for durability and speed. Machine finishing can add decorative flair if you use a specialty stitch.
For scalloped edges, follow your template to cut smooth, symmetrical curves. Sew the binding slowly around each curve, easing the fabric to avoid puckering. Clip the seam allowances carefully to allow the curves to lie flat once turned.
Prairie points follow a different process. Fold squares of fabric into triangles and insert them evenly along the edge before applying binding. This technique creates a beautiful textured border that adds dimension and charm to your quilt.
4. Creative Personalization Ideas Using the Stunning Quilted Edges Tutorial – Pattern
The Stunning Quilted Edges Tutorial – Pattern offers endless opportunities for personalization. You can tailor each edge to match your quilt’s theme, color palette, and style. For example, using contrasting binding fabric creates a bold frame, while a subtle tone-on-tone approach gives a soft, cohesive finish.
Decorative stitching is a wonderful way to add personality. Many quilters sew delicate embroidery patterns, waves, vines, stars, or leaf motifs along their borders. These designs elevate simple binding into a charming artistic accent. Experiment with colored thread to make your stitching stand out.
If your quilt features geometric blocks, try matching the border style to the block shapes. Straight-line quilting paired with angled binding creates a modern, structured look. Conversely, curved edges complement floral or whimsical designs perfectly.
Adding flanges between the quilt top and binding can create extra color and texture. A narrow strip of contrasting fabric placed between layers acts like a miniature border and adds dimension without much effort.
Scrappy binding is another beloved option. By using leftover fabric strips from the quilt top, you create harmony and connection throughout the entire piece. This sustainable and creative choice adds charm and character to the finished quilt.
Finally, you can play with width variations. Wide binding can highlight the edges dramatically, while narrow binding creates refined subtlety. Each of these ideas enhances the Stunning Quilted Edges Tutorial – Pattern and allows your work to reflect your personal artistry.
FAQ – Stunning Quilted Edges Tutorial – Pattern
1. Is the Stunning Quilted Edges Tutorial – Pattern suitable for beginners?
Yes! Beginners can easily start with traditional binding and gradually explore more advanced edging styles.
2. What is the best fabric for quilt edges?
Tightly woven quilting cotton works best because it resists stretching and fraying.
3. How do I prevent binding from shifting while sewing?
Using a walking foot and plenty of clips helps keep all layers aligned.
4. Can I machine-sew the binding instead of hand-sewing?
Yes, machine-sewing is faster and can create beautiful decorative effects.
5. Are curved edges harder than straight edges?
They require more precision and careful clipping, but they are very manageable with practice.
6. What decorative stitches look best on quilt edges?
Waves, blanket stitches, vines, and geometric motifs are popular choices.
Conclusion
The Stunning Quilted Edges Tutorial – Pattern opens the door to beautifully finished quilts that highlight your creativity and craftsmanship.
In this guide, you learned about foundational techniques, essential materials, step-by-step instructions, and countless ways to personalize your quilt edges. By mastering these techniques, you can give every quilt a polished, professional, and truly stunning finish.