A Table runner is an excellent way to add a touch of style and warmth to your dining space.
Whether you’re hosting a formal dinner party or enjoying a casual meal with family, a table runner can help elevate the look of your table.
This simple yet stylish piece of decor allows you to express your creativity while creating a functional addition to your home.
In this article, we will walk you through the steps to create your very own table runner, along with helpful tips and ideas for customizing your design.
A table runner is not just an accessory; it serves a purpose in your home decor. The Table runner – pattern provides a visual focal point, protecting your table from spills and scratches while adding texture and color to your dining area. With endless fabric choices and design possibilities, it can fit any theme, from rustic to modern. Whether you’re an experienced sewer or just getting started, this project will guide you through the basics and offer ideas for creating a personalized table runner that reflects your style.
The beauty of making your own Table runner – pattern is that you can select fabrics and colors that perfectly match your existing decor. It’s a relatively simple sewing project that even beginners can tackle. The pattern we’ll discuss can be modified in terms of size, fabric type, and stitching to suit your personal preference. Let’s dive in and explore how to create a stunning table runner for your home.
1. Materials Needed for the Table Runner
Before you begin crafting your Table runner – pattern, it’s important to gather all the necessary materials. Having the right tools and supplies will make the process smoother and more enjoyable.
Fabric: The fabric you choose will set the tone for your table runner. Cotton, linen, or burlap are popular choices for table runners due to their durability and texture. Choose a fabric that complements your table and overall dining room decor. You can go for bold prints, solid colors, or even fabric with seasonal designs like florals or plaids.
Thread: Select a matching thread to your fabric. If you’re using a cotton fabric, cotton thread works best, while polyester thread is a good option for heavier fabrics. Always make sure to choose a color that blends seamlessly with your fabric.
Sewing Machine: A sewing machine will speed up the process, but if you don’t have one, this project can be completed by hand. However, a machine will give you more precision and a cleaner finish. Make sure your machine is equipped with a straight stitch and zigzag stitch option.
Scissors: A good pair of fabric scissors is essential for cutting your fabric accurately. Make sure your scissors are sharp for clean cuts and smooth edges.
Iron and Ironing Board: After cutting and sewing your fabric, you’ll need to press it with an iron. Pressing ensures that your seams are flat and gives your finished table runner a polished look.
Measuring Tape or Ruler: Use a measuring tape or ruler to measure your fabric before cutting to ensure you get the correct dimensions for your table runner. Accuracy is important when it comes to creating straight edges and a well-fitted piece.
Pins: Pins help keep your fabric in place while you sew, preventing it from shifting. They also help you align your edges before stitching.
2. Steps to Make a Simple Table Runner
Now that you have your materials ready, let’s dive into the Table runner – pattern and learn how to make a simple, elegant runner for your table.
Step 1: Measure and Cut Your Fabric
The first step is to measure your table and determine the size of your table runner. A common length for a table runner is around 36 inches, but you can adjust this depending on the size of your table. For a standard table, a width of about 12 to 14 inches is typical, but again, feel free to customize it to suit your space. Cut your fabric pieces accordingly.
Step 2: Prepare the Edges
To prevent your table runner from fraying, it’s important to finish the edges of the fabric. You can either fold the edges over and sew a straight stitch or use a zigzag stitch along the edges for a neat, professional finish. If you’re using linen or cotton, a simple hem works well.
Step 3: Sew the Two Pieces Together
If you are using two pieces of fabric to create a reversible table runner, place the fabric pieces right sides together and sew around the edges. Leave a small opening so you can turn the runner right side out. Make sure to use a straight stitch and keep your seam allowance consistent throughout.
Step 4: Turn the Table Runner Right Side Out
Once you’ve sewn the fabric together, carefully turn the table runner right side out through the opening. Use a pencil or knitting needle to push out the corners to ensure they are sharp and well-formed.
Step 5: Press and Topstitch
Press your table runner with an iron to remove any wrinkles and give it a crisp finish. After pressing, topstitch along the edges of the table runner to secure the fabric and create a polished look.
Step 6: Final Touches
After sewing the main piece, add any additional decorative touches you like. You can add a decorative border, use contrasting fabric for the backing, or even add embellishments such as lace or embroidery for a more personal touch.
3. Creative Variations to Enhance Your Table Runner
Once you’ve mastered the basic Table runner – pattern, you can get creative and add unique details to make your project truly one of a kind.
1. Fabric Selection
Don’t be afraid to experiment with different fabrics. If you want a rustic look, consider using burlap or denim. For a more refined, elegant touch, opt for satin or velvet fabrics. Seasonal prints, such as autumn leaves or floral designs, can make your table runner stand out.
2. Adding Borders
Borders can help add definition to your table runner. You can use a contrasting fabric for the border or opt for a decorative trim such as rickrack or lace. This simple addition can elevate the overall appearance of your table runner.
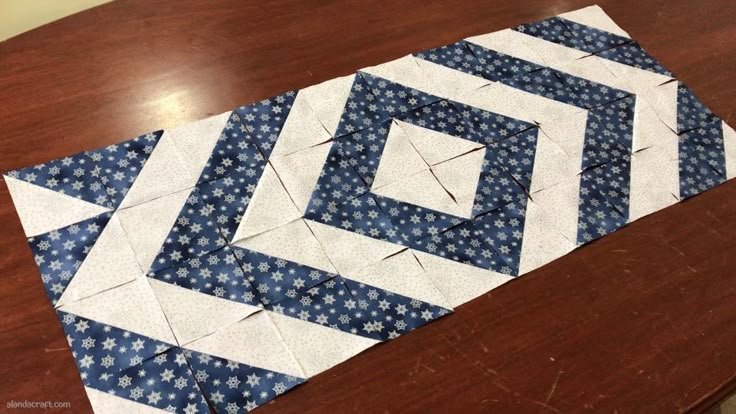
3. Quilted Table Runner
If you want to add some extra texture, consider quilting your table runner. Simply sew layers of fabric with batting in between to give the runner a quilted look. You can even incorporate different quilting patterns for an added touch of creativity.
4. Embroidery or Applique
Add personal flair by incorporating embroidery or appliqué designs onto your table runner. Flowers, geometric shapes, or even monograms can make your piece unique and meaningful.
5. Reversible Table Runner
Why not make your table runner reversible? By using two different fabrics, you can change the look of your table runner depending on the occasion or season. One side could be a neutral color for everyday use, while the other could feature bold patterns for special occasions.
6. Use of Tassels or Fringe
Adding tassels or fringe to the edges of your table runner can give it a boho-chic look. This small detail can add visual interest and make your table runner stand out.
4. How to Maintain and Care for Your Table Runner
After you’ve created your Table runner – pattern, it’s important to take care of it so that it remains in good condition for years to come. Here are some maintenance tips.
1. Regular Washing
Always check the fabric’s care instructions before washing. Most cotton or linen table runners can be machine-washed, but fabrics like velvet or silk may require special care. Wash your table runner on a gentle cycle to preserve the fabric’s integrity.
2. Ironing
After washing, always iron your table runner to remove wrinkles. Use the appropriate heat setting for your fabric, and be sure to press it while it’s still damp for the best results.
3. Stain Removal
If your table runner gets a stain, treat it immediately with a stain remover suitable for the fabric type. For minor stains, a gentle soap and water solution can help lift the stain without damaging the fabric.
4. Storage
Store your table runner in a cool, dry place when not in use. Avoid hanging it for long periods, as this may cause stretching. Fold it neatly and place it in a drawer or storage bin to keep it fresh and ready for your next occasion.
5. Repairing Damage
If your table runner becomes damaged, such as a small tear or loose stitching, repair it as soon as possible. Minor repairs can be made by hand, and you can sew over any loose seams to prevent further damage.
6. Seasonal Rotation
If you have multiple table runners for different seasons, rotate them regularly to keep your dining space fresh and exciting. A new design can bring new energy to your home each season.
FAQ – Frequently Asked Questions
- What is the standard size of a table runner?
The standard size of a table runner is typically 12 to 14 inches wide and 36 to 72 inches long. However, this can be adjusted based on your table size. - Can I use a table runner on a coffee table?
Yes! Table runners can be used on coffee tables, console tables, and even dressers for a touch of style. - Can I make a table runner without a sewing machine?
Yes, you can create a table runner by hand. Just be sure to use a sturdy hand-sewing needle and thread for durability. - How do I choose the fabric for my table runner?
Consider the tone and theme of your dining space. Natural fabrics like cotton are versatile, while bold prints or velvet fabrics can add a unique touch for special occasions. - Is a table runner only for decoration?
While primarily decorative, table runners also protect your table from scratches and spills. They can also add a layer of warmth and texture to your table setting. - Can I make a table runner for a round table?
Yes, you can make a table runner for a round table by choosing the appropriate length and width. A shorter runner works well on a round table to ensure it doesn’t overwhelm the space.
Conclusion
Creating a Table runner – pattern is a fun and simple project that can enhance the look of any dining space. With the right materials and a little creativity, you can craft a beautiful table runner that complements your home decor. From choosing fabrics to adding decorative touches, the possibilities are endless. We hope this guide has inspired you to try making your own table runner. Don’t forget to share your thoughts, experiences, and any suggestions in the comments below!