If you’re looking for a festive and fun quilting project to celebrate the fall season or Thanksgiving, the Tom Turkey Quilt – Pattern is the perfect creative choice.
This charming design typically features a bold turkey motif at the center of the quilt or repeated throughout the blocks, making it a heartwarming seasonal piece that captures the spirit of gratitude and family gatherings.
Whether you’re making it as a gift, home décor, or for a quilting challenge, this pattern is both playful and full of character.
The Tom Turkey Quilt – Pattern is especially popular around autumn and is loved by quilters who enjoy themed projects that bring joy and laughter to their home. With its delightful use of warm colors, whimsical details, and opportunity for customization, the Tom Turkey design invites both beginner and experienced quilters to join in on the fun. And the best part? You can use scraps, charm packs, or even upcycle old fabrics to bring your turkey to life.
In this guide, we’ll walk through everything you need to know to successfully create your own Tom Turkey Quilt – Pattern. From choosing fabrics and cutting shapes to assembly tips and final styling, you’ll be equipped to craft a quilt that’s festive, fun, and made with love.
1. Planning and Choosing Fabrics for the Tom Turkey Quilt
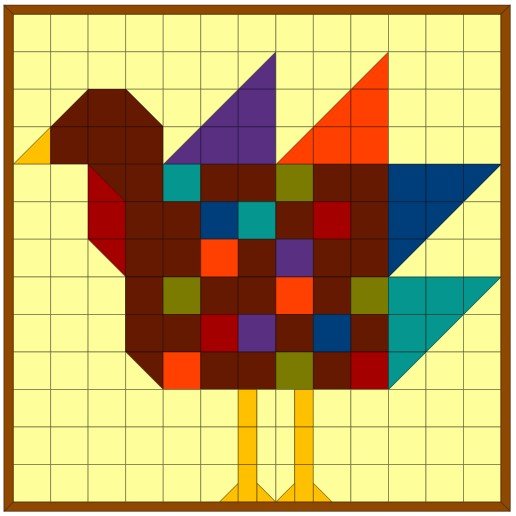
The first step in making your Tom Turkey Quilt – Pattern is planning out the design and selecting your fabrics. Since the theme revolves around autumn and Thanksgiving, earthy tones and fall-inspired prints are a great place to start.
Opt for warm shades like orange, deep red, golden yellow, brown, and olive green to bring your turkey to life. These colors not only reflect the natural tones of a turkey’s feathers but also complement the overall fall aesthetic.
When choosing fabric for the turkey’s body and feathers, consider using scraps or fat quarters. This allows for greater variety and detail, making your quilt more visually interesting. Don’t be afraid to mix prints and solids for contrast and texture.
The background fabric should help your turkey design stand out. A light neutral like cream, beige, or soft gray works well and ensures your colorful blocks don’t get lost. You can also use pieced backgrounds to create added depth and dimension.
If your Tom Turkey Quilt – Pattern includes appliqué, fusible webbing and stabilizer will be important tools. These will help the turkey shapes adhere to the quilt top securely and stitch more smoothly.
Before cutting into your fabrics, it’s helpful to sketch or lay out your quilt design using graph paper or a design wall. Planning in advance helps you maintain balance in color distribution and block layout, especially if you’re working with a full quilt top.
2. Cutting and Piecing the Tom Turkey Quilt Blocks
Once your fabrics are selected, it’s time to start cutting and piecing the quilt blocks for your Tom Turkey Quilt – Pattern. The block construction may involve both traditional piecing and appliqué techniques, depending on the pattern style.
Start with the basic background blocks. These may be standard squares or rectangles depending on the layout. Accuracy is key here, as uneven cuts can cause distortion in the final quilt top. Use a rotary cutter, cutting mat, and quilting ruler for best results.
Next, prepare the turkey shapes — body, feathers, beak, wattle, and feet. These pieces are often cut from templates included in your pattern. Carefully trace and cut each shape, ensuring clean, smooth edges for easy application.
For appliqué elements, you can use raw-edge, needle-turn, or fusible appliqué methods. Fusible appliqué is fast and ideal for beginners. Simply iron the pieces onto the background blocks and stitch around the edges using a zigzag or blanket stitch.
Once the turkey motif is assembled on each block, it’s time to start joining them together. Add sashing between blocks if desired. Sashing provides visual breathing room and helps highlight each turkey design individually.
Be sure to press all seams as you go. A well-pressed quilt top lays flat and is easier to quilt later. Use a dry iron or pressing spray to set seams without distorting the fabric.
Continue assembling your quilt top row by row. Double-check alignment and trimming as needed to ensure consistency across the top. At this stage, your Tom Turkey Quilt – Pattern will begin to take shape, and the playful personality of your turkeys will shine through.
3. Quilting and Finishing Your Tom Turkey Quilt
After your quilt top is complete, the next step is layering, quilting, and binding your Tom Turkey Quilt – Pattern. This process not only finishes your quilt but also adds texture and dimension.
Start by preparing the quilt “sandwich”: lay your backing fabric face down, add the batting, then place your completed quilt top face up. Use safety pins or basting spray to secure the layers together evenly and avoid shifting.
When it comes to quilting, you have several options. Straight-line quilting in a grid or diagonal pattern is simple and effective, especially if your blocks are busy with details. This style keeps the focus on the turkey design.
If you’re feeling creative, try free-motion quilting around the appliqué shapes to give them added emphasis. Swirls or feather motifs in the background can add a whimsical touch that complements the theme.
Don’t forget the border! Adding a border around your quilt top frames the design and adds to the finished size. You can use a single fabric or a pieced border using coordinating scraps from the turkeys.
Once the quilting is complete, trim any excess batting and backing, then bind your quilt using double-fold binding. Choose a binding color that complements your turkey blocks — something bold like rust or deep brown adds a polished finish.
Finally, add a label to the back of your quilt. Include your name, the date, and perhaps a dedication. A quilt made from a Tom Turkey Quilt – Pattern is a keepsake, and labeling it ensures it’s remembered and cherished.
4. Displaying, Gifting, and Using Your Turkey Quilt
Your Tom Turkey Quilt – Pattern is finished — now it’s time to enjoy it! Whether you’re displaying it as seasonal décor or gifting it to a loved one, this quilt is sure to bring smiles and warmth.
During the fall season, use your quilt as a throw for the couch or armchair. It also makes a beautiful table cover or wall hanging, especially if you have an entryway or fireplace mantel to decorate.
If gifting, wrap the quilt in kraft paper or a reusable fabric gift bag. This adds a handmade touch that enhances the sentiment of your thoughtful gift. Turkey quilts are great for family members, Thanksgiving hosts, or even as a teacher appreciation gesture.
Consider entering your turkey quilt in a local fair or quilt show. These types of themed quilts often stand out due to their uniqueness and charm. Be sure to include your process and inspiration if asked.
You can also create smaller versions of the Tom Turkey Quilt – Pattern such as pillows, mini quilts, or mug rugs. These smaller projects are quicker to make and still carry the holiday spirit in a fun and festive way.
Finally, don’t forget to share your quilt online. Post a photo on social media with quilting hashtags like #TurkeyQuilt or #ThanksgivingQuilt to connect with others and inspire more seasonal creativity within the quilting community.
FAQ – Tom Turkey Quilt – Pattern
1. Is the Tom Turkey Quilt – Pattern suitable for beginners?
Yes, many versions are beginner-friendly, especially those using fusible appliqué and simple piecing techniques. Look for patterns with step-by-step instructions.
2. What size should a turkey quilt block be?
Common sizes range from 10” to 12” squares, but this depends on the pattern. You can scale the blocks up or down based on your project.
3. Can I use scraps for this quilt?
Absolutely! The feathers and details of the turkey are perfect for using up small fabric pieces and colorful scraps.
4. What is the best quilting method for a turkey quilt?
Straight-line quilting works well for a clean look, while free-motion quilting around the appliqué adds texture and personality.
5. How do I keep appliqué pieces from fraying?
Use fusible web and secure edges with a tight zigzag or blanket stitch. Pre-wash fabrics to minimize fraying before cutting.
6. Can I turn this pattern into a wall hanging instead of a full quilt?
Yes! Many quilters make wall hangings using just one or two blocks. Simply add borders and quilt as usual.
Conclusion
The Tom Turkey Quilt – Pattern is more than just a seasonal project — it’s a celebration of creativity, warmth, and tradition. Whether you’re making a full-sized quilt or a mini wall hanging, this pattern gives you the chance to express your personality and festive spirit through fabric.
Throughout this article, we covered how to plan your quilt, choose fabrics, piece and appliqué your blocks, and add finishing touches that elevate the entire project. It’s a rewarding design that brings both comfort and joy to any space.
We’d love to hear from you! Please leave a sincere comment below sharing your thoughts, experiences, or suggestions. Have you made a turkey quilt before? Are you planning to? Your insights help us inspire and support the quilting community. Happy quilting!