If you’re a quilting enthusiast looking for a fresh, fun, and modern design, the Twister Dots pattern is an excellent choice.
This pattern combines the traditional charm of quilting with a contemporary twist, creating a visually striking effect that will surely stand out.
Whether you’re a seasoned quilter or just starting out, Twister Dots offers an exciting challenge while allowing you to create something both beautiful and functional.
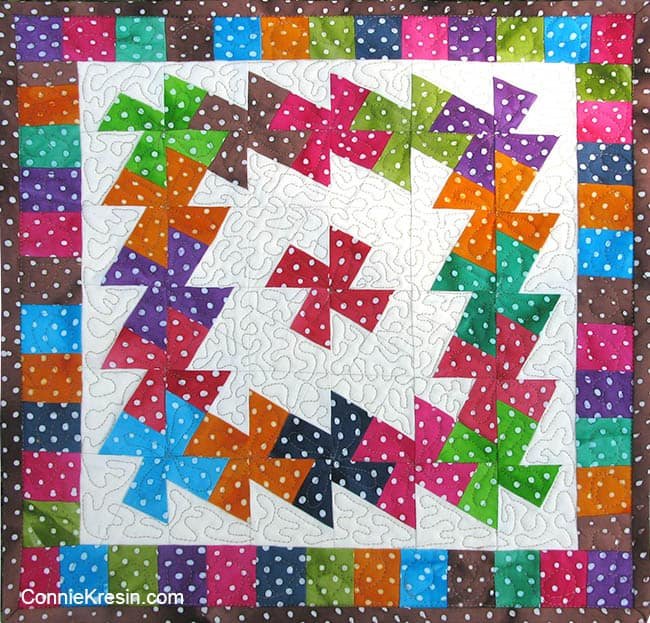
The Twister Dots pattern is known for its circular, twisting design, which is formed by carefully piecing together squares and sewing them into a striking geometric pattern. With its vibrant dots and spiraling motion, this pattern is perfect for showcasing your favorite fabrics in a creative way. Whether you use bright, bold colors or soft, subtle hues, the result will be a stunning piece of art that you can proudly display in your home.
In this article, we’ll guide you through the steps of creating the Twister Dots pattern, from gathering your materials to piecing your quilt together. We’ll also explain key techniques and tips to ensure you achieve the perfect outcome. Let’s dive into the world of quilting and discover how this fun and unique design can bring a touch of creativity to your craft.
1. Materials Needed for the Twister Dots Pattern
Before you start creating your Twister Dots quilt, it’s important to gather all the necessary materials. Using the right fabrics and tools will make your quilting experience easier and more enjoyable. Here’s a list of what you’ll need:
- Fabrics: The beauty of the Twister Dots pattern lies in the variety of fabrics you can use. Choose fabric in contrasting colors and patterns to create a bold, eye-catching effect. You’ll need squares for the main design as well as coordinating fabrics for the background. Cotton fabric is recommended because of its ease of use and durability.
- Twister Ruler: A key tool for this pattern is the Twister Ruler, which helps you create the signature twisted effect by cutting the squares into smaller units. This tool makes the process much easier and ensures that all the pieces are cut accurately. You can purchase a Twister Ruler online or at most fabric stores.
- Rotary Cutter and Mat: A rotary cutter is an essential tool for cutting your fabric into squares and ensuring that the cuts are clean and precise. Pair this with a self-healing cutting mat for safety and accuracy.
- Quilting Thread: Choose a strong quilting thread that matches your fabric choices. A high-quality cotton or polyester thread will work best for this pattern, ensuring that your seams stay strong and durable.
- Sewing Machine: For this pattern, you’ll need a sewing machine to stitch your squares and sew the quilt together. A basic sewing machine with a straight stitch is all that’s required, but a machine with quilting features can make the process more efficient.
- Batting: Batting is needed to add thickness and stability to your quilt. Choose a cotton or polyester batting based on your preference for weight and warmth. Make sure to cut the batting to the same size as the quilt top to ensure proper coverage.
Once you have your materials ready, you’re all set to begin piecing together your Twister Dots quilt!
2. Cutting Your Fabric for the Twister Dots Pattern
Now that you have your materials ready, it’s time to start cutting your fabric for the Twister Dots pattern. Precise cutting is crucial for this pattern to ensure the pieces fit together perfectly. Here’s a step-by-step guide on how to cut your fabric:
Step 1: Cut the Squares
The first step is to cut your fabric into squares. For the Twister Dots pattern, you’ll need squares of a consistent size. Typically, the squares are 5-inch or 10-inch squares, but you can adjust the size depending on how large you want your quilt to be. Use a rotary cutter and cutting mat to cut your squares accurately.
Step 2: Arrange the Fabric
Once your squares are cut, arrange them in a layout that suits your design. You can choose to arrange the fabrics randomly, or you can follow a planned color scheme to create a more structured design. The key is to create a balanced look where the Twister Dots pattern will emerge clearly.
Step 3: Use the Twister Ruler
Next, use your Twister Ruler to cut each square into smaller pieces. The ruler will help you create the twisted, circular effect that is the hallmark of this pattern. Place the ruler on each square, and follow the ruler’s markings to cut the squares into smaller triangles and segments.
Step 4: Trim the Edges
After cutting the pieces, trim any excess fabric from the edges to ensure that everything lines up correctly when you start piecing the quilt together. This is important to avoid uneven seams later on in the process.
Now that your fabric is cut, you’re ready to begin sewing the pieces together.
3. Piecing the Twister Dots Pattern Together
The next step in creating your Twister Dots quilt is to piece together the small segments and create the twisted effect. This part of the process involves some careful sewing, but with patience and attention to detail, you’ll be able to assemble your quilt beautifully. Here’s how to get started:
Step 1: Sew the Segments
Take the cut pieces from your squares and start sewing them together. Begin by sewing two triangles together, then continue adding pieces to create larger sections of the block. Be sure to follow the design carefully to maintain the twisted effect.
Step 2: Press the Seams
After each seam is sewn, press the seams flat with an iron. This will help reduce bulk and ensure that the blocks lie flat. Pressing also helps the pieces stay aligned as you move on to the next steps.
Step 3: Assemble the Blocks
Once you have pieced together the smaller segments, it’s time to assemble the full blocks. This part requires precision to make sure the twisted design lines up properly. Use a quilting ruler to help align the pieces as you sew them together.
Step 4: Join the Blocks
After your blocks are complete, arrange them in your desired pattern and begin joining them together. Be careful to match up the seams and points so that the design remains consistent across the quilt.
Step 5: Continue the Process
Repeat the process of piecing and joining the blocks until you have completed the full quilt top. Take your time to ensure each piece is properly sewn and aligned. With each block, the twisted pattern will begin to take shape.
4. Quilting and Finishing the Twister Dots Pattern
Now that your quilt top is assembled, it’s time to quilt and finish your Twister Dots pattern. This step involves adding the batting, quilting the layers together, and adding a binding to give your quilt a professional finish. Here’s how to complete the project:
Step 1: Layer the Quilt
Place the quilt top on top of the batting, and then add the backing fabric. Ensure that all three layers are aligned and smooth. If necessary, pin or baste the layers together to prevent shifting during quilting.
Step 2: Quilt the Layers Together
You can quilt your Twister Dots quilt by hand or with a sewing machine. Choose a quilting pattern that complements the design, such as a simple straight-line quilting or a free-motion design that follows the twists of the pattern.
Step 3: Add the Binding
Cut strips of fabric to create the quilt binding. Attach the binding around the edges of the quilt to cover the raw edges. Fold the binding over to the back of the quilt and sew it down for a clean, finished look.
Step 4: Final Pressing
Once the binding is attached, give your quilt a final press with the iron to smooth out any wrinkles and ensure the seams are crisp.
Your Twister Dots quilt is now complete and ready to be displayed or used in your home!
FAQ – Twister Dots Pattern
1. How long does it take to make a Twister Dots quilt?
The time required to complete a Twister Dots quilt depends on the size of the quilt and your experience level. For a small mug rug or wall hanging, it may take a few hours, while a larger quilt may take a few days to finish.
2. Do I need special equipment for the Twister Dots pattern?
The most essential tool for this pattern is the Twister Ruler, which makes it much easier to cut the fabric into the necessary shapes. A rotary cutter and quilting mat are also recommended for precision cutting.
3. Can I use any type of fabric for the Twister Dots pattern?
Cotton fabric is highly recommended for the Twister Dots pattern, as it is easy to work with and holds up well over time. However, you can experiment with other types of fabric, such as flannel or batik, for different textures and effects.
4. How do I care for my finished Twister Dots quilt?
To care for your quilt, machine wash it on a gentle cycle and tumble dry on low heat. Be sure to follow the care instructions for the specific fabrics you used to ensure your quilt stays in great condition.
5. Is this pattern suitable for beginners?
The Twister Dots pattern can be a bit tricky for beginners, as it requires precise cutting and piecing. However, with patience and practice, even a novice quilter can successfully complete this pattern.
Conclusion
Creating a Twister Dots quilt is a rewarding and fun project that allows quilters to experiment with new techniques while creating a stunning design. From cutting the fabric to piecing and quilting, this pattern provides a great opportunity to hone your skills and produce something beautiful. Whether you’re making a small mug rug or a full quilt, the Twister Dots pattern will add a modern twist to your quilting repertoire. We hope you found this guide helpful, and we’d love to hear your feedback and suggestions in the comments below!