The Whatchamacallit Quilt is a delightful and playful quilt pattern that has been embraced by quilting enthusiasts for its unique and unpredictable design.
Named for its whimsical and versatile nature, the Whatchamacallit Quilt combines various fabric shapes, colors, and patterns to create a visually stunning piece.
Whether you are new to quilting or an experienced quilter, the Whatchamacallit Quilt offers an exciting opportunity to experiment with fabric combinations and layout techniques.
This quilt pattern is perfect for quilters who enjoy working with a variety of fabrics and want to create something that looks intricate yet is relatively simple to put together. The beauty of the Whatchamacallit Quilt lies in its freedom and flexibility—there are no strict rules about color choices, pattern combinations, or quilt size. You can easily adapt the design to suit your personal style and preferences, making it a fantastic project for any quilter looking to explore their creativity.
In this article, we will explore the details of the Whatchamacallit Quilt pattern, including the materials you’ll need, the steps involved in making it, and some helpful tips to ensure a successful quilting experience. Let’s dive in and discover how you can create your own beautiful Whatchamacallit Quilt!
1. Understanding the Basics of the Whatchamacallit Quilt Pattern
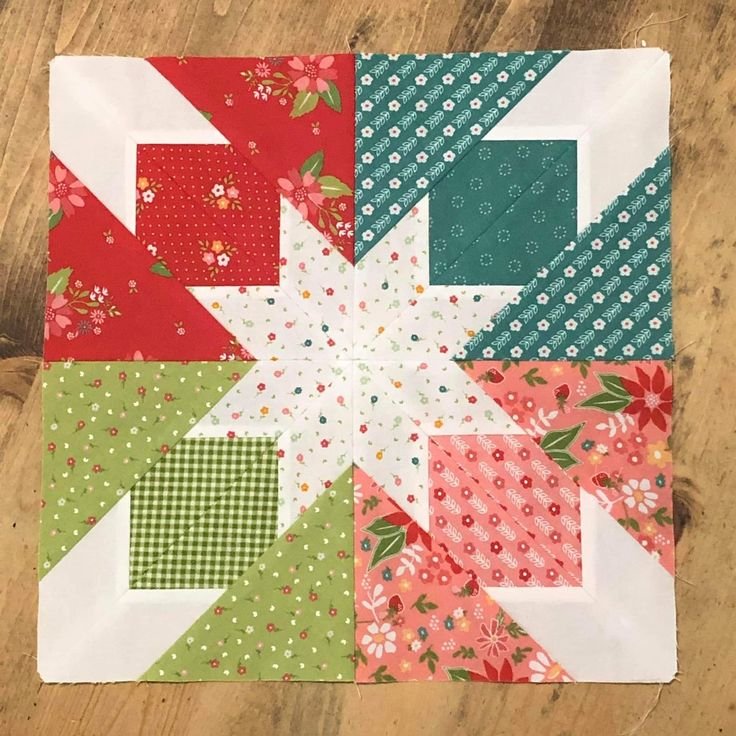
The Whatchamacallit Quilt is a patchwork-style quilt that features a combination of different shapes, such as squares, rectangles, triangles, and more. Unlike traditional quilt patterns that follow a strict geometric or symmetrical structure, the Whatchamacallit Quilt is characterized by its random and unpredictable arrangement of these shapes. The goal is to create a visually appealing design that feels organic and free-flowing.
The blocks in the Whatchamacallit Quilt can vary in size and shape, depending on your preference. Some quilters choose to make all the blocks the same size, while others opt for a more dynamic approach by using different sizes and shapes of fabric. The beauty of this pattern is that it allows you to incorporate a wide range of fabric colors and patterns, resulting in a quilt that is rich in texture and visual interest.
Because there are no rigid rules about how to assemble the blocks, quilters are encouraged to play with color combinations, fabric choices, and block placement. This makes the Whatchamacallit Quilt a perfect project for beginners and experienced quilters alike, as it offers plenty of room for creativity and experimentation.
The name “Whatchamacallit” suggests the idea of something unique and undefined, much like the quilt itself. It’s a pattern that can evolve and take on different forms depending on the choices made throughout the process.
2. Choosing the Right Materials for Your Whatchamacallit Quilt
The materials you choose for your Whatchamacallit Quilt will have a significant impact on the final look and feel of your quilt. One of the joys of making a Whatchamacallit Quilt is that you can use a wide variety of fabrics, from solid colors to bold prints, stripes, and florals. Here’s a breakdown of the essential materials you’ll need to create your quilt:
1. Fabric
Start by selecting a variety of fabrics that complement each other. You can use fabric scraps or choose new fabric from your local quilting store. Aim to have a mix of fabrics that includes both light and dark tones, as well as fabrics with different patterns and textures. For a more cohesive look, choose a color palette that ties the different fabrics together, but feel free to experiment with contrasting colors for a bolder statement.
2. Quilt Batting
Quilt batting is the soft layer that sits between the quilt top and the quilt back. It provides warmth and adds volume to your quilt. When selecting batting, consider the thickness and texture. Cotton batting is a popular choice for a lightweight and breathable quilt, while polyester batting offers a thicker and more plush feel.
3. Quilt Backing Fabric
The backing fabric is the large piece of fabric that covers the back of the quilt. You can use a solid color for a simple and classic look, or choose a patterned fabric to complement the quilt top. The size of the backing fabric should be slightly larger than the quilt top to allow for proper quilting and trimming.
4. Thread
Choose a high-quality quilting thread in a color that blends well with the fabrics you’ve chosen for the quilt top. Cotton threads are commonly used for quilting because they are strong and durable, and they blend seamlessly with most fabric types.
5. Quilting Tools
To help with cutting and piecing the quilt together, you’ll need some essential quilting tools. These include a rotary cutter, cutting mat, quilting ruler, and pins or fabric clips. These tools will make the process of cutting the fabric pieces more efficient and precise.
With your materials gathered, you’re ready to start cutting and piecing together the blocks for your Whatchamacallit Quilt. Let’s explore how to assemble the quilt and bring it to life!
3. Step-by-Step Instructions for Assembling Your Whatchamacallit Quilt
Creating the Whatchamacallit Quilt is a fun and engaging process that involves cutting and sewing various fabric pieces together. Here’s a step-by-step guide to help you assemble your quilt:
1. Cutting the Fabric Pieces
Start by cutting your fabric into different shapes, such as squares, rectangles, triangles, and even diamonds. The sizes of these pieces will depend on your design, so feel free to experiment with different dimensions. You can cut all the pieces in one size for a uniform look, or mix and match different sizes for a more dynamic design.
2. Creating the Blocks
Once you’ve cut your fabric pieces, begin arranging them into blocks. These blocks will form the individual units of your quilt. You can lay out the pieces in any order, as the design is meant to be random. Use your creativity to create visually appealing combinations of fabric pieces. Once you’re happy with the arrangement, sew the fabric pieces together to form the blocks.
3. Assembling the Quilt Top
After you’ve completed several blocks, it’s time to join them together to form the quilt top. Lay out the blocks in the desired arrangement, and then sew them together, row by row. Don’t worry about achieving perfect symmetry—part of the charm of the Whatchamacallit Quilt is its playful and organic arrangement of pieces.
4. Adding the Quilt Batting and Backing
Once the quilt top is assembled, place it on a flat surface and layer it with quilt batting and backing fabric. Ensure that the batting is evenly distributed between the quilt top and backing. Trim the excess fabric around the edges to ensure a clean finish.
5. Quilting the Layers
Now that the quilt layers are assembled, it’s time to quilt them together. You can quilt by hand or machine, depending on your preference. Use a quilting stitch to secure the layers together, either with straight lines or free-motion quilting for a more artistic effect.
6. Finishing the Quilt
The final step is to add the quilt binding. This is the fabric that covers the edges of the quilt and gives it a polished look. Fold the binding over the edges and sew it in place, making sure to miter the corners for a neat finish.
Once the binding is attached, your Whatchamacallit Quilt is complete and ready to be enjoyed!
4. Tips for a Successful Whatchamacallit Quilt
Here are some helpful tips to ensure that your Whatchamacallit Quilt turns out beautifully:
1. Embrace Imperfection
One of the key elements of the Whatchamacallit Quilt is its freeform and whimsical design. Don’t worry if the pieces don’t line up perfectly or if the arrangement feels a bit asymmetrical. Embrace the imperfections and focus on creating a quilt that reflects your unique style.
2. Use Fabric Scraps
This quilt is a great way to use up fabric scraps that you’ve accumulated over time. Mixing and matching fabrics from different projects will add personality and variety to your quilt.
3. Keep a Consistent Color Palette
While the layout of the blocks can be random, using a consistent color palette will help tie the quilt together visually. Choose a few main colors and balance them throughout the quilt for a cohesive look.
4. Experiment with Fabric Patterns
Don’t be afraid to mix and match different fabric patterns. The Whatchamacallit Quilt works well with a variety of textures, from floral prints to geometric patterns. Experiment to find the perfect combination for your quilt.
5. Prewash Your Fabric
Prewashing your fabric before cutting and sewing ensures that any shrinkage or bleeding of colors happens before the quilt is completed. This will help your quilt retain its shape and vibrancy after washing.
6. Have Fun with the Process
The Whatchamacallit Quilt is all about creativity and fun, so take your time and enjoy the quilting process. There’s no rush—let your creativity flow and create something truly unique.
FAQ: Frequently Asked Questions About the Whatchamacallit Quilt
1. What is a Whatchamacallit Quilt?
The Whatchamacallit Quilt is a fun and freeform quilt pattern that combines various fabric shapes and colors in a random, organic arrangement. There are no strict rules for design, allowing quilters to experiment and create unique quilts.
2. Can I use fabric scraps for the Whatchamacallit Quilt?
Absolutely! The Whatchamacallit Quilt is a perfect project for using fabric scraps. Mixing and matching different fabrics will add variety and personality to your quilt
.
3. What size should the quilt blocks be?
The size of the blocks can vary depending on your preference. Some quilters make all blocks the same size, while others mix different sizes for a more dynamic effect.
4. Do I need to follow a specific color palette?
No, you can use any color palette you like. However, using a consistent palette of colors can help create a more cohesive design. Feel free to experiment with contrasting colors for a bold look.
5. How do I quilt the layers together?
You can quilt by hand or machine, using quilting stitches to secure the layers of the quilt together. Free-motion quilting is a popular choice for a creative touch.
Conclusion
In this article, we’ve explored the fun and creative world of the Whatchamacallit Quilt, from understanding the basics of the pattern to choosing the right materials, assembling the quilt, and finishing it with style. This pattern offers endless possibilities for quilters who love to experiment with fabric combinations and layout designs. We hope you found this guide helpful and inspiring!
If you have any thoughts, feedback, or suggestions, feel free to share them in the comments below. Happy quilting!