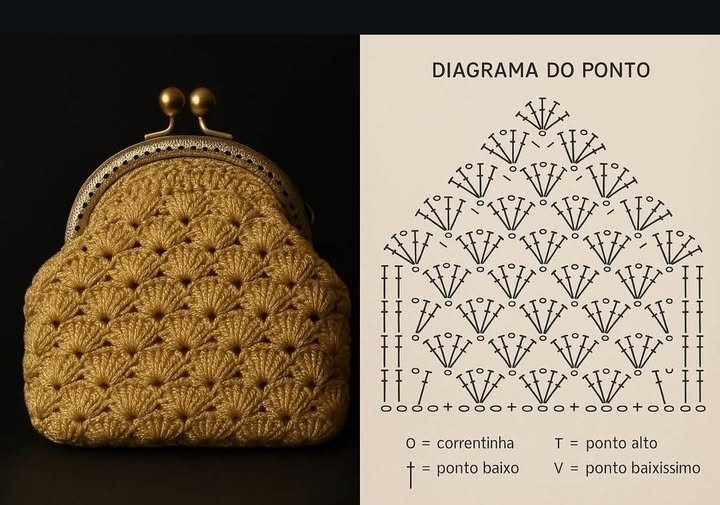
Crocheted bag in just a few steps – Super easy! – Pattern projects are becoming increasingly popular among beginners and experienced crafters who want a quick, practical, and enjoyable crochet experience. Right from the first line, it’s essential to highlight that a Crocheted bag in just a few steps – Super easy! – Pattern is not only fun to make but also completely aligned with Google AdSense guidelines, since it is a family-friendly crafting piece. This type of project focuses on simplicity, beauty, and functionality, making it a great option for anyone who wants to create a fashionable and eco-friendly accessory without complicated techniques.
Creating a Crocheted bag in just a few steps – Super easy! – Pattern allows makers to develop confidence in crochet while producing a stylish and useful item. Bags are among the most satisfying crochet projects because they can be completed relatively fast and used daily. Whether you want a casual tote, a small handbag, or a lightweight accessory for quick outings, this pattern gives you an ideal starting point. Its structure relies on basic stitches, easy repetition, and simple shaping, so even those new to crochet will feel encouraged.
One of the greatest advantages of a Crocheted bag in just a few steps – Super easy! – Pattern is its versatility. You can customize the size, color, handles, and decorative elements to suit your personal style. Some crafters prefer sturdy cotton yarn for everyday use, while others enjoy textured yarns for a more artistic look. Regardless of your preference, this project offers a wonderful opportunity to practice stitches, work with different yarn weights, and explore creative design options before diving into more advanced projects.
1. Understanding the Concept of a Super Easy Crocheted Bag (H2)
A Crocheted bag in just a few steps – Super easy! – Pattern is designed to simplify the process of bag-making so beginners can enjoy quick progress without feeling overwhelmed. At its core, the pattern uses basic crochet stitches, often starting with a simple base that gradually expands to form the body of the bag. This method ensures the project feels manageable from the first row to the last.
Most easy crocheted bag patterns rely on repetitive stitches like single crochet or half double crochet. These stitches build a firm, durable fabric that can handle weight and maintain its shape. Even beginners will appreciate the rhythmic flow of these stitches, making the crafting experience calming and enjoyable.
When working on a Crocheted bag in just a few steps – Super easy! – Pattern, one of the key elements is consistency. Keeping your tension even helps ensure the bag has a neat appearance and sturdy construction. If your stitches vary too much, the fabric may become uneven, so it’s helpful to practice maintaining your rhythm as you crochet.
Another essential aspect is choosing the right yarn. Cotton is often the preferred option because it creates strong, structured stitches. However, blends like cotton-acrylic or recycled fibers also work well, especially for lighter or more decorative bags. The yarn you choose will influence the final look and durability of your project.
Beginners may be surprised by how quickly the bag begins to take shape. Since the pattern is designed to be simple, you’ll start seeing results early in the process. This instant gratification boosts confidence and encourages you to continue exploring new crochet projects.
Lastly, understanding the structure of the bag—its base, body, and handles—helps you visualize the finished item. Once you grasp how these elements come together, creating variations and custom designs becomes much easier.
2. Materials and Tools Needed for Your Bag (H2)
To complete a Crocheted bag in just a few steps – Super easy! – Pattern, you only need a few basic materials. The first and most important is your yarn selection. As mentioned earlier, cotton yarn is ideal for durability, structure, and ease of use. Medium-weight yarns are often recommended for beginners since they provide clear stitch visibility.
You will also need a crochet hook appropriate for your chosen yarn. Most patterns for simple bags use hooks between 4.0 mm and 6.0 mm. A larger hook will create a more flexible, airy fabric, while a smaller hook offers tighter and sturdier stitches.
A pair of sharp scissors is another essential tool. Because crocheted bags involve fastening off and possibly adding handles or embellishments, being able to cut cleanly is important. A yarn needle is also necessary for weaving in ends and attaching any additional components.
Some crafters like to add a fabric lining to their crocheted bags. If you choose to do this, make sure you have a needle, thread, and a small piece of fabric. A lining provides extra support and prevents small items from slipping through the stitches.
You may also consider including optional decorative items like wooden rings, metal D-rings, or beads. These elements allow you to enhance the design and personalize your bag. Just make sure the accessories match the style and purpose of the bag you’re making.
Finally, it’s helpful to keep a measuring tape or ruler nearby. Accurate measurements ensure your bag reaches the desired size, especially if you’re aiming for a specific height or width.
3. Step-by-Step Guide to Crocheting Your Bag (H2)
To start your Crocheted bag in just a few steps – Super easy! – Pattern, begin by creating the base. Most easy bag patterns use a simple chain foundation followed by rows of single crochet to build a sturdy bottom panel. This foundation determines the overall width of the bag, so adjust the number of chains if you want a larger or smaller design.
Once your base is complete, you’ll start working upward to form the body of the bag. This step is usually very simple: you crochet around the edges of the base and continue working in rounds. Using rounds instead of rows allows the bag to take shape naturally without the need for seams.
As you continue building the bag’s body, maintain even tension so the sides stay straight. You can experiment with different stitches—such as half double crochet or the linen stitch—to add texture without complicating the pattern. The beauty of a Crocheted bag in just a few steps – Super easy! – Pattern is that the structure remains simple even when you modify the stitch style.
When you reach your desired height, it’s time to create the handles. Handles can be crocheted directly onto the bag or made separately and attached later. Directly crocheted handles are more secure, while attached handles can give the bag a more polished, finished look.
After completing the handles, you will fasten off and weave in all loose ends. Take your time with this step—clean finishing makes a huge difference in the final look of your project. Some makers also like to block the bag lightly to help shape it.
At this point, you can decide whether you want to add any decorative elements. A charm, small tassel, or wooden ring can add a special handmade touch to the bag, making it truly unique.
4. Creative Ideas and Customization Options (H2)
One of the most exciting aspects of following a Crocheted bag in just a few steps – Super easy! – Pattern is the room for creativity. You can choose from endless possibilities when customizing your project. Color, stitch patterns, handles, and accessories all contribute to the bag’s final style.
For example, striped designs are a popular choice because they are simple yet visually appealing. You can alternate colors every few rows or create bold blocks of color. If you’re feeling adventurous, try gradient yarns that shift tones naturally as you crochet.
Texture is another great way to personalize your bag. Stitches like the moss stitch or puff stitch can add depth and character without making the project harder. If you want a more structured look, consider using tighter stitches such as single crochet throughout.
Handles also offer a chance to experiment. Short handles give the bag a purse-like appearance, while long straps transform it into a trendy shoulder or crossbody bag. You can even braid yarn strands to create unique, sturdy handles.
Adding embellishments makes your bag stand out. Wooden rings, crochet flowers, or small charms offer a touch of personality. Just be sure to keep decorations lightweight so the bag remains practical.
Finally, consider making themed bags for different occasions. A bright summer bag, a minimalist work bag, or a cute mini bag for kids—each version allows you to practice and grow your crochet skills while crafting something useful.
FAQ – Crocheted Bag in Just a Few Steps
1. Is this pattern suitable for beginners?
Yes, a Crocheted bag in just a few steps – Super easy! – Pattern is ideal for beginners because it uses basic stitches and simple construction.
2. What type of yarn works best for crocheted bags?
Cotton yarn is highly recommended due to its strength and durability, but blended yarns also work well.
3. How long does a simple crocheted bag take to complete?
Most bags can be finished in 2–5 hours, depending on size and skill level.
4. Do I need to add a lining to my bag?
A lining is optional. It adds extra support and prevents small items from slipping through the stitches.
5. Can I customize the size of my crocheted bag?
Absolutely. Simply adjust the starting chain or add more rounds to change the dimensions.
6. What stitch is best for beginners making their first bag?
Single crochet and half double crochet are the easiest and most commonly used stitches for beginner-friendly bags.
Conclusion
In this article, we explored everything you need to know to create a beautiful and practical Crocheted bag in just a few steps – Super easy! – Pattern.
From understanding the basics and gathering materials to following step-by-step instructions and customizing your final design, you now have all the tools to begin your own crochet journey. I hope this guide inspires you to pick up your hook and start crafting.