Crochet Star – Tutorial is one of the most rewarding and versatile projects you can embark on, whether you are a seasoned crafter or a beginner looking to expand your skills. Creating a beautiful, five-pointed star is a foundational technique that opens up a world of possibilities for home decor, holiday ornaments, and personalized gifts. This Crochet Star – Tutorial is designed to guide you through every stitch with clarity, ensuring that your final piece looks professional, symmetrical, and structurally sound.
In the world of fiber arts, the Crochet Star – Tutorial stands out because it combines geometric precision with the soft texture of yarn. Understanding how to manipulate increases and decreases is essential for achieving those crisp, sharp points that define a high-quality Crochet Star – Tutorial. As we dive into this guide, you will learn not only the “how” but also the “why” behind the techniques, allowing you to adapt the size and style of your project to fit any creative vision you might have.
Mastering the Crochet Star – Tutorial requires a basic understanding of stitches like the magic ring, double crochet, and slip stitches. By following this structured Crochet Star – Tutorial, you will ensure that your work remains flat and even, avoiding common issues like curling or bunching. Let’s prepare your crochet hook and your favorite cotton yarn as we begin this comprehensive journey into crafting the perfect celestial accent for your next handmade masterpiece.
1. Essential Materials for Your Crochet Star – Tutorial
Choosing the right yarn weight is the first step in ensuring your Crochet Star – Tutorial turns out exactly as envisioned. For beginners, a worsted weight cotton yarn is highly recommended because it offers excellent stitch definition and holds its shape well. Using a high-quality yarn ensures that the points of the star remain stiff rather than floppy, which is crucial for decorative items.
Your crochet hook size should correspond directly to the yarn you have selected for this Crochet Star – Tutorial. If you want a tighter, more rigid star, consider using a hook that is slightly smaller than the manufacturer’s recommendation. This technique creates a dense fabric that is perfect for amigurumi-style stars or hanging ornaments that need to withstand gravity.
Don’t forget the small but vital tools like stitch markers and a tapestry needle. In a Crochet Star – Tutorial, tracking the beginning of your rounds is essential to maintain the symmetry of the five points. A sharp pair of scissors will also be needed to create clean finishes when you fasten off your work at the end of the project.
Blocking mats and T-pins are often overlooked but are secret weapons for a professional Crochet Star – Tutorial. Once your star is finished, pinning it out and lightly steaming it helps to sharpen the angles and flatten the center. This extra step elevates a simple craft project into a piece of art suitable for home styling or professional selling.
If you are following this Crochet Star – Tutorial to create a specific holiday theme, consider experimenting with metallic threads or variegated yarns. These specialty fibers can add a magical sparkle to your crochet project, making each star unique. However, be aware that textured yarns can sometimes hide your stitches, making it harder to count your progress.
Lastly, ensure you have a comfortable workspace with plenty of light before starting this Crochet Star – Tutorial. Good lighting is essential for seeing the “V” of your stitches, especially when working into the foundation chain or joining rounds. Preparing your environment helps you maintain a steady tension, which is the key to a uniform and beautiful crochet result.
2. Starting the Foundation and Center Circle
The most effective way to begin a Crochet Star – Tutorial is by using a magic ring (also known as a magic circle). This technique allows you to pull the center tight, leaving no visible hole in the middle of your star. If you find the magic ring tricky, you can also chain four and join with a slip stitch to form a small ring.
Once your ring is established, the first round of your Crochet Star – Tutorial usually involves a series of standing stitches or chains to gain height. Typically, you will work 10 or 15 stitches into the ring, depending on how large you want the base of your star to be. Consistency in these initial stitches is vital because they serve as the anchor for every star point.
As you progress through the first round of this Crochet Star – Tutorial, remember to count your stitches frequently. A single missing stitch in the base will result in uneven points later on, which can ruin the geometric symmetry. Most patterns for a Crochet Star – Tutorial rely on multiples of five to ensure each of the five points has an equal amount of space.
After completing the first round, you will join the work with a slip stitch to the first stitch of the round. This creates a seamless circle that is ready for the expansion phase of the Crochet Star – Tutorial. It is helpful at this stage to pull the tail of your magic ring tightly to close the center gap completely, giving it a polished look.
The second round of a Crochet Star – Tutorial often focuses on increasing the diameter of the circle. This is where you prepare the “platforms” from which the points will grow. By using half-double crochets or double crochets, you create a sturdy fabric that supports the weight of the star’s extensions without drooping.
Tension control is paramount during these early stages of the Crochet Star – Tutorial. If your stitches are too tight, the center will cup like a bowl; if they are too loose, the center will ripple. Aim for a balanced, firm feel so that your crochet star lies perfectly flat on a table when you set it down between rounds.
3. Crafting the Points of the Star
The magic of the Crochet Star – Tutorial happens when you begin working on the individual points. Usually, this involves a combination of chains, single crochets, half-double crochets, and double crochets worked into a single sequence. This graduation in stitch height is what creates the iconic triangular shape of each point.
To achieve a sharp tip in your Crochet Star – Tutorial, many patterns suggest using a picot stitch or a specific chain-and-slip-stitch combination at the very peak. This tiny detail makes a massive difference in the overall silhouette, transforming a rounded petal into a crisp, celestial star point. Precision at the peak is what defines a high-quality handmade star.
As you move from one point to the next in this Crochet Star – Tutorial, you will often use a slip stitch in the “valleys” between the points. These slip stitches pull the fabric down, creating the deep indentations necessary for a five-pointed design. Without these low points, your star would look more like a pentagon than a traditional star shape.
Repeat the sequence for each of the five points, ensuring that you use the exact same number of stitches for each. In a detailed Crochet Star – Tutorial, consistency is your best friend. Even a slight variation in stitch height can make one point look longer or wider than the others, leading to an asymmetrical final product.
While working on the points, you might notice the edges starting to curl slightly. Don’t worry—this is a natural part of the crochet process. As you finish the Crochet Star – Tutorial, the structure will stabilize, and any remaining minor curls can be easily fixed during the blocking stage we discussed earlier in the guide.
The final point of your Crochet Star – Tutorial should be joined back to the very first stitch with a hidden slip stitch. This ensures that the transition is invisible to the naked eye. Once joined, you can cut your yarn, leaving a long enough tail to weave in securely using your yarn needle, ensuring the star never unravels.
4. Finishing Touches and Creative Variations
Now that the main structure of your Crochet Star – Tutorial is complete, it is time for the finishing touches. Weaving in your ends is a critical step; always weave in at least three different directions to ensure the yarn is locked in place. For a Crochet Star – Tutorial intended for heavy use, like a keychain, this durability is essential.
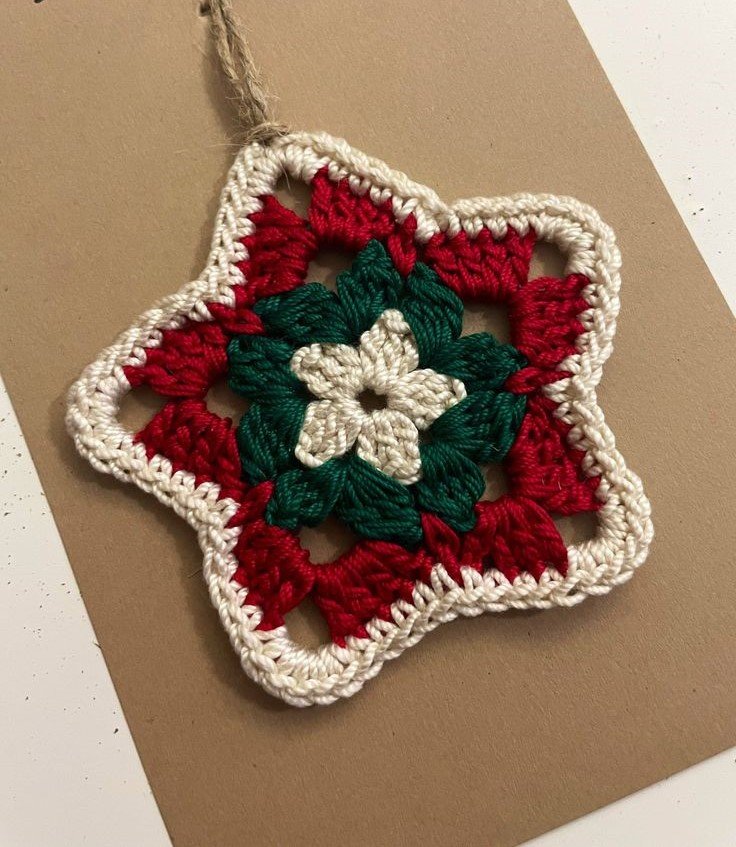
If you want to add a loop for hanging, you can simply attach your yarn to one of the points and create a chain loop of 10 to 20 stitches. This turns your Crochet Star – Tutorial into a beautiful ornament for a Christmas tree or a nursery mobile. The versatility of this pattern is what makes it a favorite among DIY crafters.
For a more decorative look, you can add a border to your star. Using a contrasting color and a simple single crochet or crab stitch around the entire edge can make the shape “pop.” This technique is often used in a Crochet Star – Tutorial to give the project a modern, graphic feel that stands out in photos.
You can also scale this Crochet Star – Tutorial to create different sizes. By using thread crochet and a tiny hook, you can make delicate earrings. Conversely, using t-shirt yarn or bulky roving can result in a large star-shaped floor pillow. The logic of the stitches remains the same regardless of the scale you choose.
Another popular variation in the Crochet Star – Tutorial community is the “Star Bunting.” By making several stars in various colors and stringing them together on a long crochet chain, you can create a festive garland. This is a fantastic way to use up scrap yarn from your stash while making something cohesive and beautiful.
Finally, consider adding embellishments like beads, sequins, or embroidery to your finished piece. A Crochet Star – Tutorial provides a blank canvas for your creativity. Adding a simple “smiley face” with black thread can turn your star into a cute character for children, showing just how adaptable this single pattern can be.
FAQ – Frequently Asked Questions
1. How do I stop my crochet star from curling?
Curling usually happens due to tight tension or an incorrect number of stitches in the center. Try using a larger hook or ensure you are following the Crochet Star – Tutorial stitch counts exactly. Blocking your finished star with steam or water will also help flatten it out.
2. What is the best yarn for a Crochet Star – Tutorial?
Cotton yarn is widely considered the best choice because it is inelastic and holds the star’s shape well. If you want a soft, fuzzy star, acrylic is fine, but it may require stiffening spray to keep the points from drooping.
3. Can I make this star bigger without changing the pattern?
To make the star larger using the same Crochet Star – Tutorial, you can use thicker yarn and a larger hook. If you want to add more rounds to the points themselves, you would need to increase the number of stitches in the foundation circle to accommodate larger triangles.
4. How do I make the points look sharper?
The secret to sharp points in a Crochet Star – Tutorial is the picot stitch or a “chain 2, slip stitch in the first chain” at the peak of each point. This creates a defined tip that looks much cleaner than a rounded turn.
5. Is this Crochet Star – Tutorial suitable for absolute beginners?
Yes! As long as you know the basic stitches like single crochet and double crochet, you can complete this project. It is a great way to practice working in the round and learning how to create geometric shapes.
Conclusion
In this Crochet Star – Tutorial, we have covered everything from selecting the perfect cotton yarn to mastering the magic ring and shaping those iconic five points. By focusing on stitch tension and using techniques like blocking, you can create a professional-grade star that serves as a beautiful ornament, gift, or applique. This project is a testament to how simple stitches can be combined to form something truly celestial and elegant.
We hope this guide has inspired you to pick up your hook and start crafting. Whether you are making a single star or a whole galaxy of bunting, the skills learned here will serve you well in all your future crochet endeavors.