Owl Crochet Table Runner – Tutorial is the perfect project for those who want to blend whimsical charm with practical home decor, creating a conversation piece that brightens any dining room or kitchen. If you have been looking for a way to showcase your love for nature and intricate needlework, this comprehensive guide will walk you through every loop and stitch required to bring these wise little creatures to life on your tabletop. The beauty of an Owl Crochet Table Runner – Tutorial lies in its versatility; you can adapt the colors to match a rustic farmhouse aesthetic, a vibrant bohemian vibe, or even a sophisticated monochrome look for modern interiors.
Creating a piece of this scale requires a blend of patience and precision, but the result is a durable, handmade textile that can be passed down through generations. In this Owl Crochet Table Runner – Tutorial, we focus on a modular approach, where individual owl motifs are joined together or appliquéd onto a solid crochet base to ensure the structure remains flat and functional for dishes and centerpieces. Using high-quality cotton yarn is essential for this type of project, as it provides the necessary weight and heat resistance for a surface that might interact with warm plates or coffee pots.
As we dive into this Owl Crochet Table Runner – Tutorial, remember that the “eyes” of the owl are often the most defining feature, offering a wonderful opportunity to play with color theory and layering. Whether you are a seasoned pro at amigurumi techniques or a beginner looking to expand your skills into home accessories, this guide is structured to be clear, encouraging, and highly detailed. Grab your favorite ergonomic crochet hook, find a cozy corner with plenty of natural light, and let us begin the journey of crafting your very own woodland-inspired masterpiece.
1. Selecting Materials and Planning Your Owl Crochet Table Runner – Tutorial
The foundation of any successful Owl Crochet Table Runner – Tutorial starts with the right fiber choice, and for table linens, mercerized cotton is the undisputed king. Unlike wool or acrylic, cotton does not pill easily and offers a crisp stitch definition that makes the owl’s “feathers” pop with texture. Choosing a weight like DK or Worsted weight yarn ensures the runner has enough substance to stay in place on a wooden or glass table without slipping around.
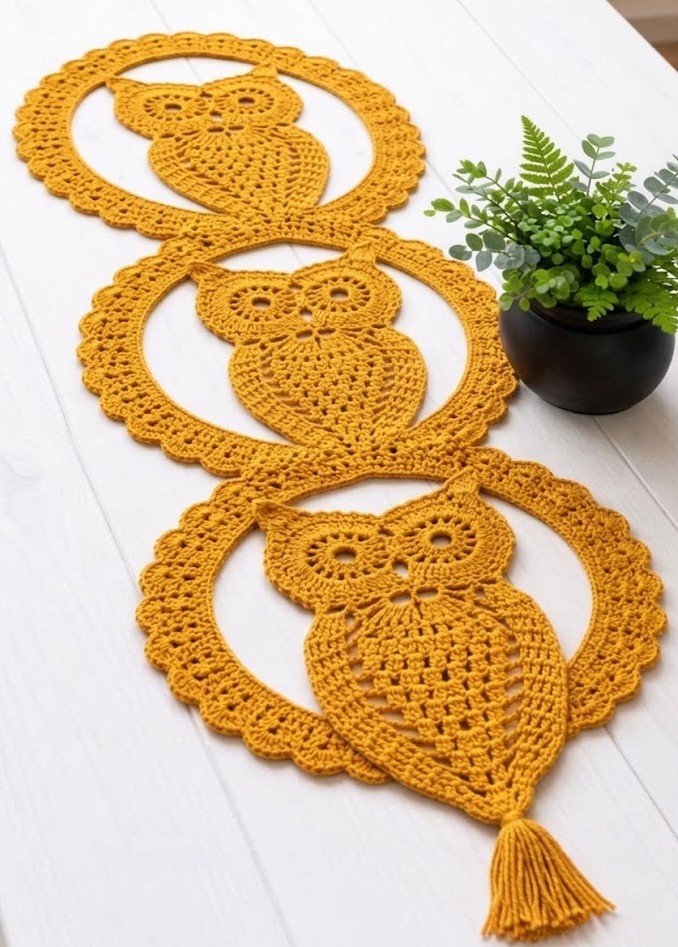
When planning your color palette for the Owl Crochet Table Runner – Tutorial, consider the season or your existing room decor. Earthy tones like terracotta, sage green, and mustard yellow create a cozy, autumnal feel that highlights the forest theme perfectly. Alternatively, using crisp white and soft greys can make the owl motifs look elegant and understated, allowing the texture of the stitches to be the primary focus of the artwork.
In this Owl Crochet Table Runner – Tutorial, you will also need a variety of hook sizes; a larger hook for the main body of the runner to ensure a nice drape, and a slightly smaller hook for the owl’s eyes and beak to keep those stitches tight and neat. Having a set of stitch markers is also vital, as you will be working in rounds for the owl components and rows for the main rectangular base. Precision in counting is what makes the final assembly look professional and symmetrical.
Don’t overlook the importance of a good tapestry needle and sharp scissors for the finishing stages of your Owl Crochet Table Runner – Tutorial. Since this project involves several small pieces like the wings, eyes, and tufted ears, you will have plenty of yarn tails to weave in. A secure weaving technique is essential for items that will be laundered frequently, ensuring that your hard work doesn’t come undone after the first wash cycle.
For those who want to add a bit of “sparkle” or unique texture, you might consider using variegated yarn for the owl’s body. In our Owl Crochet Table Runner – Tutorial, we’ve found that self-striping yarn can create a beautiful feathered effect without the need for constant color changes. However, always ensure the yarn is colorfast so that the darker owl colors don’t bleed into the lighter background of the runner during cleaning.
Lastly, prepare a flat surface for blocking your finished Owl Crochet Table Runner – Tutorial. Blocking is the “secret sauce” of professional crocheters; it involves pinning the damp finished piece to specific measurements to straighten the edges and open up the lace patterns. This step is especially important for a table runner, as it ensures the piece lies perfectly flat and doesn’t curl up at the corners, providing a polished, high-end look.
2. Crafting the Owl Motifs: Stitches and Techniques
The heart of the Owl Crochet Table Runner – Tutorial is, of course, the owl itself, which is usually constructed starting with the eyes. We use a magic ring (or magic circle) to start the eyes, ensuring there is no hole in the center. By working in continuous spirals of single crochet, you create two flat discs that serve as the focal point of the face, often using a contrasting “iris” color to give the owl personality.
Moving to the body in this Owl Crochet Table Runner – Tutorial, the crocodile stitch or the shell stitch is often employed to mimic the appearance of overlapping feathers. These textured stitches add a wonderful 3D element to the runner, making the owls feel more lifelike. If you prefer a flatter surface for stability, a V-stitch or a simple double crochet cluster can still convey a feathered look while keeping the surface smooth for glassware.
The beak and ears are the finishing touches that bring the character to your Owl Crochet Table Runner – Tutorial. A small triangle worked in half-double crochet creates a sturdy beak, while “tufts” of fringe added to the top corners of the head represent the iconic ears of a Great Horned Owl. These small details are where the humanized element of your craft shines, as no two owls will look exactly the same once you add your personal flair.
In this Owl Crochet Table Runner – Tutorial, the wings can be worked as separate semi-circles and sewn onto the sides of the body. This layered approach adds thickness to the ends of the runner, providing a nice weight that helps it hang beautifully over the edge of the table. Using a slip stitch to join these pieces creates a seamless transition that looks much cleaner than a standard whip stitch.
One advanced tip for your Owl Crochet Table Runner – Tutorial is to use “safety eyes” or small black buttons for the pupils, provided the runner won’t be used around very small children. If you prefer a 100% textile approach, a simple French knot or a small circle of black yarn works perfectly. The goal is to create a soulful expression that makes anyone sitting at the table smile at your crochet artistry.
Throughout the assembly of the motifs in this Owl Crochet Table Runner – Tutorial, keep your tension consistent. If one owl is worked tighter than the others, it may look smaller or warped when attached to the main base. Periodically lay your owls out on a flat surface and compare them to ensure they are uniform in size, which will make the final joining process much smoother and more enjoyable.
3. Constructing the Main Body and Border
While the owls are the stars, the “stage” they sit on is just as important in this Owl Crochet Table Runner – Tutorial. Most crafters choose a neutral background, such as cream or tan, worked in filet crochet or simple rows of double crochet. This provides a sturdy, rectangular canvas that allows the colorful owls to stand out without the background becoming too distracting or busy.
When determining the length of your runner in the Owl Crochet Table Runner – Tutorial, a good rule of thumb is to have it be about 12 inches longer than your table, allowing for a 6-inch “drop” on either side. This is where you will usually place your owls—at the hanging ends—so they are visible even when the table is set with a full spread of food and centerpiece decorations.
Joining the owls to the base in this Owl Crochet Table Runner – Tutorial can be done using a “join-as-you-go” method or by sewing them on at the end. For beginners, sewing them on is often easier as it allows for perfect placement. Use a running stitch or invisible stitch around the perimeter of each owl to ensure they are firmly attached and won’t flap around when the runner is moved.
To give the piece a finished look, this Owl Crochet Table Runner – Tutorial includes a decorative border around the entire rectangle. A simple scalloped edge or a picot border adds a touch of elegance that ties the whole project together. Using the same color for the border as you used for the owl’s highlights or eyes can create a cohesive and professionally designed appearance.
If your table is particularly long, you might consider placing a third owl in the center of the runner. However, in our Owl Crochet Table Runner – Tutorial, we recommend keeping the center clear or using very flat stitches to ensure that vases or candles can sit level. A lumpy surface is the enemy of a functional table runner, so always prioritize the flatness of the central “path” where items will be placed.
Finally, consider adding tassels or fringe to the very ends of your Owl Crochet Table Runner – Tutorial. These can be made from the leftover yarn of all the different owl colors, creating a “rainbow” fringe that adds movement and fun to the piece. Tassels also help weight the ends of the runner, ensuring it hangs straight and doesn’t get blown off by a stray breeze from an open window.
4. Care, Maintenance, and Styling Your Runner
Once your Owl Crochet Table Runner – Tutorial is complete, knowing how to care for it is crucial for longevity. Since it’s made of cotton, it can be machine washed, but I always recommend placing it inside a mesh laundry bag to protect the delicate owl tufts and eyes. Use a gentle cycle with cold water and a mild detergent to prevent the colors from fading over time.
Drying your Owl Crochet Table Runner – Tutorial should always be done by laying it flat on a clean towel. Never wring out a crochet piece, as this can stretch the fibers and ruin the shape you worked so hard to achieve. Gently pat it into shape, ensuring the owls are lying flat and the borders are straight, and let the air do the rest of the work.
Styling is where you can really have fun with your Owl Crochet Table Runner – Tutorial. During the autumn months, place small pumpkins or pinecones along the runner to enhance the woodland theme. For a summer look, a simple vase of wildflowers provides a beautiful contrast to the structured crochet stitches. It is a piece that transitions through the seasons with ease.
If you find that the edges of your Owl Crochet Table Runner – Tutorial start to curl after some use, a quick steam from a handheld steamer or an iron (using a pressing cloth!) will bring it back to life. Never touch the iron directly to the yarn, especially if there is any acrylic content, as it can “kill” the fibers and leave them flat and shiny. A bit of steam is all you need to relax the cotton.
For those who sell their work, this Owl Crochet Table Runner – Tutorial is a high-value item for craft fairs or online shops like Etsy. Including a small “care card” with these washing instructions adds a professional touch that customers appreciate. People love handmade home decor that feels personal, and the “owl” theme is a perennial favorite that never goes out of style.
Ultimately, completing this Owl Crochet Table Runner – Tutorial is a testament to your skill and creativity. Whether you keep it for your own home or give it as a wedding or housewarming gift, it is a piece that carries the warmth of the maker in every stitch. We hope this tutorial has empowered you to create something beautiful, functional, and uniquely yours.
FAQ – Frequently Asked Questions
1. Is this Owl Crochet Table Runner – Tutorial suitable for beginners?
Yes, but it is best if you already know basic stitches like the single, double, and half-double crochet. The owl motifs require working in rounds, which is a slightly more intermediate skill, but the step-by-step nature of this tutorial makes it achievable for anyone with a bit of patience.
2. How much yarn will I need for a standard 6-foot table?
For a standard runner, you will likely need about 800 to 1,000 yards of the main background color and small scraps (less than 50 yards each) of various colors for the owls. It is a fantastic stash-buster project for the owl details!
3. Can I make the runner wider for a buffet or sideboard?
Absolutely! The beauty of this Owl Crochet Table Runner – Tutorial is that the base is a simple rectangle. You can increase the starting chain to whatever width you need. Just remember that a wider runner may require more or larger owls to keep the proportions looking balanced.
4. What if I can’t find mercerized cotton?
Standard cotton yarn will work, but it may have a more “matte” look and might be slightly softer/less structured. Avoid using 100% acrylic if you plan on placing hot items on the runner, as acrylic can melt under high heat.
5. How do I stop the owls from looking “bulky” under plates?
In this Owl Crochet Table Runner – Tutorial, we suggest placing the owls only on the ends of the runner that hang off the table. This way, the part of the runner on the tabletop remains flat and functional for your dinnerware.
Conclusion
In this Owl Crochet Table Runner – Tutorial, we have explored the journey from choosing the perfect mercerized cotton to the final, intricate details of the owl’s eyes and tufted ears.
You have learned how to construct a sturdy, rectangular base, how to create textured owl motifs using advanced stitches, and how to assemble the pieces into a cohesive work of art. This project is more than just a table accessory; it is a labor of love that brings personality and a “handmade” warmth to any home environment.