Making your own Star Bucket Hat Crochet – Tutorial is one of the most rewarding projects you can dive into this season, combining the nostalgic flair of 90s fashion with the modern “cottagecore” aesthetic. Whether you are a seasoned pro with a hook or a complete beginner looking for your first big win, creating a crochet star hat allows you to express your personality through vibrant colors and unique textures. This guide is designed to take you through the entire process, ensuring that your final piece is not just a hat, but a statement of your creative journey.
The beauty of a Star Bucket Hat Crochet – Tutorial lies in its versatility, as the star pattern can be adapted to fit any head size or style preference. From choosing the right cotton yarn to mastering the magic ring, every step is an opportunity to refine your skills and build a wardrobe that is truly one-of-a-kind. In the world of handmade fashion, the bucket hat remains a staple because it is both functional—providing shade from the sun—and incredibly stylish when paired with casual streetwear or festival outfits.
In this comprehensive Star Bucket Hat Crochet – Tutorial, we will break down the complex stitches into manageable steps, focusing on the star motif that sits perfectly at the crown of the hat. We will explore the essential crochet supplies you need, the specific crochet stitches involved, and how to assemble the pieces for a professional finish. By the end of this article, you will have all the knowledge required to transform a simple ball of yarn into a stunning, celestial-inspired accessory that everyone will be asking about.
1. Essential Materials and Preparation for Your Star Bucket Hat Crochet – Tutorial
Before you start your Star Bucket Hat Crochet – Tutorial, gathering the correct crochet tools is the most important step for a smooth experience. You will need a 5mm crochet hook (H/8) and medium-weight worsted yarn (Category 4) to ensure the hat has enough structure to hold the star shape without drooping.
Choosing the right yarn fiber makes a huge difference in the final look of your crochet project. Cotton or cotton-blend yarns are highly recommended for a Star Bucket Hat Crochet – Tutorial because they are breathable, durable, and offer excellent stitch definition, which is crucial for making that star pop.
Don’t forget the small but mighty accessories: stitch markers, a tapestry needle for weaving in those pesky ends, and a sharp pair of scissors. Having these ready prevents interruptions once you get into the “flow” of your star pattern crochet rhythm, making the process much more enjoyable.
Preparation also involves understanding the crochet gauge, which ensures your hat actually fits your head. Before starting the full Star Bucket Hat Crochet – Tutorial, spend a few minutes making a small swatch to check if your tension matches the recommended measurements for a standard adult size.
If your tension is too tight, your star bucket hat might end up too small; if it’s too loose, the hat will be floppy. Adjusting your hook size up or down is the easiest way to fix this, ensuring that your DIY crochet hat fits comfortably and looks professionally made.
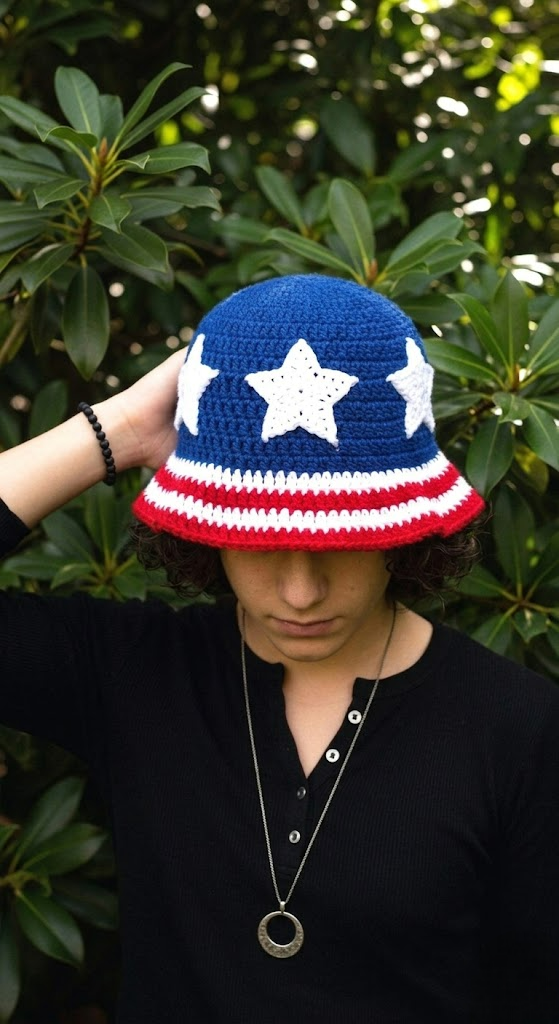
Finally, pick a color palette that makes you happy! You can use a single solid color for a minimalist look or use contrasting colors for the star design to make it the focal point of your Star Bucket Hat Crochet – Tutorial. Once your materials are organized, you are ready to begin the foundation.
2. Mastering the Center Star Motif and Crown Construction
The heart of the Star Bucket Hat Crochet – Tutorial is the central star motif located at the very top of the hat. You will begin with a magic circle (or magic ring), which allows you to pull the center tight, leaving no hole in the middle of your celestial crochet design.
Inside the ring, you will work a series of double crochet stitches (dc) to create the base of the star. The star pattern usually involves five or six points, which are formed by using a combination of chain stitches, half double crochets, and treble crochets to create those sharp, iconic angles.
As you expand the star motif, it is vital to keep track of your stitch count to ensure symmetry. A lopsided star will affect the way the rest of the bucket hat sits on your head, so using stitch markers at the tip of each star point is a great tip for beginners.
Once the star is finished, you will transition into the “crown” of the hat by filling in the gaps between the star points. This is done by working increments of stitches to turn the star shape into a flat circle, which serves as the foundation for the Star Bucket Hat Crochet – Tutorial structure.
This transition requires a bit of patience, as you’ll be working different stitch heights (like single crochet near the points and double crochet in the valleys). This technique “levels out” the work, preparing you for the “body” or “walls” of the hat where the crochet pattern becomes more repetitive.
By the end of this stage, you should have a flat, circular piece that covers the top of your head. This is the most technical part of the Star Bucket Hat Crochet – Tutorial, so if you’ve made it this far, the rest of the journey will be a relaxing breeze of rhythmic stitching.
3. Working the Body and Creating the Perfect Bucket Hat Shape
Now that the crown is complete, the next phase of our Star Bucket Hat Crochet – Tutorial is building the “walls” or the body of the hat. This is the section that goes from the top of your head down to your ears, and it determines the overall depth of the hat.
Unlike the crown, you will no longer be increasing your stitches; instead, you will work one double crochet into every stitch from the previous row. This causes the flat circle to naturally “bowl” or curve downwards, creating the classic bucket hat silhouette we all love.
Consistency is key during this part of the Star Bucket Hat Crochet – Tutorial. Keep your stitch tension even so the sides of the hat look uniform. You can continue with the same color or introduce color changes every few rows to create a striped effect that complements your crochet star.
Typically, you will want to work about 5 to 7 rounds for the body, but the best part of a DIY tutorial is that you can try it on as you go. Simply slip the piece onto your head; if it reaches just above your ears, you are ready to move on to the brim.
Many enthusiasts of the Star Bucket Hat Crochet – Tutorial like to add textured stitches here, such as the front post double crochet, to give the hat more grip and style. However, sticking to basic stitches is perfectly fine for maintaining a clean and modern crochet aesthetic.
Remember to keep count of your rows! If you plan on making a second hat later, having your crochet notes ready will ensure your next Star Bucket Hat Crochet – Tutorial project is just as successful as the first one. Now, let’s get ready to flare out that brim!
4. Crafting the Brim and Finishing Your Crochet Masterpiece
The final structural step in our Star Bucket Hat Crochet – Tutorial is the brim. To get that signature “flare,” you will need to start increasing stitches again. A common formula is to add an extra stitch every 3 or 4 stitches in the first row of the brim.
The width of your brim is entirely up to you—some prefer a short, sporty brim, while others love a wide, “floppy” 70s-style look. In this Star Bucket Hat Crochet – Tutorial, we recommend 3 to 4 rounds of increases followed by a final round of single crochet for a sturdy edge.
To prevent the brim from becoming too wavy, ensure your increases are spaced out evenly. If the brim looks like it’s ruffling too much, do a row without any increases to stabilize the shape. This “custom fit” approach is what makes handmade crochet so special.
Once you reach your desired length, it’s time for the fasten off stage. Cut your yarn, leaving a 6-inch tail, and pull it through the final loop. This ensures your hard work won’t unravel, securing the end of your Star Bucket Hat Crochet – Tutorial project.
Use your tapestry needle to weave the yarn tails into the back of the stitches. This “invisible finish” is a hallmark of high-quality crochet craftsmanship. Take your time here to ensure the ends are tucked away securely so they don’t pop out during wear or washing.
The final touch is blocking your hat. Lightly steam the brim with an iron (don’t touch the yarn directly!) or dampen it and shape it over a bowl to dry. This sets the star motif and gives your Star Bucket Hat Crochet – Tutorial creation a crisp, professional, and boutique-ready appearance.
FAQ – Frequently Asked Questions
1. What is the best yarn for a Star Bucket Hat Crochet – Tutorial?
The best yarn is 100% cotton or a cotton-acrylic blend. Cotton provides the necessary “stiffness” to keep the brim from falling over your eyes and highlights the star stitch details beautifully.
2. Is this tutorial suitable for absolute beginners?
Yes! While the star motif requires some focus, the rest of the bucket hat uses basic stitches. If you know how to do a chain, single crochet, and double crochet, you can complete this Star Bucket Hat Crochet – Tutorial.
3. How long does it take to crochet a star bucket hat?
For an intermediate crocheter, it takes about 3 to 5 hours. Beginners might take a bit longer, perhaps a full weekend, but the result of a handmade star hat is well worth the time investment.
4. Can I adjust the size for a child?
Absolutely. To make a smaller version of the Star Bucket Hat Crochet – Tutorial, simply use a smaller hook size (like 3.5mm or 4mm) or stop the crown increases a few rows earlier than the adult pattern suggests.
5. How do I wash my crochet bucket hat?
It is best to hand wash your hat in cold water with mild detergent. Lay it flat to dry on a towel to maintain its shape and ensure the crochet star doesn’t get distorted in a washing machine.
Conclusion
In this Star Bucket Hat Crochet – Tutorial, we have covered everything from selecting the perfect worsted weight yarn to mastering the intricate star motif and shaping the flared brim.
By following these steps, you’ve learned how to combine technical crochet skills with creative flair, resulting in a unique accessory that is both trendy and timeless. Crocheting is more than just a hobby; it’s a way to slow down and create something tangible and beautiful in a fast-paced world.