A Crochet Keychain with a Smiling Face – Tutorial is the ultimate way to dive into the world of amigurumi while creating something incredibly functional, bright, and cheerful. If you have been searching for a quick, beginner-friendly project that instantly lifts your mood every time you grab your keys, this handmade crochet accessory is exactly what you need. Crafting small items is a fantastic way to utilize leftover yarn stash, practice fundamental stitches, and create heartwarming, personalized gifts for your loved ones or profitable items for your craft shop.
Choosing to make a Crochet Keychain with a Smiling Face – Tutorial allows you to master the art of working in a seamless spiral, creating smooth spheres, and embroidering expressive details that bring your characters to life. This guide is fully optimized to provide you with comprehensive, step-by-step instructions, essential troubleshooting tips, and professional finishing techniques. Whether you are a seasoned crocheter looking for a relaxing afternoon project or a complete novice eager to learn the basics, this complete walkthrough ensures a rewarding and stress-free crafting experience.
As we embark on this creative journey together, keep in mind that the beauty of a Crochet Keychain with a Smiling Face – Tutorial lies in its absolute versatility and customizability. You can easily modify the colors, experiment with different facial expressions, or scale the size by simply changing your yarn weight and hook size. By the end of this comprehensive guide, you will possess a high-quality, durable, and adorable smiling face crochet charm ready to accompany you on your daily adventures or shine brightly on your digital store shelves.
1. Materials and Tools for Your Smiling Face Project
Selecting the proper materials is the foundational step to ensure your Crochet Keychain with a Smiling Face – Tutorial turns out beautifully structured and highly durable over long-term daily use. For the best definition and a clean finish that resists pilling, a high-quality 100% cotton yarn or a premium cotton-acrylic blend in a vibrant yellow or bright color of your choice is highly recommended. These specific yarn types provide excellent stitch visibility, which is incredibly helpful when working on tight amigurumi stitches that need to hold stuffing without stretching out.
To match your chosen yarn, selecting the correct ergonomic crochet hook size is absolutely vital for maintaining a tight, professional tension throughout your work. Typically, a 2.5mm or 3.0mm crochet hook works perfectly with standard sport or DK weight yarn, ensuring that the polyester fiberfill stuffing remains completely hidden inside the sphere. Using a hook slightly smaller than what the yarn label recommends prevents any unwanted gaps, keeping your finished charm firm, spherical, and neat.
In addition to your main yarn and hook, you will need a few essential crochet notions to complete the assembly and face embroidery smoothly. Gather a sharp pair of crafting scissors, a blunt-tipped yarn needle for weaving in ends, a secure metal stitch marker to keep track of your continuous spiral rounds, and a small handful of high-grade polyester fiberfill stuffing. For the facial features, a small length of black embroidery floss or thin black yarn will be needed to construct the eyes and that signature happy, radiant grin.
For the final assembly that transforms your stitched sphere into a functional accessory, you will need a durable metal keychain ring with a sturdy jump ring or a short lobster clasp. You can find these hardware components easily at local craft stores or in bulk online, making it highly cost-effective if you plan to create multiple items. Having all these tools organized on your crafting table beforehand ensures a seamless, uninterrupted, and highly enjoyable making process from the very first stitch to the final knot.
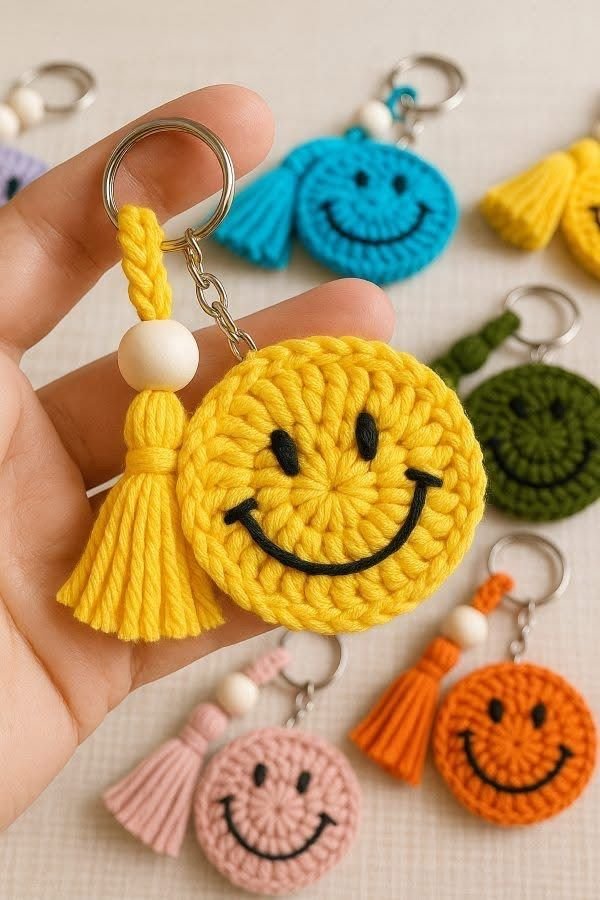
When choosing your color palette for this project, do not feel strictly limited to traditional emojis or classic yellow tones. Exploring soft pastel hues, bright neon shades, or even multi-colored variegated yarns can give your handmade keychain charm an incredibly unique and modern aesthetic. By stocking up on a diverse array of colorful yarn scraps and durable hardware, you can easily set up an efficient production line to create dozens of unique gifts or market-ready products.
Ultimately, investing a little time into selecting premium, colorfast materials prevents your hard work from fraying, fading, or losing its shape when tossed into bags or pockets. A well-made amigurumi keychain should be resilient enough to handle daily handling while retaining its cheerful charm for years to come. Now that your crafting workspace is fully prepped with the best tools, you are completely ready to dive into the core stitching techniques and start creating your masterpiece.
2. Step-by-Step Stitch Guide for the Perfect Sphere
To begin the foundational structure of your Crochet Keychain with a Smiling Face – Tutorial, you will want to start by creating a secure magic ring (also known as a magic circle). Inside this adjustable loop, work 6 single crochet (sc) stitches, then pull the tail firmly to close the central hole completely. This clever technique ensures there is absolutely no gap at the bottom of your work, providing a perfectly solid foundation for your continuous, seamless spiral rounds.
For the second round, you will perform an increase round by working 2 single crochet stitches into every single stitch from the previous round, ending with a total of 12 stitches. Place your handy stitch marker into the very last stitch of this round, moving it up as you complete each subsequent layer to avoid losing your place. In the third round, follow a strict pattern of working 1 single crochet in the first stitch, followed by an increase in the next, repeating this sequence around to reach 18 stitches.
To finish expanding your circle, round four follows a rhythm of 1 single crochet in the next 2 stitches, followed by an increase in the next stitch, leaving you with a clean total of 24 stitches. Once this expansion is complete, rounds five through nine are your straight crochet rounds, where you simply work 1 single crochet into every stitch around without adding any increases. These rounds of even tension build the smooth, structural sides of your sphere, turning your flat disk into a beautiful, rounded cup shape.
Round ten introduces your decrease rounds, which carefully mirror the increase patterns to smoothly taper the top of your adorable smiling face charm. Work 1 single crochet into the next 2 stitches, then execute a clean invisible decrease over the next two stitches, repeating this pattern around to bring your count back down to 18 stitches. Using the invisible decrease method rather than a standard decrease prevents unsightly bumps and keeps the exterior fabric looking flawless.
Before your opening becomes too small to work with, it is time to pack your polyester fiberfill firmly into the hollow core of the sphere. Use the back of your crochet hook or a clean stuffing tool to distribute the fluff evenly, ensuring there are no lumpy areas or deflated pockets. For round eleven, work 1 single crochet followed immediately by an invisible decrease around the circle, bringing your final stitch count down to 12 stitches before adding any final pinches of stuffing.
To close the shape, round twelve consists entirely of 6 consecutive invisible decreases, leaving a very small, neat opening at the very top of your work. Cut your working yarn, leaving a generous 8-inch yarn tail, and pull the thread entirely through the remaining loop to secure it. Thread this tail onto your yarn needle, weave it through the front loops of the final 6 stitches, pull tight like a drawstring to close the gap completely, and weave the end deeply into the center.
3. Embroidering the Happy Face and Attaching Hardware
The true personality of your Crochet Keychain with a Smiling Face – Tutorial comes alive during the embroidery stage, where a few simple stitches create an undeniable charm. Thread your yarn needle with a length of black embroidery floss or thin black yarn, inserting it through the back of the head and bringing it out between rounds seven and eight. To create classic, sleeping or happy curved eyes, stitch a small ‘V’ or ‘U’ shape across two horizontal stitches, securing the curve with a tiny anchor stitch.
If you prefer a bolder look, you can substitute embroidered eyes with plastic safety eyes, which must be inserted between rounds seven and eight prior to stuffing and closing the sphere. However, embroidery remains the most versatile, cost-effective, and safe method for handmade items, allowing you to customize the expression with complete artistic freedom. For the smiling mouth, bring your needle down to round nine, centered perfectly between the eyes, and create a wide, joyful curve spanning three to four stitches wide.
To give your smiling crochet character an extra dose of undeniable cuteness, you can add soft, rosy cheeks right underneath the embroidered eyes. You can easily achieve this by using a tiny strand of soft pink yarn to stitch two small horizontal lines directly next to the outer edges of the smile. Alternatively, applying a tiny dab of real cosmetic pink blush or fabric paint using a cotton swab gives a wonderfully soft, airbrushed finish to the cheeks.
Once you are fully satisfied with the facial expression, bring all your embroidery yarn tails out through the exact same stitch at the back or base of the sphere. Tie them together in a secure, tight knot, then use your yarn needle to push the knot completely inside the body of the amigurumi to hide it from view. This professional method ensures that the facial features are permanently locked into place and will never unravel, even with heavy, everyday keychain usage.
Now, it is time to securely attach the functional metal keychain assembly to the very top center of your beautifully completed, smiling crochet sphere. You can attach a small jump ring directly through the top stitches of round one, clamping it firmly shut with jewelry pliers to prevent it from sliding off. For an ultra-secure hold, crochet a tiny yarn loop of 4 chain stitches directly onto the top of the sphere, using that loop to host your metal keyring.
Give your newly attached hardware a gentle tug to ensure everything is locked down tightly and sits perfectly centered on top of the head. Your gorgeous, vibrant handmade smiling keychain is now fully assembled and ready to bring a massive burst of handcraft joy to your daily routine. Take a moment to smooth out the stuffing, straighten the features, and admire the beautiful, neat work you have accomplished throughout this tutorial.
4. Professional Customization and Monetization Tips
Once you have mastered the foundational pattern of this Crochet Keychain with a Smiling Face – Tutorial, you can unlock endless creative possibilities by tweaking the design. Consider experimenting with variegated yarn options or creating seasonal variations, such as adding a tiny green leaf on top to resemble a happy fruit or a small red bow for a festive look. You can also play around with fluffy chenille or velvet yarns alongside a larger hook size to create an ultra-soft, oversized bag charm.
If you run a creative craft blog, an online boutique, or an active social media page, this specific project is an absolute goldmine for generating highly engaging content. Small, visually appealing items perform exceptionally well on short-form video platforms, where you can share quick, satisfying reels showcasing your assembly process. Photographing your finished crochet keychains against bright, clean, natural backgrounds will instantly elevate your brand image and attract eager craft enthusiasts to your online store.
For crafters looking to turn their passion into a thriving business, these smiling face crochet charms make incredibly high-profit inventory items for local craft fairs or online marketplaces. Because they require minimal yarn and can be completed in under thirty minutes, your production costs remain low while the perceived value of a handmade gift stays wonderfully high. Packaging them on custom cardboard backing cards with your brand logo adds an instant level of professionalism that customers absolutely love.
You can easily sell these cheerful accessories individually, or bundle them up into adorable color-coordinated sets, such as a “Family of Smiles” or a pastel gradient collection. They serve as perfect, budget-friendly impulse-buy items to place right near your checkout area at physical craft booths to boost your daily sales totals. Offering custom options, where buyers can choose their favorite colors or custom facial expressions, is another fantastic way to charge a premium price.
Additionally, teaching this specific pattern in local community workshops or hosting virtual crochet-alongs is a brilliant way to build a supportive, loyal audience around your craft brand. Providing clear, printed copies of this beginner amigurumi tutorial alongside pre-packed material kits creates an all-in-one experience that beginner crafters will happily pay for. Sharing your deep passion for textile arts not only generates income but also fosters a deep sense of community fulfillment.
Never underestimate the immense power of a simple, cheerful, handmade token in today’s fast-paced, digital-centric world. A beautifully crafted key accessory brings a personal, tactile touch of warmth to an item people interact with multiple times a day. Keep refining your tension, document your creative journeys online, and let this simple stitching project open up exciting new doors for your creative craft business.
Frequently Asked Questions (FAQ)
What is the best type of yarn to use for this crochet keychain?
The absolute best choice for making a durable and clean amigurumi keychain is 100% mercerized cotton yarn in a sport or DK weight. Cotton yarn provides fantastic stitch definition, does not pill over time when rubbed against keys, and holds its shape exceptionally well under daily wear and tear.
How do I prevent the fiberfill stuffing from showing through my stitches?
To keep your stuffing completely hidden, you need to maintain a firm tension and use a crochet hook that is one or two sizes smaller than what the yarn label recommends. Using invisible decreases instead of traditional decreases also eliminates gaps in the fabric, ensuring a smooth, flawless surface.
Can I use plastic safety eyes instead of embroidering the eyes?
Yes, you can absolutely use 6mm or 8mm plastic safety eyes for this project if it is intended for adults or older children. Be sure to insert the safety eyes and secure their washers firmly onto the back of the fabric between rounds seven and eight before you begin stuffing and closing up your sphere.
How long does it typically take to complete one smiling face keychain?
This project is wonderfully quick, making it perfect for rapid crafting sessions. A beginner might take around forty-five minutes to an hour, while an experienced crocheter can easily finish a complete handcrafted keychain—including face embroidery and hardware attachment—in under thirty minutes.
Is this pattern suitable for an absolute beginner to crochet?
Yes, this pattern is highly recommended for beginners because it uses fundamental stitches like the magic ring, single crochet, increases, and decreases. It serves as a fantastic, low-risk introduction to the wonderful world of amigurumi and 3D crochet shapes without overwhelming you with complex color changes.
How can I wash my crochet keychain if it gets dirty from daily use?
To keep your keychain looking fresh and bright, it is highly recommended to spot clean it with a damp cloth and mild soap, or hand wash it gently in cold water. Reshape the sphere with your fingers while it is damp, and lay it completely flat to air dry away from direct, intense sunlight to prevent fading.
Conclusion
In summary, this Crochet Keychain with a Smiling Face – Tutorial has guided you through the entire process of creating a cheerful, professional-grade amigurumi charm from scratch.
We have covered the ideal selection of cotton yarns, the precise step-by-step math required to stitch a structurally flawless sphere, the delicate art of embroidering an expressive smile, and the secure attachment of your metal hardware. With these techniques now in your crafting repertoire, you can confidently produce endless rows of these delightful, high-quality accessories for your personal use, gifts, or online store.