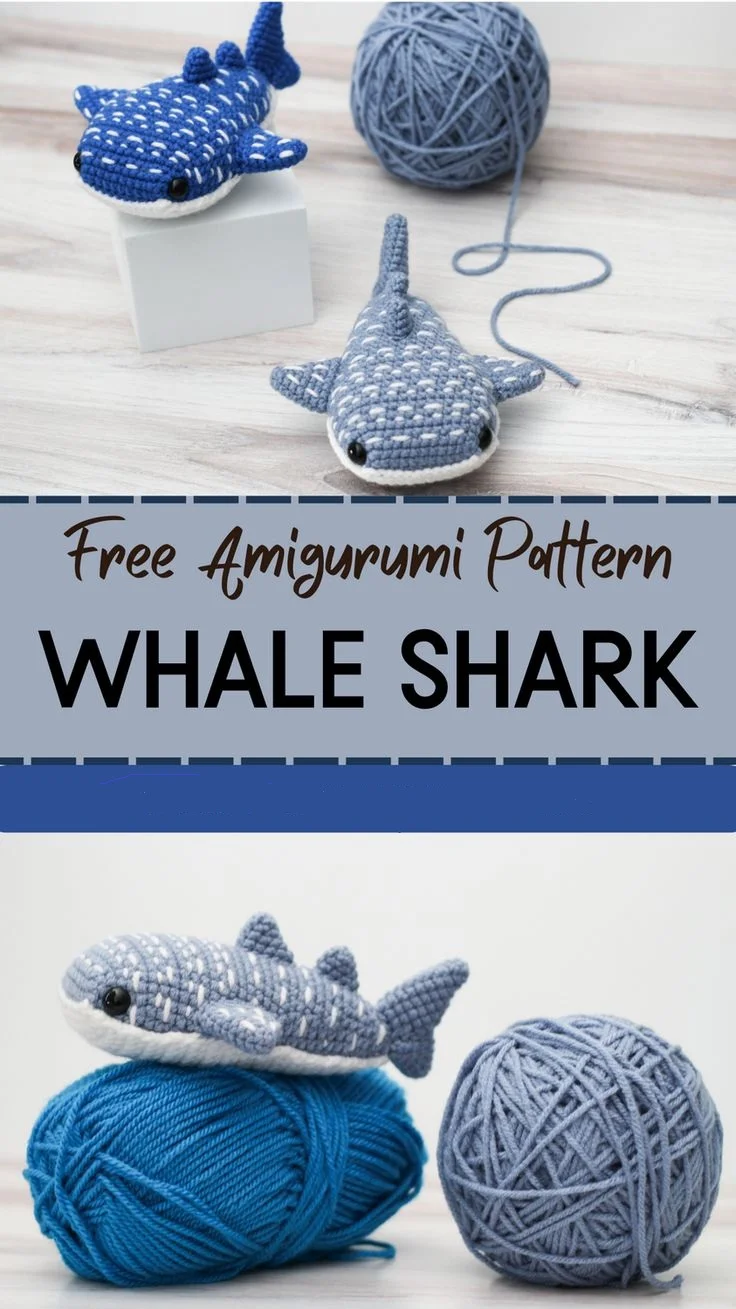
Bringing the ocean’s most gentle giant into your crafting space is a delightful project, and this Amigurumi Whale Shark – Tutorial will guide you through every step of creating your very own plush marine friend. Whale sharks are known for their massive size in the wild, but in the world of crochet, they transform into the most adorable, huggable companions imaginable. Whether you are looking to expand your marine collection or searching for the perfect handmade gift for an ocean lover, making an amigurumi whale shark is a rewarding experience that combines simple stitches with beautiful structural shaping.
The beauty of a crochet tutorial like this lies in how easily a complex-looking creature can be broken down into manageable pieces. With their wide, flat heads, characteristic white spots, and distinct fins, these creatures offer a fantastic opportunity to practice color changes and seamless assembly techniques. By following this Amigurumi Whale Shark – Tutorial, you will learn how to mimic these unique features using basic stitches, turning a few skeins of yarn into a detailed, high-quality plushie that looks professional yet feels wonderfully personal.
As you embark on this creative journey, remember that patience and consistency are your best tools for achieving a beautiful result. Working on an amigurumi whale shark allows you to experiment with different yarn textures and weights, meaning you can create a tiny keychain version or a massive, couch-sized pillow using the exact same pattern steps. Let’s dive straight into the materials, techniques, and step-by-step instructions needed to bring this magnificent blue creature to life with your crochet hook.
1. Choosing the Perfect Materials for Your Amigurumi Whale Shark
Selecting the right yarn is the foundation of any successful crochet project, especially when you are working on a detailed Amigurumi Whale Shark – Tutorial. For a classic look, a worsted weight cotton or acrylic yarn in a deep ocean blue or slate grey paired with a crisp cream or white for the underbelly works best. If you prefer an ultra-soft, modern plushie, you can opt for a chunky chenille or blanket yarn, which works up incredibly fast and hides minor stitching imperfections perfectly.
Your crochet hook size should be chosen based on your yarn selection, but a general rule for amigurumi is to go down one or two sizes from what the yarn label recommends. Using a smaller hook, such as a 2.5mm or 3.5mm, ensures that your stitches remain tight, firm, and close together. This structural tightness is essential because it prevents the polyester fiberfill stuffing from peeking through the gaps when the toy is fully assembled and stretched.
Safety eyes are another critical component that will give your amigurumi whale shark its gentle, innocent expression. For a standard worsted weight project, 10mm or 12mm black safety eyes are usually the ideal size to balance out the wide, flat shape of the shark’s head. Make sure to secure the washers firmly on the inside of the fabric before closing up the head, or choose to embroider the eyes with black yarn if the toy is intended for an infant.
Do not forget the essential secondary tools that make the process of this tutorial much smoother and more enjoyable. You will need a high-quality, sharp pair of scissors, a sturdy yarn needle with a large eye for weaving in ends, and plenty of stitch markers. Since amigurumi is worked in continuous spiral rounds without joining at the end of each row, a reliable stitch marker is vital to keep track of your starting points.
High-quality polyester fiberfill is the secret to giving your ocean creature the perfect squishy texture without losing its signature silhouette. When stuffing your amigurumi whale shark, it is best to add small clumps at a time, teasing them apart to avoid lumps inside the body. Pay special attention to the wide mouth area and the tail section, ensuring they are firmly packed to maintain their distinctive, hydrodynamic shapes over time.
Lastly, you will want some white embroidery floss or a small amount of thin white yarn to create the iconic spots that define this species. The spotting pattern is what truly transforms a generic fish shape into an authentic amigurumi whale shark, making this step a favorite for many crafters. Gathering all these high-quality materials before you strike your first loop ensures a seamless, interruption-free crafting experience from start to finish.
2. Mastering the Essential Stitches and Techniques
Before diving into the core sections of this Amigurumi Whale Shark – Tutorial, it is important to familiarize yourself with the fundamental stitches required. The absolute backbone of this project is the single crochet stitch, which creates a dense, durable fabric perfect for holding stuffing. You will also need to master the magic ring technique, which allows you to start your circular rounds with zero visible holes in the center.
Increasing and decreasing are the magic mechanisms that sculpt the unique, flat-headed shape of your beautiful amigurumi whale shark. To expand the body smoothly, you will perform standard single crochet increases by placing two stitches into a single loop from the previous round. To narrow down the body toward the tail, using the invisible decrease method is highly recommended, as it keeps the surface of your plushie smooth and completely professional.
Color changing is another vital skill highlighted in this comprehensive tutorial, as a traditional whale shark features a dark top and a light underbelly. To achieve a perfectly clean color transition, always introduce the new color during the very last pull-through of the previous stitch. This technique prevents the colors from bleeding into each other haphazardly, giving your finished plushie sharp, well-defined boundaries between its back and belly.
Working in the front loops only or back loops only is a clever technique used to create sharp angles and ridges on the shark’s body. For instance, shifting to the front loops can help form the distinctive, flat, wide mouth area that characterizes this filter-feeding giant. Understanding how to manipulate these loops allows you to build complex three-dimensional structures without needing to cut your yarn or sew extra pieces on later.
Managing your yarn tension is incredibly crucial throughout the entire creation process of your new amigurumi whale shark. If your tension is too loose, the stuffing will show through and pull the stitches apart; if it is too tight, your hands will fatigue quickly, and inserting the hook will become difficult. Try to maintain a steady, relaxed rhythm, letting the hook size dictate the tightness of the loops rather than pulling too hard on the working strand.
Finally, practicing how to seamlessly weave in your loose yarn tails will elevate the overall durability and safety of your finished project. Secure your knots internally within the body of the plushie, using your yarn needle to pull the excess thread through the stuffing several times before clipping it short. This ensures that no matter how much your amigurumi is hugged, played with, or washed, the stitches will never unravel or come undone.
3. Step by Step Guide to Crafting the Body and Head
To begin the main body of our Amigurumi Whale Shark – Tutorial, we start at the front of the head using our chosen dark blue yarn and a standard magic ring. You will place six single crochet stitches into the ring, pull it tight, and then follow a steady increase pattern over the next few rounds. Unlike a typical round ball, we will increase more rapidly on the sides to create that iconic, flattened, wide-mouthed shark silhouette.
Once the maximum width of the head is achieved, it is time to integrate the lighter underbelly yarn using the clean color change technique. You will work across the top half of the rounds using the blue yarn and switch to the white or cream yarn for the bottom half of the stitches. This dual-color method continues down the length of the body, beautifully mimicking the natural countershaving coloration of a real-life whale shark.
After a few rounds of maintaining the same stitch count to establish the length of the head, you will insert the safety eyes between the designated rounds. Position them on the outer lateral edges of the wide head, ensuring they are perfectly symmetrical before snapping the washers into place. At this point, you can also use your white yarn to embroider a few simple accent lines or dots around the eyes for extra character.
Slowly, you will begin the reduction process, using invisible decreases to taper the wide head down into a sleek, streamlined aquatic body. Continue alternating your colors perfectly on every single round, making sure the line dividing the blue back and white belly stays straight and centered. As the space narrows down, begin adding your polyester fiberfill gradually, packing the wide head firmly while keeping the texture smooth.
As you reach the narrowest part of the body, which forms the base of the tail, the stitch count will be significantly reduced. This area requires a bit of focus, as working in tight, small circles can be slightly finicky for beginners tackling an amigurumi project. Ensure you do not overstuff this narrow section, as a slightly flexible tail base makes it much easier to attach the fins properly in the final steps.
To close the main body entirely, finish your final round of decreases, leave a long yarn tail for sewing, and fasten off your work. Thread the yarn tail onto your needle, pass it through the front loops of the remaining stitches, and pull tightly to close the opening like a drawstring. Knot the yarn securely, push the needle directly through the body to hide the tail inside the stuffing, and clip the excess close to the surface.
4. Assembling the Fins and Adding the Iconic Spots
A true Amigurumi Whale Shark – Tutorial would not be complete without creating the characteristic fins that give this creature its majestic swimming posture. You will need to crochet one large dorsal fin for the back, two large pectoral fins for the sides, and a distinct caudal fin for the tail end. Each of these components is worked separately in the dark blue yarn, starting with a small magic ring and increasing to form flat, triangular shapes.
When making the pectoral fins, you want them to look aerodynamic and slightly curved, which is achieved by placing increases on only one side of the piece. Do not stuff the fins with fiberfill; instead, flatten them out completely with your fingers to maintain a sleek, thin profile. Leave a generous yarn tail at the end of each completed fin, as these will be used to sew the pieces securely onto the main body.
Attaching the fins requires careful placement to ensure your amigurumi whale shark looks perfectly balanced and structurally realistic. Pin the dorsal fin directly onto the center line of the blue back, roughly halfway down the length of the shark’s body. The two pectoral fins should be pinned symmetrically on the lower sides of the body, right where the blue yarn meets the white underbelly fabric.
Use a whip stitch or a ladder stitch to attach the fins, sewing through both the edge of the fin and the loops of the body stitches. Pull your stitches firm but not overly tight to prevent the body fabric from puckering unnaturally around the base of the fins. Once a fin is completely attached, tie a hidden knot, pull the yarn tail deep into the internal stuffing, and cut it so the end disappears entirely.
Now comes the most exciting and defining part of this entire tutorial: embroidering the beautiful, starry spots across the shark’s dark blue back. Using a strand of white yarn or embroidery floss, make small, neat French knots or simple straight stitches randomly across the top half of the body. Space them out evenly, concentrating a higher density of spots near the head and letting them scatter lighter as they approach the tail.
Take a step back to inspect your completed work, adjusting the stuffing shape with a gentle squeeze if necessary to perfect the silhouette. Your amigurumi whale shark is now completely assembled, featuring a wide head, perfect fins, and gorgeous embroidered spots that bring it to life. This charming plushie is a testament to your crochet skills, combining structure, colorwork, and embroidery into one magnificent, huggable piece of handmade art.
FAQ – Frequently Asked Questions
Is this amigurumi whale shark pattern suitable for absolute beginners?
Yes, this project is highly accessible if you already know how to make a single crochet, increase, and decrease. The most challenging aspects are the color changes and working in continuous rounds, but taking your time and using stitch markers will make it a smooth learning experience.
What is the best type of yarn to use for a crisp, defined stitch look?
A 100% cotton yarn in worsted or DK weight is ideal if you want highly defined stitches and a sturdy structure that holds its shape perfectly. Cotton also shows off the embroidered white spots beautifully without getting lost in fuzzy fibers.
How do I prevent the stuffing from showing through my stitches?
The best way to prevent stuffing from showing is to drop down a hook size or two from what your yarn suggests and maintain a firm tension. If you can still see the fiberfill, your stitches are too loose, so trying a smaller crochet hook will solve the problem instantly.
Can I make this whale shark safe for babies and toddlers?
Absolutely! To make this plushie completely baby-safe, replace the plastic safety eyes with embroidered eyes using black yarn or embroidery floss. This eliminates any choking hazards while still giving your shark an incredibly sweet and expressive face.
How do I wash my finished amigurumi marine plushie?
If you used premium acrylic or cotton yarn, you can gently hand wash your plushie in cold water with a mild detergent. Reshape the shark while it is damp and lay it flat on a clean towel to air dry completely; avoid using a clothes dryer as it can warp the stuffing.
Conclusion
In this Amigurumi Whale Shark – Tutorial, we have explored everything from choosing the ideal tight-tension hooks and ocean-toned yarns to mastering seamless color changes and structural shaping.
We successfully crocheted the wide, characteristic head, sculpted a beautifully tapered body, attached aerodynamic fins, and embroidered the iconic white spots that make this gentle giant so beloved around the world. Crafting this plushie is an incredibly fulfilling way to practice essential amigurumi techniques while creating a high-quality, durable piece of handmade art.