Men’s Shirt Apron – Tutorial: Giving your old clothes a stylish second life is one of the most rewarding ways to embrace sustainable crafting. If you have a closet full of button-downs that are slightly worn at the collars or cuffs, transforming them into a functional kitchen or workshop accessory is the ultimate creative project. This comprehensive men’s shirt apron tutorial will guide you step-by-step through the process of upcycling a pre-loved garment into a durable, charming, and highly practical apron.
Repurposing textiles is not just an eco-friendly choice; it also allows you to preserve fabrics that carry sentimental value. An oversized plaid flannel or a classic striped dress shirt can easily become your favorite cooking companion or a thoughtful, handmade gift for someone special. By following this upcycled clothing project, you will master the art of turning common household items into functional art without needing advanced sewing skills.
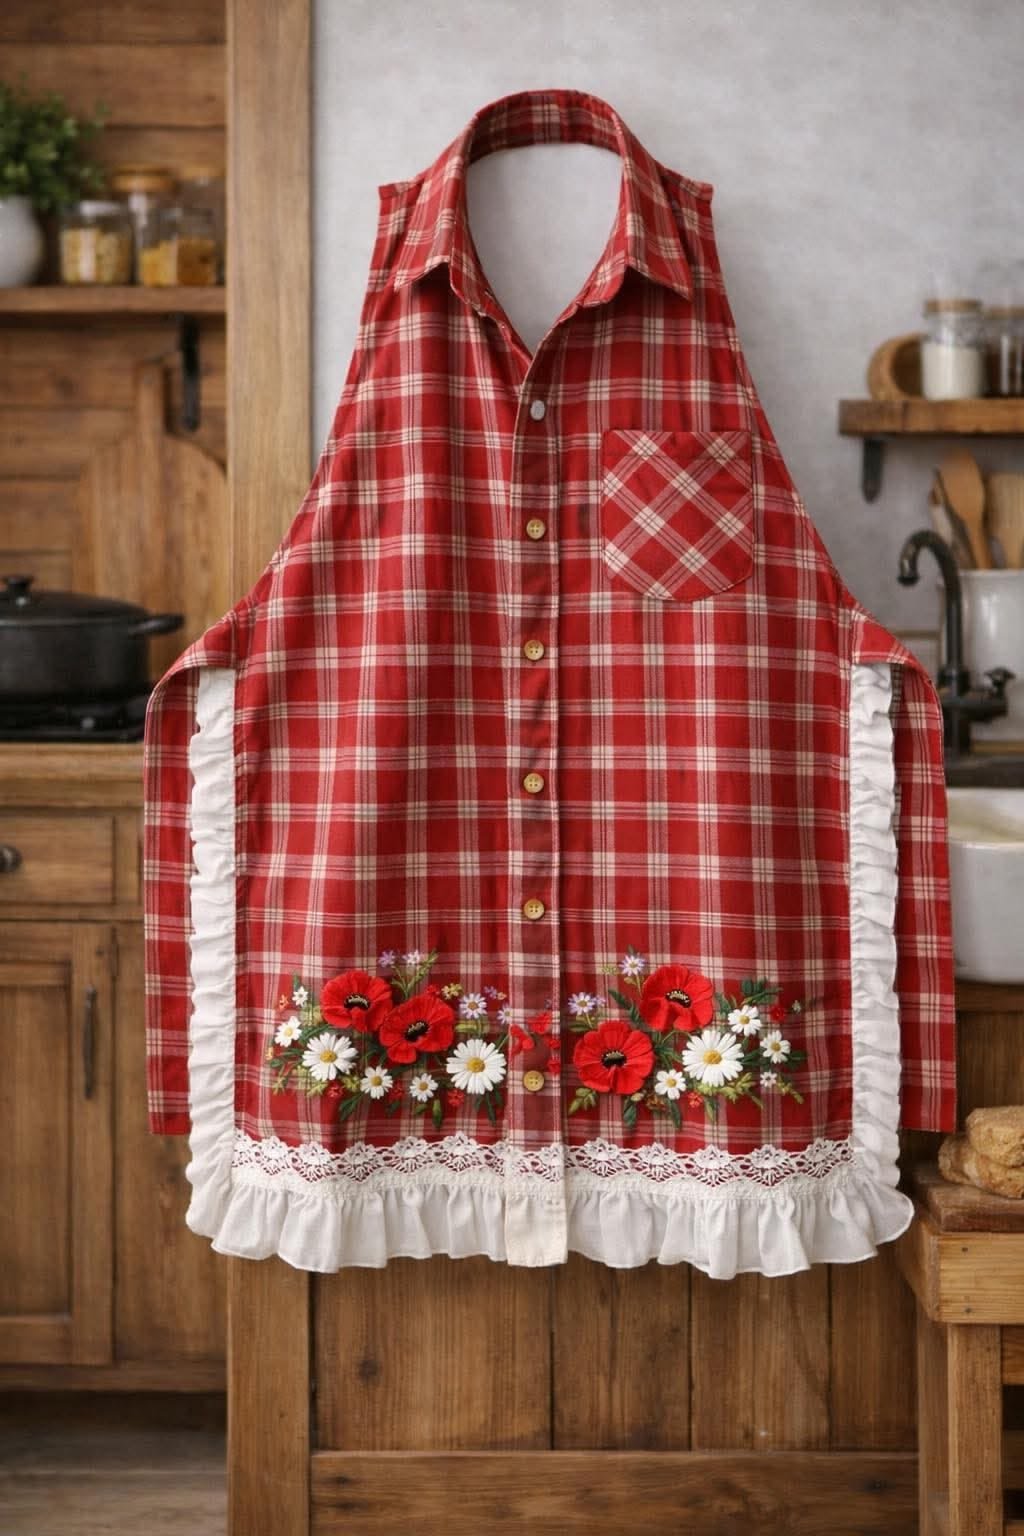
The beauty of learning how to make a men’s shirt apron lies in the unique design features already built into the original clothing item. Buttons, plackets, and even chest pockets can be cleverly integrated into the final design, saving you time and adding an authentic, rustic flair to your work. Grab your sewing machine, select a shirt that deserves a grand second act, and let’s dive straight into this rewarding sewing journey.
1. Selecting the Perfect Fabric and Preparing Your Materials
Choosing the right base garment is the foundational step for a successful men’s shirt apron tutorial. Look for shirts made from sturdy, woven fabrics such as heavy cotton, denim, flannel, or linen, as these materials offer excellent protection against kitchen spills and stains. Thinner synthetic fabrics tend to wrinkle easily and might not provide the structural integrity needed for a durable, long-lasting DIY cooking apron.
Size matters significantly when you are selecting a garment for this specific repurposed clothing craft. Opt for an extra-large or oversized shirt because a larger size provides significantly more fabric coverage for your torso and legs. A larger shirt also guarantees that you will have plenty of excess material left over to construct sturdy waist ties and neck straps.
Before you make a single cut with your fabric shears, you must wash, dry, and thoroughly iron your chosen garment. Laundering the shirt beforehand ensures that any potential fabric shrinkage happens prior to assembly, preventing warped seams later on. Ironing out the wrinkles is equally crucial because flat fabric allows for highly accurate measuring, pinning, and cutting.
Gather your essential sewing tools to keep your workspace efficient and organized throughout the assembly process. You will need sharp fabric scissors, a rotary cutter, a cutting mat, a clear quilting ruler, sewing pins, and a fabric marker. Matching or contrasting thread will work beautifully, depending on whether you want your topstitching to blend in or stand out.
Take a close look at the original features of the shirt to decide which elements you want to highlight in your creative upcycling project. The front button placket will serve as the center design detail, creating an instant focal point for your finished piece. If the shirt has a functional front pocket, keep it intact so you can easily store thermometers, pens, or recipe cards.
Once your tools are ready and your fabric is pressed, lay the shirt completely flat on your cutting mat, aligning the front placket perfectly straight down the center. Button the shirt completely from top to bottom to secure the layers together before cutting. Now that your preparation is complete, you are fully ready to move on to the precise shaping phase.
2. Cutting the Fabric Layout and Creating the Apron Shape
To transform the structured garment into an ergonomic shape, you will need to cut away the sleeves, collar, and back panel. Start by carefully cutting along the side seams of the shirt, separating the front section from the back section completely. Keep the back panel of the shirt set aside safely, as this large piece of fabric will be used to create your straps.
Lay the front panel of the shirt face down on your workspace, ensuring the button placket remains centered and straight. Fold the front panel exactly in half along the vertical line of the buttons to ensure perfect symmetry on both sides. Managing your cuts while the fabric is folded guarantees that the left side and right side of your men’s shirt apron match perfectly.
Using your fabric marker and a long ruler, mark a straight horizontal line across the chest area, just below the collar band. Next, measure your desired waist width from the center fold outward, making a small mark on the fabric. You will then draw a smooth, sweeping diagonal curve connecting the top chest line down to the waist mark.
Carefully cut along the marked diagonal line through both layers of the folded fabric to form the classic curved armholes of the apron. When you unfold the fabric, you will instantly recognize the familiar, clean silhouette of a traditional chef’s apron. The original hemline of the shirt will serve as the finished bottom edge of your new creation.
Do not discard any of the fabric scraps, especially the sleeves or the lower portions of the back panel. These discarded pieces are incredibly valuable for creating matching embellishments, custom pockets, or reinforcement patches. Embracing a zero-waste mindset is a core principle of this rewarding men’s shirt apron tutorial.
Examine the raw edges along the top chest and the curved sides where you just made your cuts. These edges are prone to fraying, so they will need to be properly finished with neat hems. With the primary shape successfully cut out, you are ready to stabilize the edges and prepare for the sewing machine.
3. Hemming Raw Edges and Constructing Sturdy Straps
Finishing the raw edges is essential to ensure your handmade creation survives countless trips through the washing machine. Turn the apron panel wrong-side up and fold the raw diagonal edges over by one-quarter of an inch, pressing with an iron. Fold the edge over an additional half-inch to completely conceal the raw fabric edge inside a clean, double-fold hem.
Pin the double-folded hems securely in place along both of the curved armhole sections to prevent the fabric from shifting. Take your time at the sewing machine, stitching close to the inner folded edge with a straight stitch. Repeat this identical double-fold pressing and stitching process for the top horizontal chest edge of the apron.
Now it is time to retrieve the back panel of the shirt that you set aside earlier to create your functional straps. Cut three long strips of fabric measuring approximately three inches wide to form your neck loop and twin waist ties. The length of the waist ties should be generous enough to easily wrap around your back and tie comfortably.
To construct a strap, fold a fabric strip in half lengthwise with the right sides facing together, and pin along the long raw edge. Sew down the long edge using a quarter-inch seam allowance, leaving both short ends open so you can turn it right-side out. Attach a safety pin to one open end, feed it through the fabric tube, and pull gently to invert the strap.
Press the inverted fabric tubes completely flat with your iron, ensuring the long seam is positioned neatly along one side edge. Topstitch along both long edges of each strap at a precise one-eighth inch distance to give them a professional, crisp finish. Fold in the raw ends of the waist ties and stitch them closed to prevent future unraveling.
Position the ends of your neck strap at the top corners of the chest section, pinning them securely to the backside of the fabric. Align the waist ties at the outer corners of the waistline, pointing outward away from the center placket. Double-check the placement of all components before proceeding to the final assembly and personalization steps.
4. Final Assembly, Pocket Attachment, and Finishing Touches
With all your components neatly pinned in place, it is time to permanently secure the straps to the main body. Stitch a small, durable square box pattern with a diagonal cross inside where each strap meets the apron fabric. This specialized reinforcement stitch ensures the straps can withstand heavy pulling and daily wear without tearing away.
If your original shirt did not include a chest pocket, you can easily construct a custom utility pocket using your remaining sleeve fabric. Cut a rectangle measuring seven inches wide by eight inches tall, and finish the top edge with a neat double-fold hem. Fold the remaining three raw edges inward by half an inch and press them flat with your iron.
Position this newly created pocket right in the center of the apron front, low enough to be easily reached by your hands. Pin the pocket securely through the front layer of fabric, making sure you do not accidentally pin the button placket shut. Sew around the sides and bottom of the pocket, leaving the top edge completely open for storage.
To add extra utility to your DIY craft apron, you can stitch vertical lines down the center of the pocket to create narrow compartments. These specialized slots are absolutely perfect for holding tweezers, specialized tools, paintbrushes, or tasting spoons. Customize the spacing of these pocket dividers to perfectly match your specific hobbies or kitchen routines.
Inspect the entire garment for any loose threads, clipping them away cleanly with your embroidery scissors for a professional look. Give the completed project one final, thorough press with your iron to set all the newly stitched seams beautifully. Take a moment to appreciate how a simple garment has been completely transformed into a unique piece of functional apparel.
Your new accessory is now completely finished and ready to tackle tough projects in the kitchen, garden, or craft studio. The original buttons remain fully functional, allowing you to unbutton the bottom portion slightly if you ever need extra leg mobility. This successful project proves that sustainability and style can blend seamlessly together through creative crafting techniques.
Frequently Asked Questions (FAQ)
What is the best type of shirt to use for a men’s shirt apron tutorial?
The best choice is an oversized button-down shirt made from 100% woven cotton, heavy flannel, canvas, or denim fabric. These materials offer the necessary thickness and structural weight to shield your clothing from liquids, grease, and dirt effectively. Avoid stretchy knits or thin synthetic blends, as they are difficult to sew and lack durability.
Do I need an advanced sewing machine to complete this upcycling project?
Not at all. This introductory sewing project is highly beginner-friendly and requires only a basic machine capable of executing a reliable straight stitch. Since you are utilizing the existing hems and buttons of the original shirt, the amount of technical sewing required is significantly reduced compared to making an apron from scratch.
How can I make sure the apron fits comfortably around my waist?
To ensure a perfect fit, maximize the use of the shirt’s back panel to cut your waist ties as long as possible. If the shirt fabric is limited, you can easily substitute handmade fabric ties with durable cotton twill tape, webbing, or Grosgrain ribbon. Making the waist ties longer allows you to wrap them completely around your body and tie them neatly in the front.
Can I keep the original buttons functional on the finished apron?
Yes, keeping the buttons functional is a highly recommended design feature of this project. Leaving the placket operational adds authentic character and allows you to unbutton the bottom few buttons for enhanced ease of movement. Just ensure that you stitch the placket closed near the chest area so the apron remains securely closed while you work.
How do I care for and wash my newly created upcycled apron?
You can care for your upcycled apron exactly like a standard cotton shirt. Wash it in your washing machine on a normal cycle with similar colors, using cool or warm water. Tumble dry on medium heat and use a hot steam iron to press the hems flat whenever it becomes wrinkled from heavy use.
Conclusion
This men’s shirt apron tutorial demonstrates exactly how simple it is to combine sustainability with practical everyday utility. By carefully cutting away the unnecessary bulk of an old garment and reinforcing the raw edges, you can easily design a stylish, durable accessory that keeps waste out of landfills. From selecting the ideal woven fabric to stitching reinforced utility pockets, you have mastered the foundational skills of functional textile upcycling.
We would absolutely love to hear about your experience with this project! Please leave your sincere opinion, sharing how your creation turned out, and drop any creative suggestions or adjustments you discovered along the way in the comments section below.