Creating a beautiful butterfly quilt is one of the most rewarding projects a quilter can undertake. The vibrant shapes, delicate wings, and endless color possibilities make the butterfly quilt a timeless favorite for both beginners and experienced makers alike. If you are looking for a comprehensive butterfly quilt – tutorial that guides you through every single step with ease, clarity, and creative inspiration, you have come to the right place. Quilting is more than just sewing fabric together; it is an art form that allows you to express your personality, unwind after a busy day, and create a functional heirloom that your family will treasure for generations.
The beauty of working on a butterfly quilt pattern lies in its incredible versatility. You can go for a modern look using bold, solid fabrics, or embrace a traditional, cozy aesthetic by diving into your scrap bin for a whimsical, multicolored patchwork effect. This butterfly quilt block design is highly adaptable, meaning you can easily scale it up to make a large, cozy bedspread or scale it down for a stunning nursery baby quilt or a decorative wall hanging. Regardless of your current skill level, this project offers an amazing opportunity to practice essential quilting techniques, from precise cutting to mastering gentle angles and seam alignment.
In this detailed guide, we will break down the entire process from start to finish so that you feel confident at every stage of your creative journey. We will cover fabric selection, accurate cutting methods, step-by-step block assembly, and the final touches that make your work look truly professional. By the time you reach the end of this butterfly quilt – tutorial, you will have all the knowledge, tips, and tricks needed to transform simple fabric squares into a breathtaking flurry of quilted butterflies. Grab your favorite cup of tea, turn on some relaxing music, and let’s dive straight into the wonderful world of butterfly quilting.
1. Choosing the Perfect Fabrics and Tools for Your Project
Selecting the right materials is the absolute foundation of a successful quilting project. For a vibrant butterfly quilt, you want to choose high-quality 100% cotton quilting fabric because it holds its shape beautifully, presses crisp lines, and does not slip around while you are stitching. To make your butterflies truly pop, look for fabrics with a strong contrast between the butterfly wings and the background fabric. A solid or subtle neutral background, like cream, soft grey, or crisp white, allows the colorful wings of your patchwork butterfly to take center stage.
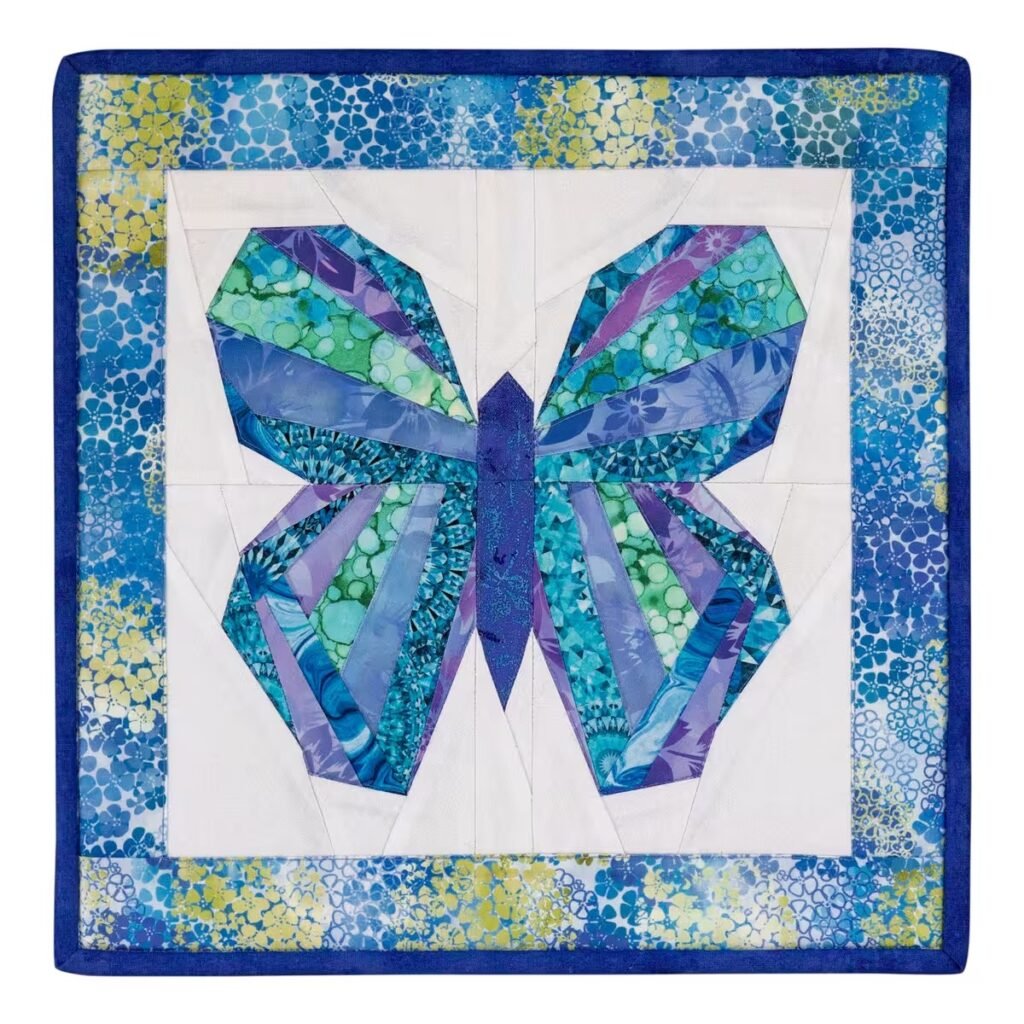
Don’t be afraid to experiment with color theory when picking out your prints. You can opt for a coordinated monochromatic look using different shades of blue and teal, or create a warm, sunny vibe with a palette of pinks, corals, and golden yellows. Fat quarters are incredibly popular and convenient for this specific project because they give you a wide variety of patterns and colors without requiring you to buy yards of a single fabric. Mixing small floral prints, dots, and geometric patterns can add wonderful depth and visual texture to each individual block.
Aside from your fabric, having the right quilting tools on hand will save you time and prevent unnecessary frustration. A sharp rotary cutter is absolutely essential for getting those clean, straight edges that make piecing a total breeze. Pair your cutter with a self-healing cutting mat and a non-slip acrylic quilting ruler to ensure your measurements are completely accurate down to the millimeter. When your initial fabric cuts are precise, your seams will line up much more naturally during the sewing process, resulting in a perfectly flat quilt top.
You will also need a reliable sewing machine equipped with a standard quarter-inch piecing foot. In the world of quilting, a consistent 1/4-inch seam allowance is the golden rule that keeps all your block pieces fitting together perfectly like a puzzle. Using a neutral-colored, high-quality cotton thread, such as 50-weight grey or beige, ensures that your stitches remain strong but virtually invisible from the front of the quilt. Lastly, keep a good seam ripper nearby—not as a sign of defeat, but as a helpful tool that every expert quilter uses from time to time.
Before making your very first cut, it is always a fantastic idea to give your fabrics a quick press with a warm iron. Removing any deep wrinkles or folds upfront ensures that your measurements are true and that the fabric doesn’t shift unexpectedly under your ruler. If you are working with dark, highly saturated fabrics like deep reds or purples alongside a bright white background, consider pre-washing them or using a color catcher. This simple step prevents any accidental dye bleeding when you wash your finished masterpiece for the first time.
Organization is your best friend when managing multiple fabric pieces for a butterfly quilt – tutorial. As you cut your various squares and rectangles, use small sticky notes or labeled pins to keep your wing fabric separated from your background fabric. Labeling your pieces according to the cutting chart will make the actual assembly process incredibly smooth and fast. Taking an extra ten minutes to organize your workspace before sewing will prevent confusion later on and keep your creative energy flowing beautifully.
2. Cutting Your Fabric with Precision and Accuracy
Accurate cutting is the secret ingredient that transforms a good quilt into a spectacular one. To begin your butterfly quilt, you will need to cut specific shapes for the upper wings, lower wings, and the background corners. For a standard block, you will typically cut larger squares for the top wings and slightly smaller squares for the bottom wings. The background fabric will require smaller squares that will be used to create the angled corners of the wings using the popular “snowballing” technique.
When using your rotary cutter, always make sure to stand up straight and apply even, downward pressure over the acrylic ruler. Line up the grid lines of the ruler directly with the edge of your fabric rather than relying solely on the mat lines, as mats can sometimes stretch slightly over time. Keep your fingers safely away from the edge of the ruler, and always roll the blade away from your body in a smooth, continuous motion. Making clean cuts on the first pass prevents frayed edges and keeps your pieces perfectly square.
If you are aiming to create a scrappy butterfly quilt pattern, try cutting all your pieces for one butterfly block at a time. This method allows you to visually audition your fabric combinations before committing to the cut, ensuring that the top and bottom wings complement each other beautifully. If you prefer a more uniform look, you can stack your fabric up to four layers deep to cut multiple squares simultaneously. Just be sure to go slowly so the layers do not shift out of alignment under your ruler.
In addition to the wing pieces, you will need to cut thin strips for the butterfly’s body and antenna sections. The body is usually represented by a dark, contrasting fabric strip, such as a rich espresso brown or charcoal grey, running right down the center of the block. Cutting these central strips perfectly straight is crucial because they act as the anchor holding the left and right wing sections together. Double-check your width measurements for these strips before slicing into your fabric.
For the background pieces that frame your butterfly, it is often helpful to cut a few extra squares just in case a minor mistake happens along the way. Having a small basket on your cutting table to collect your leftover fabric scraps is a wonderful habit to build. These tiny leftovers can be saved for future scrap-friendly projects, minatures, or even used as colorful stuffing for handmade pincushions. Once all your background and wing pieces are cut, arrange them in neat stacks right next to your sewing machine.
To make the next sewing step incredibly easy, take your small background squares and draw a faint diagonal line on the wrong side of each one using a water-soluble fabric pen or a standard mechanical pencil. This drawn line will serve as your precise stitching guide to create the beautiful, sloping angles of the butterfly’s wings. If you have a steady eye, you can also use specialized quilting tape placed directly on your sewing machine bed to guide your straight lines without drawing on the fabric at all.
3. Step-by-Step Assembly of the Butterfly Quilt Block
Now comes the most exciting part of our butterfly quilt – tutorial—watching your fabric pieces come together to form a beautiful creature. We will begin by constructing the individual wing sections using the easy stitch-and-flip method. Take one of your large wing squares and place a smaller background square in the top outer corner, right sides of the fabric facing together. Sew directly along the diagonal line you drew earlier, making sure to guide the fabric smoothly under your presser foot.
Once you have stitched along the line, chain piece the remaining wings to speed up your sewing time. Chain piecing simply means feeding your fabric pairs through the machine one after another without lifting the presser foot or cutting the thread between them. This traditional quilting technique saves an incredible amount of thread and keeps your workflow moving in a wonderful, rhythmic rhythm. Once a chain is done, snip the connecting threads to separate your individual wing units.
Next, use your acrylic ruler to trim away the excess corner fabric, leaving a neat quarter-inch seam allowance measured outward from your stitched line. Take your piece to the ironing board and gently press the background triangle open, turning it toward the dark wing fabric. Pressing carefully with a lifting and lowering motion, rather than sliding the iron back and forth, prevents the fabric from stretching out of shape. Your square should now look exactly the same size as before, but with a beautiful background triangle in the corner.
Repeat this exact stitch-and-flip process on the bottom corners of the wings using smaller background squares to create the realistic, tapered shape of a butterfly’s wing. It is amazing to see how a few straight seams can create such a beautiful dynamic illusion of curves and motion. Once you have finished all four wing segments—two upper and two lower—lay them out on your flat workspace or design wall to verify that the wing angles are pointing in the correct directions.
Now, sew the top wing to the bottom wing for both the left side and the right side of the butterfly, creating two distinct wing halves. Press these horizontal seams downward toward the lower wings to minimize bulk when joining the sections later. At this point, prepare the center vertical strip that represents the butterfly’s body. If your pattern includes fabric antennae, piece those small background rectangles to the top of the body strip before connecting the main pieces.
To complete your butterfly quilt block, simply pin the left wing unit to the left side of the center body strip, and the right wing unit to the right side. Align your edges perfectly, using fine quilting pins to hold the fabric layers securely in place so they don’t shift as you sew. Sew down both long edges with your precise 1/4-inch seam, remove the pins as you approach them, and give the entire finished block a final, satisfying press. You have just successfully brought your very first quilted butterfly to life!
4. Joining Blocks and Adding the Professional Final Touches
Once you have sewn an array of gorgeous butterfly blocks, it is time to assemble them into a complete, cohesive quilt top. Lay all your finished blocks out on a large clean floor, a bed, or a dedicated design wall so you can play around with the layout. Take your time to balance the colors and prints across the entire surface, ensuring that two identical fabrics aren’t sitting directly next to each other. Taking a quick digital photo of your layout on your phone is an excellent trick to help you see the color distribution clearly and catch any upside-down blocks.
To give your butterflies plenty of room to breathe and fly, consider adding sashing strips between your blocks. Sashing is simply strips of fabric sewn between rows and blocks, acting like a beautiful frame around each piece of artwork. Using the same fabric as your block background for the sashing creates a gorgeous seamless look, making the butterflies appear as if they are floating elegantly in mid-air. If you want a bolder, more modern look, try a contrasting sashing color to make a vibrant grid pattern.
After sewing your blocks and sashing into long horizontal rows, press the row seams in alternating directions—Row 1 to the right, Row 2 to the left, and so on. This simple technique allows the seams to nestle together perfectly when you sew the rows together, resulting in crisp, flat intersections where all the corners meet. Once all the rows are joined together, you can add an outer border around the entire edge of the quilt to frame your hard work and lock the design in place.
Now your quilt top is completely assembled, and you are ready to prepare your “quilt sandwich,” which consists of the backing fabric, the batting, and your beautiful top layer. Choose a soft, breathable batting material, like 100% cotton or a cotton-bamboo blend, which provides a lovely drape and cozy warmth without feeling overly heavy. Tape your backing fabric flat to a hard floor, layer the batting on top, and center your completed quilt top on the very peak, smoothing out any stray wrinkles from the center outward.
Baste the three layers together securely using either curved quilting safety pins placed every few inches or a specialized temporary fabric basting spray. For the actual quilting process, you can use a standard walking foot on your machine to sew simple, elegant straight lines along the sashing, or try free-motion quilting to create beautiful swirling wind currents across the background. Straight-line quilting is incredibly beginner-friendly and adds a lovely, clean structure that perfectly balances the whimsical nature of the butterfly shapes.
The final step in this butterfly quilt – tutorial is applying the binding, which seals the raw edges and finishes your project beautifully. Cut 2.5-inch wide fabric strips, sew them together end-to-end, fold the long strip in half lengthwise, and press to create a durable double-fold binding. Machine sew the raw edges of the binding to the front of your quilt, flip the folded edge over to the back, and hand-stitch or machine-stitch it down for a clean, secure finish. Give your completed quilt one last warm press, wrap yourself up in its handmade coziness, and celebrate your incredible accomplishment!
Frequently Asked Questions (FAQ)
What is the best size for a beginner butterfly quilt block?
A 10-inch or 12-inch square block is generally considered the absolute sweet spot for beginners. Blocks of this size feature fabric pieces that are large enough to handle easily under your sewing machine without feeling too finicky, while still keeping the project moving quickly. Smaller blocks require working with tiny seam allowances that can be a bit challenging for someone just starting out on their quilting journey.
Can I use scrap fabrics for this butterfly quilt – tutorial?
Yes, absolutely! In fact, a scrappy butterfly quilt is one of the most popular variations of this design. Because butterflies in nature are naturally diverse and colorful, using an assortment of mixed fabric scraps from your stash adds an organic, lively charm to the project. Just ensure that all your scraps are of a similar fabric weight, preferably high-quality quilting cotton, so that the quilt wears and washes evenly.
How do I prevent the delicate corners of the wings from getting cut off?
To keep your wing points perfectly crisp, always pay close attention to your 1/4-inch seam allowance when joining your blocks together. When sewing rows, look closely at the back of your pieced wing units; you will see the exact spot where your previous diagonal stitches intersect. If you guide your needle to sew directly through or just a hairline to the outside of that intersection point, your beautiful wing tips will remain fully intact on the front.
Do I need to use an applique technique for the butterfly’s body?
Not at all. While applique is a wonderful method, this specific butterfly quilt – tutorial relies entirely on simple, beginner-friendly pieced construction. The body and wings are joined using straightforward straight-line machine sewing, meaning you do not need to do any hand sewing or use fusible webs to create the shape. This piecing method results in a durable quilt that can easily handle frequent trips through the washing machine.
What type of batting is recommended for a lightweight baby quilt?
If you are creating a cozy baby quilt, a premium 100% cotton batting or a cotton-bamboo blend is highly recommended. These natural fibers are incredibly soft against delicate skin, highly breathable to prevent overheating, and drape beautifully. Additionally, cotton batting softens up immensely after its very first wash, giving the finished quilt that classic, crinkly, well-loved vintage texture that parents absolutely adore.
Conclusion
This butterfly quilt – tutorial has taken you on a complete creative journey, showing you how to select the best fabrics, make precise cuts, piece together a beautiful block, and assemble your final layers into a gorgeous finished heirloom. Quilting is a wonderful step-by-step process where patience and creativity blend together to create something truly magical out of simple fabric squares.
Now that you have learned the core techniques, we would love to hear your thoughts on this project. Please leave an honest opinion and your creative suggestions in the comment section below—what color palette are you planning to use for your own butterfly quilt.