Creating your own Denim Bag – Tutorial is one of the most rewarding upcycling projects you can undertake, transforming an old pair of jeans into a stylish, durable accessory. In a world increasingly focused on sustainable fashion, repurposing denim is not just a trendy statement but a conscious choice to reduce textile waste. Whether you are a seasoned sewing enthusiast or a complete beginner looking for a fun weekend craft, learning how to craft a custom denim bag allows you to express your personal style while giving a second life to forgotten garments.
The beauty of a Denim Bag – Tutorial lies in the sheer versatility and resilience of the fabric itself, which has been a staple of modern wardrobes for decades. Denim is inherently rugged, meaning your finished product will easily withstand the wear and tear of daily use, whether you use it as a grocery tote, a casual purse, or a beach bag. By following a structured approach, you can master the basic techniques required to handle this thick textile, ensuring your DIY venture yields a professional-looking result you will be proud to carry around.
In this comprehensive guide, we will walk you through every single phase of creating your own masterpiece, ensuring that the Denim Bag – Tutorial experience is smooth, educational, and highly enjoyable. From selecting the perfect pair of old jeans to mastering the final structural stitches, you will gain the practical skills needed to conquer heavy-duty sewing. Let’s dive deep into the essential steps, tools, and creative design choices that will elevate your handmade bag from a simple craft project to a high-quality fashion staple.
1. Selecting the Ideal Materials and Preparing Your Fabric
Before you begin working on your Denim Bag – Tutorial, choosing the right pair of old jeans is paramount to the project’s ultimate success. Look for denim that has minimal stretch, as 100% cotton denim provides the structural integrity needed to help your bag retain its shape when filled with personal items. Check the fabric for thin spots or excessive fraying, aiming to use the sturdiest sections of the legs or the waistband for the main body of your tote.
Once you have selected your garment, it is vital to thoroughly wash and iron the denim before making any precise cuts. Washing ensures the fabric is completely clean and shrinks to its natural state, which prevents awkward warping later on when you sew the pieces together. Ironing the material flat allows you to lay down your patterns accurately, ensuring that every straight line you cut remains perfectly true to your design measurements.
In addition to the denim itself, gathering the correct heavy-duty sewing notions will save you from a great deal of frustration during the assembly process. You will definitely need a specialized denim needle (size 90/14 or 100/16) for your sewing machine to pierce through multiple thick layers of fabric without snapping. Standard polyester thread works well, but choosing a heavy-duty topstitching thread in a classic golden-brown hue will give your bag that authentic, store-bought look.
Beyond the machine requirements, ensure you have sharp fabric shears, a reliable measuring tape, fabric chalk for marking, and plenty of sturdy sewing pins or quilting clips. Standard office scissors will dull quickly and chew through denim, leaving jagged edges that are difficult to work with during the construction phase. Investing in a good pair of dedicated textile shears makes a world of difference when slicing through thick, stubborn seams.
Don’t forget to think about the interior of your creation, as a proper lining can elevate your Denim Bag – Tutorial project from a simple pouch to a premium accessory. Cotton quilting fabric, canvas, or even an old flannel shirt make excellent choices for a contrast lining that adds a pop of color whenever you open the bag. If you prefer a structured, rigid bag, consider purchasing some iron-on fusible interfacing to bond to your fabric pieces before assembly.
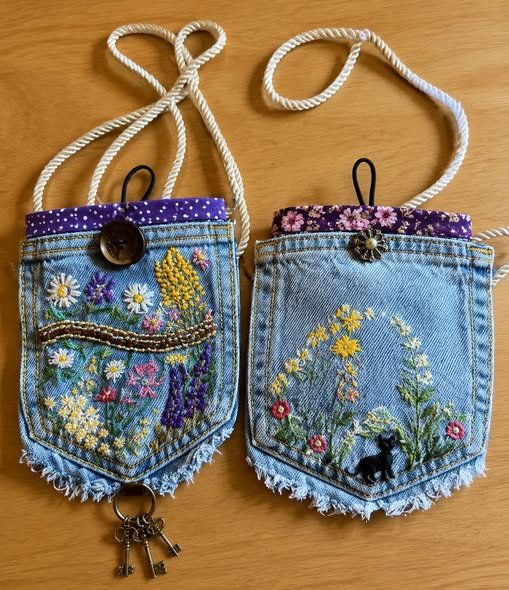
Finally, take a moment to carefully inspect the original features of your jeans, such as the back pockets, leather brand patches, or unique belt loops. These pre-existing elements are goldmines for creative embellishment, allowing you to add functional exterior pockets to your bag with almost zero extra effort. Planning how to integrate these cool, authentic details early on will make your final product look incredibly unique and wonderfully personalized.
2. Cutting Your Pattern Pieces with Precision and Accuracy
To achieve a clean aesthetic for your Denim Bag – Tutorial, you need to carefully map out your cuts on the prepared fabric. Lay your flattened jeans out on a large table, and decide whether you want a tall vertical tote or a wider, horizontal shoulder bag. For a standard, beginner-friendly everyday tote bag, cutting two matching rectangles measuring roughly 16 inches by 14 inches from the straightest parts of the pant legs is an excellent starting point.
When marking your cut lines with fabric chalk, always remember to factor in a consistent half-inch seam allowance around all edges of your panels. Failing to account for seam allowances is a common beginner mistake that results in a finished bag that is significantly smaller than initially anticipated. Double-check your measurements with a ruler before making the first cut, adhering to the timeless crafter’s golden rule: measure twice, cut once.
If you desire a bag that can stand upright on its own, you will need to incorporate a technique known as boxing the corners. To prepare for this during the cutting stage, simply cut out a small, perfect square measuring 2 inches by 2 inches from the bottom two corners of your main panels. This simple geometry trick will later create a flat, structured bottom panel for your bag, giving it depth and a much more professional silhouette.
Next, you must address the creation of the handles or straps, which bear the full weight of the contents you will carry in your finished tote. You can cut two long strips of denim measuring 30 inches in length and 4 inches in width, which will be folded and stitched into durable, comfortable straps. Alternatively, if you want a quicker option, you can carefully cut away the original, thick waistband of the jeans to use as ready-made, heavy-duty handles.
Now is also the perfect time to cut out your interior lining pieces using the exact same dimensions as your main exterior denim panels. Cut two identical rectangles from your lining fabric, and if you decided to use fusible interfacing for added structure, cut two pieces of that as well. Iron the interfacing directly onto the wrong side of either the denim or the lining, following the manufacturer’s instructions to ensure a permanent, bubble-free bond.
With all your pieces cut out and neatly organized on your workspace, do a quick inventory check before moving over to your sewing machine. You should have two main denim panels, two lining panels, two strap strips, and any extra pocket pieces you salvaged from the original jeans. Having everything cut precisely at this stage ensures that the actual assembly process flows smoothly without unexpected interruptions or uneven misalignments.
3. Sewing the Main Body and Assembling the Structure
Now comes the most exciting phase of our Denim Bag – Tutorial: bringing the pieces together at the sewing machine to create the bag’s main structure. Place your two main denim panels directly on top of each other, ensuring that the right sides (the pretty, finished sides of the fabric) are facing inward. Pin or clip securely along the left side, the bottom edge, and the right side, leaving the top opening completely free of pins.
Carefully sew along the three pinned sides using a straight stitch, maintaining your planned half-inch seam allowance with the help of the guide lines on your machine’s throat plate. Go slowly over any areas where thick original seams intersect, as forcing the machine can jam the mechanism or break your heavy-duty needle. It is often helpful to use the manual handwheel to slowly guide the needle through these excessively thick, stubborn fabric layers.
Once the three main sides are successfully stitched, it is time to box the bottom corners to give your tote its flat, functional base. Pull the front and back denim panels apart at one of the open corner squares, flattening the fabric so the side seam aligns perfectly with the bottom seam. Pin this newly formed straight edge securely, and sew across it using a sturdy straight stitch, repeating the exact same process on the opposite corner.
To prevent the raw edges of your internal denim seams from fraying over time with repeated use, you should finish them properly using a zigzag stitch. Sew a wide zigzag directly along the raw edges of your cuts, which locks the loose cotton threads in place and ensures your bag lasts for years. If you happen to own a serger or an overlock machine, you can use it here to achieve a pristine, factory-quality edge finish.
Repeat this entire structural assembly process with your two lining fabric panels, with one incredibly important modification to keep in mind. Along the bottom edge of the lining, leave a generous 4-to-5-inch opening completely unstitched, as this open gap is vital for turning the entire bag right-side out later on. Box the corners of the lining fabric exactly as you did with the denim so that the interior fits flush inside the exterior.
Before joining the exterior and interior together, construct your straps by folding the long denim strips in half lengthwise, right sides together, and sewing down the edge. Turn the tubes right-side out using a safety pin, press them perfectly flat with your iron, and run two neat rows of topstitching down each side for stability. Pin the ends of these completed straps to the top edge of your right-side-out denim body, pointing downward toward the floor.
4. Joining the Layers and Adding Professional Finishing Touches
With your main denim body and lining fully prepared, you are ready to execute the final assembly step of this comprehensive Denim Bag – Tutorial. Keep your main denim bag body right-side out (with the handles pinned downward), and keep your lining bag inside-out (with the pretty side facing inward). Insert the right-side-out denim bag completely into the inside-out lining, nesting them together so their top raw edges align perfectly.
Carefully match up the side seams of both the denim exterior and the textile lining, pinning them securely together all the way around the top perimeter. Ensure your straps remain tucked safely down inside the layers so they do not accidentally get caught in the top seam where they shouldn’t be. Sew completely around the circular top rim of the bag using a firm, strong straight stitch, securing all the layers together.
Reach your hand through the intentional 4-inch gap you left in the bottom of the lining fabric, grasp the denim body, and gently pull it through. The entire assembly will magically turn right-side out, revealing the completed exterior of your bag with the lining perfectly positioned on the inside. Gently push out the corners of your denim bag using a blunt tool, like a chopstick, to ensure the shape looks crisp and symmetrical.
Tuck the raw edges of the lining opening inward, pin them flat, and sew the small gap closed using either a neat machine topstitch or a hidden hand ladder stitch. Once closed, push the entire lining down inside the denim shell, smoothing it out so it lays completely flat against the interior walls. Use your steam iron to give the top rim of the bag a crisp, professional press, ensuring the lining doesn’t peek out over the top.
The final hallmark of a premium DIY project is adding a clean row of topstitching roughly a quarter-inch below the top rim of your bag. This topstitch anchors the lining permanently to the denim, prevents it from riding up when you use the bag, and gives the opening a beautiful structural rigidity. Go slowly during this step, as this visible stitching will be prominently displayed on the outside of your finished fashion accessory.
Now that the structural sewing is officially complete, you can customize your bag further by adding hardware like heavy-duty magnetic snaps, metal rivets, or decorative buttons. Give the entire tote one final, thorough press with your iron to remove any lingering wrinkles from the assembly process, and clip away any loose threads. Your beautiful, sustainable, and incredibly sturdy new tote bag is now completely finished and ready to be styled with your favorite outfits!
Frequently Asked Questions (FAQ)
Do I need an industrial sewing machine to sew a denim bag?
No, you do not need an industrial machine to successfully complete this project. Most modern domestic sewing machines can handle denim quite well, provided you use the correct settings and accessories. The absolute key is using a dedicated heavy-duty denim needle (size 90/14 or 100/16) and sewing at a slow, controlled pace over thick seams.
What can I do if my sewing machine keeps skipping stitches on thick denim layers?
Skipping stitches usually happens because the needle is dull, bent, or too thin for the fabric thickness. Try replacing your needle with a brand new, thicker denim needle, and ensure you are using high-quality polyester or heavy-duty thread. Additionally, using a tool called a “hump jumper” or a folded piece of cardboard under the back of your presser foot can help keep the foot level when climbing over bulky seams.
Can I make a denim bag without a sewing machine?
Yes, you can absolutely create a denim tote bag without a sewing machine by using strong fabric glue, iron-on fusible mending tape, or by hand-sewing. If you choose to hand-sew, utilize a classic backstitch with heavy-duty thread or embroidery floss, as this stitch mimics the strength of a machine stitch. However, a machine-sewn bag will always offer the highest level of durability for daily load-bearing use.
How do I properly care for and wash my handmade denim tote?
Since your bag is made primarily of cotton denim and lining fabric, it can generally be washed easily. To preserve the structure and prevent any hardware from scraping, turn the bag inside out and wash it on a gentle cycle with cold water. Hang the bag up to air dry completely instead of putting it in the dryer, and iron it while slightly damp to smooth out deep wrinkles.
What is the best type of fabric to use for the interior lining?
Light-to-medium-weight cotton fabrics, such as quilting cotton, broadcloth, or lightweight canvas, work best for lining a denim bag. They add a clean finish and structural contrast without adding an excessive amount of extra bulk to your seams. Choosing a fabric with a bright pattern or a light color also makes it much easier to find small items floating around inside your bag.
Conclusion
In this Denim Bag – Tutorial, we have covered the entire rewarding journey of transforming an old, forgotten pair of jeans into a beautiful, functional, and highly durable tote bag.
By carefully selecting your materials, cutting your pattern pieces with precise accuracy, properly boxing the corners for structure, and executing a clean topstitch, you have unlocked the foundational skills of sustainable fashion crafting. This eco-friendly project not only helps reduce global textile waste but also leaves you with a completely unique, personalized accessory built to withstand the rigors of everyday use.
!