Welcome to this comprehensive Heart-Shaped Fabric Bag – Tutorial where you will learn how to create a beautiful, handmade accessory from scratch. Crafting your own bags is not only a fantastic way to express your personal style, but it also allows you to make unique, eco-friendly gifts for your loved ones. Whether you want to hold small cosmetics, gift jewelry, or build a cute everyday tote, this project is highly versatile and beginner-friendly.
In this detailed Heart-Shaped Fabric Bag – Tutorial, we are going to explore the entire process step by step, ensuring you achieve a professional finish even if you are relatively new to sewing. Using a heart-shaped fabric bag configuration introduces a few fun challenges, like navigating curved seams and achieving a sharp bottom point, but with the right guidance, you will master these techniques quickly.
By following this specific Heart-Shaped Fabric Bag – Tutorial, you will discover how easy it is to transform simple pieces of cloth into a structured, functional, and adorable pouch. We have optimized this guide to answer all your practical questions while keeping the instructions clear, engaging, and deeply rewarding to follow.
1. Gathering Your Materials and Preparing the Template
Before diving into the actual sewing, the absolute first step of our Heart-Shaped Fabric Bag – Tutorial is collecting all the necessary supplies to ensure a smooth crafting experience. To make a durable heart-shaped fabric bag, you will need to choose a main exterior fabric, a matching lining material, and a stabilizing layer like fusible interfacing to give the bag its crisp shape.
Cotton fabrics are highly recommended for this project because they do not slip around while you are trying to sew complex curves, making them ideal for beginners and seasoned crafters alike. You will also need standard sewing tools including a sharp pair of fabric scissors, matching thread, straight sewing pins or quilting clips, a water-soluble fabric marker, and a reliable sewing machine.
The magic of creating a perfect heart-shaped fabric bag lies entirely within your initial paper template, which ensures both sides of your finished project look perfectly symmetrical. To make your pattern, fold a piece of sturdy paper or cardboard in half, draw one half of a heart shape against the folded edge, and cut it out to reveal a perfectly balanced heart when opened.
Once your custom template is ready, lay your selected fabrics flat on your cutting mat, ensuring there are no deep wrinkles or creases that could distort your final shapes. Pin the paper heart securely to your fabric layers and carefully cut out two matching pieces from your exterior fabric, two pieces from your lining fabric, and two pieces from your fusible interfacing.
Applying the fusible interfacing is a crucial phase of this Heart-Shaped Fabric Bag – Tutorial because it gives the fabric the necessary body to hold its romantic shape without sagging. Place the textured, adhesive side of the interfacing against the wrong side of your exterior fabric pieces, and press down firmly with a warm iron according to the manufacturer’s instructions.
Taking your time during this preparation stage sets the foundation for the entire project, ensuring that every subsequent step aligns beautifully. Now that all your fabric pieces are stiffened, cut symmetrically, and organized neatly on your workspace, you are officially ready to move on to the sewing machine layout.
2. Sewing the Outer Shell and Navigating the Curves
Now we enter the construction phase of the Heart-Shaped Fabric Bag – Tutorial, where your flat pieces of fabric finally start transforming into a real, three-dimensional pouch. Take your two exterior heart pieces, which have already been reinforced with interfacing, and place them together with their right sides facing each other, matching up all the edges precisely.
Pin or clip around the entire perimeter of the heart shape, leaving a clear opening of about two to three inches along one of the straight upper sides for turning later. When sewing a heart-shaped fabric bag, maintaining a consistent seam allowance—preferably a standard one-quarter of an inch—is vital for keeping the shape recognizable and balanced.
Begin sewing slowly at one side of your designated opening, backstitching at the start to secure your threads, and gently guide the fabric through your sewing machine along the edge. Navigating the sharp top cleft of the heart and the bottom point requires a classic sewing technique known as pivoting, which keeps your corners looking sharp instead of rounded.
To pivot perfectly at the bottom point, sew directly into the very tip, stop the machine with your needle down in the fabric, lift your presser foot, rotate the fabric, lower the foot, and continue. Once the perimeter is stitched completely, you must clip small V-shaped notches into the seam allowance around the curves and snip the excess bulk from the bottom point.
Clipping these curves is an essential trick in this Heart-Shaped Fabric Bag – Tutorial because it relieves fabric tension, allowing the seams to lay perfectly flat when turned right-side out. Without these tiny relief cuts, the circular edges of your finished heart-shaped fabric bag will bunch up, buckle, and look puckered from the outside.
Carefully reach into the opening you left, turn the entire exterior shell right-side out, and use a dull tool like a chopstick to gently push out the bottom point. Press the entire outer shell flat with your iron, focusing on pulling the seams out completely to create a beautiful, smooth silhouette that highlights the iconic heart contour.
3. Assembling the Lining and Joining the Pieces Together
The third phase of our Heart-Shaped Fabric Bag – Tutorial focuses on creating the interior lining, which hides all the raw edges and gives your bag a professional boutique finish. Take your two lining fabric pieces, place them right sides together, and pin them around the edges just like you did with the exterior pieces earlier.
When sewing the lining of your heart-shaped fabric bag, you will want to leave a slightly larger opening—around three inches—along the bottom straight edge of the heart shape. This larger opening will act as the main portal through which you will pull the entire combined bag later on during the final reveal.
Stitch around the lining perimeter using the exact same seam allowance, remembering to pivot carefully at the top indentation and the bottom sharp point. Just as you did with the outer shell, clip your curves and trim the excess fabric from the point so the interior sits smoothly inside the bag without creating uncomfortable internal lumps.
Leave this lining piece wrong-side out for now, and gently insert your completed, right-side-out exterior bag entirely down into the inside of this lining shell. This configuration means the right sides of your exterior fabric and the right sides of your lining fabric are now touching each other directly on the inside.
Align the top edges, top clefts, and side seams of both bags perfectly, pinning them heavily around the top rim to keep the layers from shifting while you sew. Sew completely around the top opening of the bag, joining the exterior and lining together into one unified piece, making sure to reinforce your stitches at the heavy stress points.
Reach through the opening you left in the bottom of the lining fabric, carefully grab the exterior bag, and slowly pull the entire project right-side out. This moment is always the most exciting part of the Heart-Shaped Fabric Bag – Tutorial, as your completed bag structure suddenly appears with all its raw seams neatly hidden inside.
4. Adding Closures and Putting on the Finishing Touches
We have arrived at the final stage of our Heart-Shaped Fabric Bag – Tutorial, where we secure the openings and add functional closures to make the bag usable. Tuck the raw edges of the lining opening inward by a quarter of an inch, press them flat with an iron, and sew the gap closed using a neat topstitch or a hidden ladder stitch.
Push the lining down into the exterior shell of your heart-shaped fabric bag, smoothing out any internal bunches with your fingers until it sits perfectly flush. Take your project back to the ironing board and give the upper rim a crisp, professional press, ensuring the lining fabric doesn’t peek out over the beautiful exterior edges.
To prevent the lining from shifting over time, run a delicate topstitch around the entire upper rim of the bag, roughly one-eighth of an inch away from the edge. This topstitching step not only looks incredibly clean and sophisticated, but it also adds structural integrity to the opening of your handmade creation.
Now you can decide on the perfect closure system for your heart-shaped fabric bag depending on how you plan to use it in your daily life. You can easily attach a set of magnetic snaps, sew on a vintage button with an elastic loop, or install a small zipper along the top curves for maximum security.
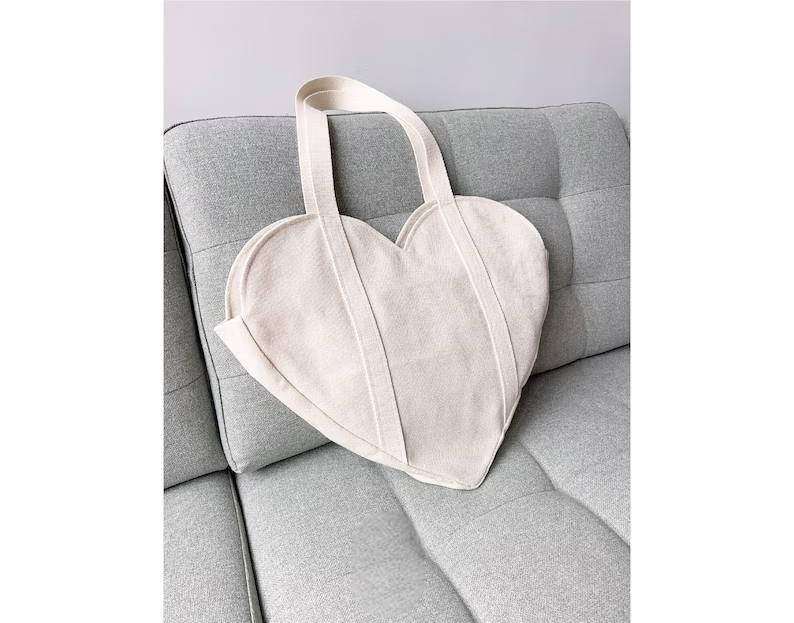
If you want to turn your creation into a wearable purse, you can easily stitch matching fabric straps or attach a delicate metal chain to the upper sides of the heart. For a simpler pouch design, adding a small ribbon loop to one side allows you to carry it easily on your wrist or hang it as a decorative organizational piece.
Give your completed bag one final press with the iron to set all your stitches, clear away any loose threads, and admire your gorgeous handiwork. You have successfully navigated all the curves, corners, and layers of this comprehensive Heart-Shaped Fabric Bag – Tutorial, creating a beautiful accessory you can be proud of.
Frequently Asked Questions (FAQ)
What is the best type of fabric to use for a heart-shaped bag?
The ideal choice for this project is 100% quilting cotton because it holds its shape well, doesn’t stretch out of frame, and behaves beautifully under the sewing machine needle. You can also use sturdier materials like canvas, denim, or lightweight upholstery fabrics for the exterior shell if you want a heavier, more protective bag. Avoid using slippery silks or stretchy knits until you are highly confident navigating tight curves.
Why is my heart shape looking puckered around the curved edges?
Puckered edges happen when the tension in the seam allowance isn’t properly released after sewing the curves. To fix this, you must clip small notches or make tiny straight cuts into the seam allowance all around the circular parts of the heart before turning the bag right-side out. Be very careful not to clip through your actual line of stitching while doing this.
Can I make this bag larger or smaller using the same tutorial?
Yes, this design is fully scalable to fit whatever specific needs you have. To change the size, simply take your original paper template to a copy machine and scale the percentage up or down, or draft a new heart shape on a larger piece of paper. The structural sewing steps remain exactly the same whether you are making a tiny coin pouch or a large beach tote.
Do I absolutely need to use fusible interfacing for this project?
While you can technically sew the bag without it, skipping interfacing is not recommended if you want a clean, professional look. The interfacing adds necessary body, crispness, and support, allowing the unique heart shape to remain clearly visible even when the bag is completely empty. Without it, your bag may look floppy and lose its iconic heart definition.
How do I sew the top cleft of the heart without bunching the fabric?
When you approach the center top indentation of the heart, slow down your sewing machine dramatically and stitch right into the valley. Stop with your needle deep in the fabric, lift your presser foot, pivot the fabric sharply to align with the next curve, lower the foot, and proceed. Clipping a deep single slit straight down into the seam allowance at that exact pivot point is essential before turning it right-side out.
Conclusion
In this comprehensive Heart-Shaped Fabric Bag – Tutorial, we have covered everything from drafting your custom paper template and cutting symmetrical pieces to navigating tricky curves and installing professional finishes.
By reinforcing your cotton panels with fusible interfacing, pivoting precisely at key corners, and clipping your seam allowances, you can easily create a gorgeous, structurally sound heart-shaped fabric bag that stands out. This project is a wonderful way to practice fundamental sewing skills while making something beautiful and functional.