Vintage Sun Hat – Tutorial: If you have ever wanted to recreate the timeless elegance of classic fashion while protecting yourself from the sun, making a Vintage Sun Hat is the perfect weekend project. There is something uniquely satisfying about crafting your own accessories, especially those that carry the charm of bygone eras. In this comprehensive guide, we will walk you through every single step to ensure you can create a beautiful, functional piece of headwear that looks like it came straight out of a mid-century fashion magazine.
The beauty of a Vintage Sun Hat lies in its versatility and its ability to instantly elevate any summer outfit. Whether you are aiming for a 1950s Hollywood glam look or a rustic Edwardian countryside vibe, the right fabric choice and brim structure will make all the difference. This Vintage Sun Hat – Tutorial is designed for crafters of all skill levels, breaking down complex millinery concepts into simple, actionable steps that you can follow at home with basic sewing tools.
Before we dive into the actual construction, it is important to understand why this specific style remains a staple in modern wardrobes. A Vintage Sun Hat does not just offer excellent UV protection; it frames the face beautifully and allows you to express your personal style through unique fabric patterns and trimmings. By mastering this Vintage Sun Hat – Tutorial, you will gain valuable sewing skills, such as working with heavy-duty interfacing and shaping curved brims, which you can apply to many other DIY fashion projects in the future.
1. Choosing the Right Materials for Your Vintage Sun Hat – Tutorial
Selecting the perfect fabric is the foundational step of our Vintage Sun Hat – Tutorial because the weight and texture determine how the hat drapes and holds its shape. For an authentic retro look, natural fibers like heavy cotton canvas, linen, or duck cloth work best for the exterior. These materials are breathable, durable, and historical staples for summer wear.
The interior lining of your Vintage Sun Hat requires a softer touch, so look for lightweight cotton voile, poplin, or even a soft silk if you want a luxurious feel against your hair. Avoid synthetic fabrics that trap heat, as the primary goal of a sun hat is to keep you cool during warm, sunny days.
Structure is everything when it comes to a classic wide-brimmed look, which is why heavyweight fusible interfacing is an absolute must-have item. The interfacing is ironed onto the wrong side of the fabric to give the brim its iconic, crisp shape without making it feel like cardboard.
If you desire an extra wide or dramatic flip to your brim, you might also want to source some millinery wire or horsehair braid to sew into the outer edge. This allows you to mold, bend, and style the brim of your finished hat precisely how you want it to sit.
Do not forget the essential sewing notions required for this Vintage Sun Hat – Tutorial, including high-quality polyester thread, a heavy-duty sewing machine needle (size 90/14 works perfectly), and sharp fabric shears. Having the right tools prevents frayed edges and skipped stitches during assembly.
Lastly, think about the decorative elements that will give your hat that distinct vintage flair. Grosgrain ribbons, faux flowers, vintage buttons, or even a contrasting fabric band can transform a simple hat into a stunning, personalized statement piece.
2. Preparing and Cutting Your Pattern Pieces Accurately
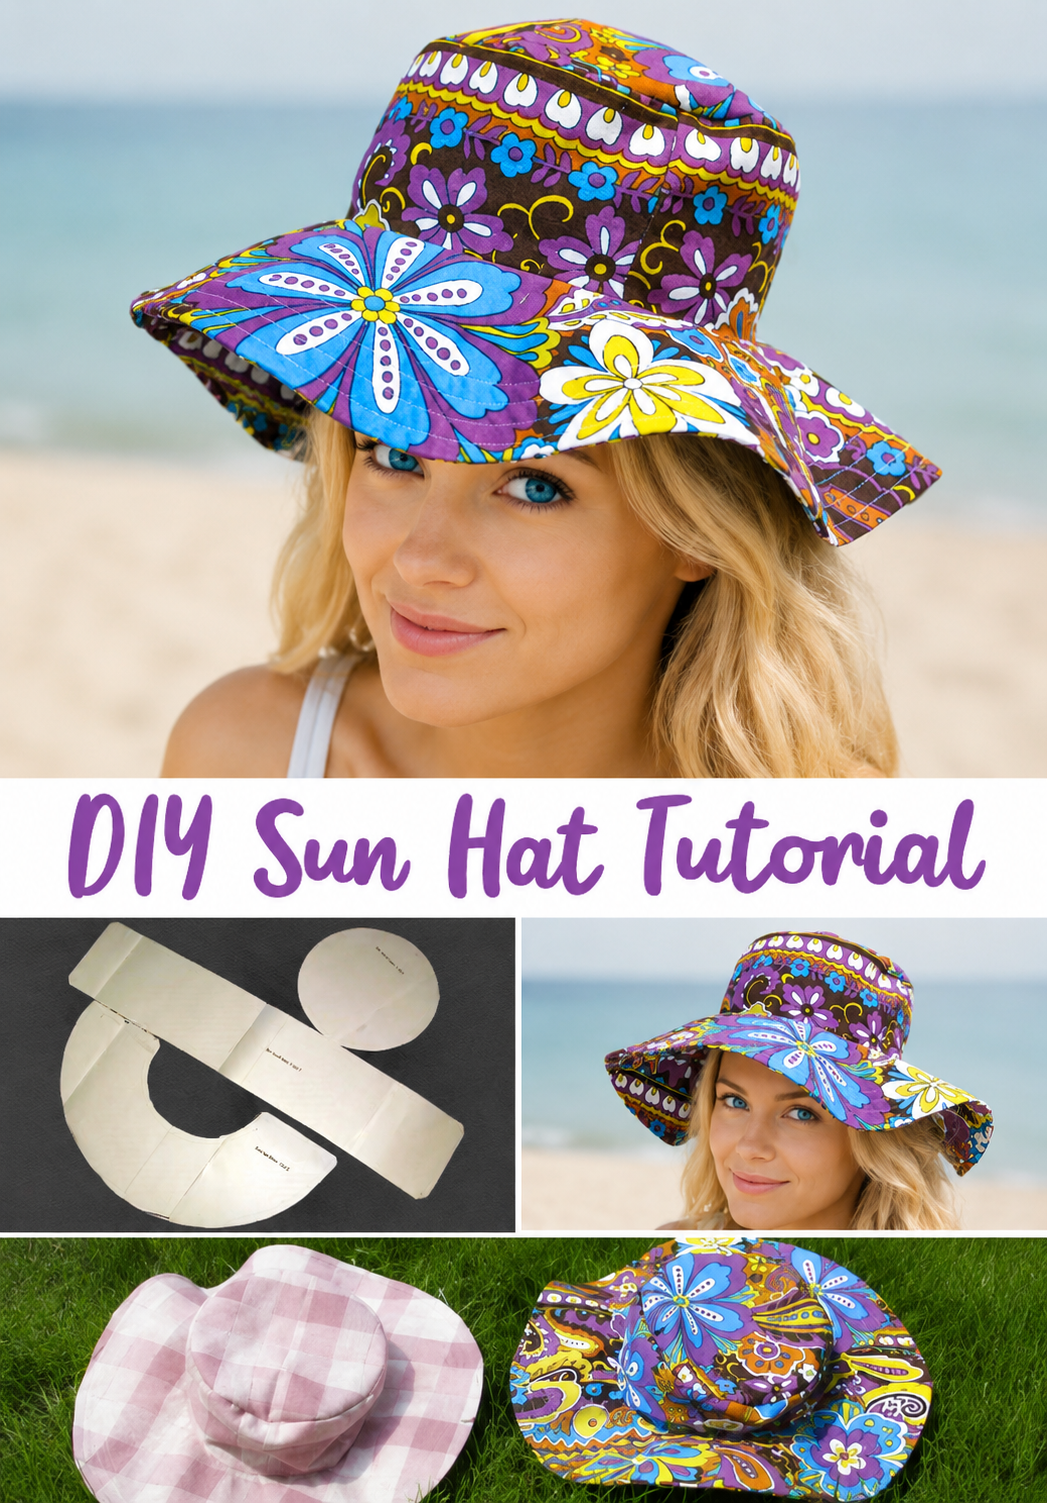
The secret to a flawless Vintage Sun Hat is precision during the cutting phase, as even a minor misalignment can cause the crown to twist or the brim to ripple unevenly. You will need three main pattern components: the top crown (a circle), the side crown (a curved band), and the brim (a large donut shape).
Start by washing and ironing your chosen fabrics to ensure any potential shrinkage happens before you begin cutting your pieces. Lay your fabric completely flat on a large cutting mat, paying close attention to the grainline arrows indicated on your paper pattern.
Pin your pattern pieces securely to the fabric, ensuring that the brim pieces are cut on the bias if you want a softer roll, or on the straight grain for maximum stiffness. Cut two pieces for the brim (one upper, one under), two for the side crown, and two for the top crown.
Repeat the exact same cutting process for your heavyweight fusible interfacing, but note that you only need to interface one layer of the brim and one layer of the side crown. This prevents the finished hat from becoming overly bulky or difficult to turn right-side out.
Carefully fuse the interfacing to the wrong side of your exterior fabric pieces using a hot iron and plenty of steam. Press firmly for several seconds rather than sliding the iron, ensuring a permanent bond that won’t bubble or separate later.
Use a fabric marker or tailor’s chalk to transfer all critical alignment notches from your paper pattern onto the wrong side of the fabric. These small marks are vital roadmaps that will help you align the pieces perfectly when you move over to the sewing machine.
3. Stitching the Crown and Assembling the Hat Body
Now that preparation is complete, we enter the core assembly stage of our Vintage Sun Hat – Tutorial, starting with the construction of the crown. Take your exterior side crown pieces, pin the short ends right sides together to form a continuous loop, and stitch them using your designated seam allowance.
Press the seam flat, then open, to minimize bulk at the sides of your hat. Next, match the alignment notches of your top circular crown piece with the top edge of your newly formed side crown loop, pinning generously around the entire circumference.
Slowly stitch the circle to the loop, gently easing the fabric around the curves to avoid puckers or tucks. Once stitched, clip small V-shapes into the seam allowance all the way around, which allows the circular seam to lay perfectly flat and smooth.
Repeat these exact steps for the lining fabric pieces to create an identical inner crown, but leave a three-inch opening in one of the side seams. This open gap is crucial, as it will serve as the magic window through which we turn the entire hat right-side out later.
Take your two brim pieces, place them right sides together, and pin around the entire outer circumference. Stitch carefully along this outer edge, using a consistent seam allowance to maintain a perfectly round or oval shape for your brim.
Trim the brim seam allowance down by half, clip the curves, and turn the brim right-side out through the open inner circle. Press the outer edge completely flat with your iron, and topstitch several rows parallel to the edge to give the brim that classic, structured look.
4. Final Assembly and Adding Authentic Vintage Embellishments
We have reached the exciting climax of our Vintage Sun Hat – Tutorial, where all the separate components finally come together into a recognizable piece of headwear. Sandwich the completed brim between the right sides of your exterior crown and your lining crown, matching all side seams and notches.
Pin through all three layers meticulously, ensuring the fabric remains flat without bunching up. Stitch completely around the inner circle, securing the brim permanently to both the outer hat body and the inner lining fabric.
Reach your hand through the small opening you left in the lining seam earlier, carefully grab the exterior of the hat, and gently pull the entire structure through. Your Vintage Sun Hat will suddenly materialize before your eyes, right-side out and beautiful.
Hand-stitch or machine-stitch the opening in the lining closed, then push the lining down inside the hat crown. Give the entire hat a thorough, professional press with your iron, using a tailor’s ham or a rolled-up towel inside the crown to maintain its rounded shape.
To truly honor the vintage aesthetic, sew a wide grosgrain ribbon around the base of the crown where it meets the brim. You can fashion a dramatic, oversized bow at the back or side, secured with a few hidden hand stitches to keep it in place.
For a final touch of glamorous sophistication, consider pinning a removable vintage brooch to the ribbon or attaching delicate silk flowers. Put your new creation on, adjust the tilt of the brim to your liking, and step out into the sunshine with confidence and style.
Frequently Asked Questions
What is the best fabric to use for a summer hat?
The best fabrics are sturdy, breathable natural fibers such as cotton canvas, linen, duck cloth, and denim. These materials hold their shape well when combined with interfacing while allowing your head to stay cool in hot weather.
Can I make this hat without a sewing machine?
Yes, you can absolutely hand-sew this entire project using a strong backstitch. However, using a sewing machine saves a significant amount of time and ensures highly consistent, durable stitches, especially through multiple layers of heavy fabric.
How do I choose the right size for my hat pattern?
Measure the circumference of your head using a flexible tape measure, wrapping it around your forehead just above your ears. Compare this measurement to your pattern guide, and always add about half an inch of ease for a comfortable, non-restrictive fit.
How do I wash and care for my DIY vintage hat?
It is highly recommended to spot-clean your hat with a damp cloth and mild detergent to preserve the structure of the internal interfacing. Avoid submerging the hat completely in water or putting it in a washing machine, as this can cause the interfacing to warp or unstitch.
Why is my hat brim too floppy and drooping?
If your brim lacks structure, it usually means the fusible interfacing used was too lightweight, or it wasn’t bonded properly with enough heat and steam. You can fix a floppy brim by adding rows of dense topstitching or inserting a flexible millinery wire along the outer edge.
Conclusion
In this Vintage Sun Hat – Tutorial, we have covered everything from selecting breathable natural fabrics and cutting precise pattern pieces to assembling the crown, structuring the wide brim, and adding gorgeous retro embellishments.