
Seat Belt Cushion Pattern is a practical and beginner-friendly sewing project that combines comfort, safety, and creativity into one useful accessory. Whether you are looking for a way to make long car rides more enjoyable or simply want to personalize your vehicle with handmade accessories, this Seat Belt Cushion Pattern is a wonderful project to try. With only a few sewing supplies and some fabric of your choice, you can create a soft cushion that protects the shoulder and neck from the rough texture of a seat belt while adding a stylish touch to your car’s interior.
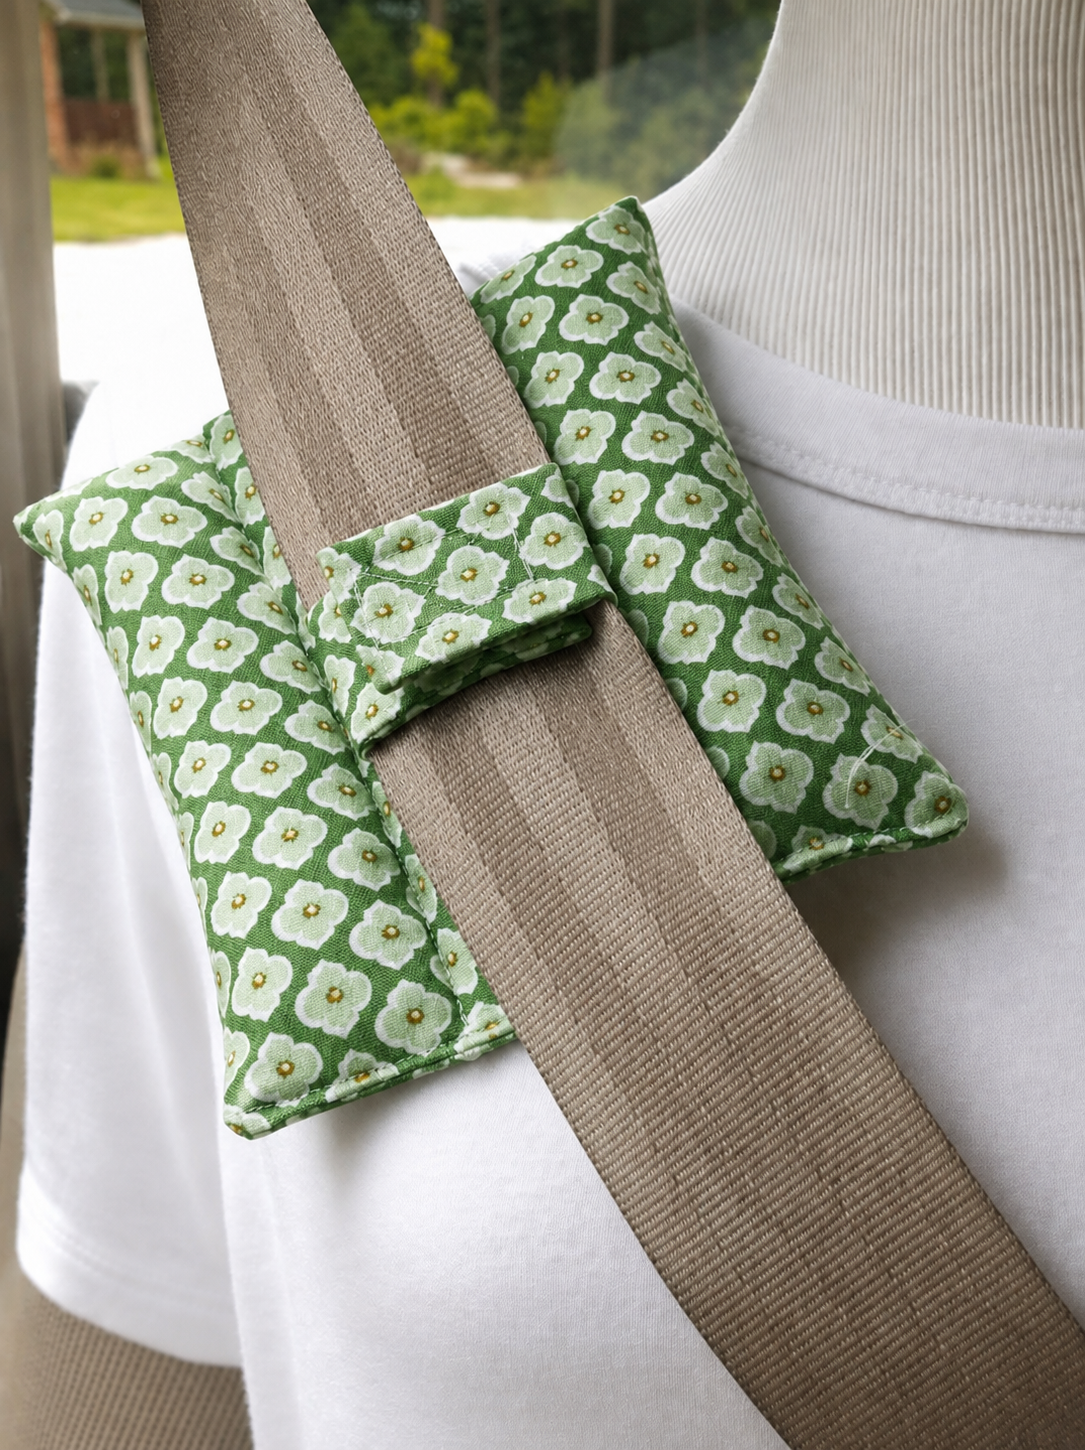
A handmade Seat Belt Cushion Pattern is also a thoughtful gift for family members, friends, children, or anyone who spends a lot of time driving or traveling. The finished cushion wraps neatly around the seat belt using a simple closure, allowing it to stay securely in place without affecting the normal operation of the belt. This project is ideal for beginners because it requires only basic sewing techniques while still producing a professional-looking result.
Another great advantage of making your own Seat Belt Cushion Pattern is the ability to customize every detail. You can select floral prints, modern fabrics, children’s themes, seasonal designs, or elegant neutral colors to match your personality or vehicle. Since this project uses relatively small fabric pieces, it is also an excellent way to use fabric scraps left over from larger quilting or sewing projects. Besides being economical, it encourages creativity and helps reduce fabric waste.
Materials and Preparation for Your Seat Belt Cushion Pattern
Before starting your Seat Belt Cushion Pattern, gather all the necessary materials. Preparing everything ahead of time makes the sewing process smoother and more enjoyable.
The main fabric can be quilting cotton, linen blends, canvas, or other medium-weight fabrics. Cotton is especially recommended because it is soft, breathable, and easy to sew.
For the lining, use another piece of cotton fabric or the same fabric as the exterior if you prefer a coordinated appearance.
Soft polyester batting or lightweight cushion filling creates the comfortable padding that protects the shoulder from pressure during travel.
You will also need coordinating thread, sewing pins or clips, scissors, a rotary cutter if available, a ruler, fabric marker, sewing machine, and hook-and-loop tape (Velcro) or snaps for the closure.
Before cutting the fabric, wash, dry, and press it to prevent future shrinking. Ironing also helps achieve more accurate measurements and cleaner seams throughout the project.
Cutting and Sewing the Seat Belt Cushion Pattern
Begin by deciding the finished size of your Seat Belt Cushion Pattern. A common size is approximately 9 inches long by 5 inches wide (23 cm x 13 cm), although you may adjust these measurements depending on personal preference.
Cut two exterior fabric rectangles using your chosen measurements. Cut matching pieces of batting using the same dimensions or slightly smaller to reduce bulk at the seams.
Place the batting against the wrong side of one fabric piece and baste or quilt it lightly if desired. This helps keep the padding evenly distributed during use.
Place the two fabric pieces right sides together, sandwiching the batting inside if you did not quilt it first. Pin around all edges carefully.
Using a ¼-inch seam allowance, sew around the entire rectangle while leaving an opening of approximately 2 to 3 inches for turning.
Trim the corners diagonally to reduce bulk, then turn the project right side out through the opening. Push out the corners gently using a blunt turning tool or chopstick before pressing the entire cushion flat.
Adding the Closure and Finishing Touches
Once the cushion is pressed, close the turning opening with a neat topstitch close to the edge. This also gives the project a polished appearance.
To allow the cushion to wrap around the seat belt, attach strips of hook-and-loop tape along the long edges. Sew each strip securely several times since this area will experience repeated opening and closing.
If you prefer an alternative closure, sew snaps or buttons instead. Make sure the closure is easy to operate while remaining secure during use.
Test the finished cushion by wrapping it around a seat belt. It should fit comfortably without slipping excessively while remaining easy to remove for washing.
Decorative topstitching can be added around the perimeter for extra durability while giving the project a more professional finish.
If making multiple cushions, experiment with coordinating fabrics, patchwork designs, embroidered initials, or quilted textures to create unique handmade accessories.
Tips for Creating a Professional Seat Belt Cushion Pattern
Accurate cutting is one of the most important factors in achieving a clean-looking Seat Belt Cushion Pattern. Even small differences in measurement can affect the final fit.
Choose high-quality cotton fabrics because they are durable, washable, and comfortable against the skin, especially during long trips.
Avoid using fabrics that are too thick, as excessive bulk may make the cushion difficult to wrap around the seat belt.
Keep the batting lightweight. Too much padding may reduce flexibility, while too little may decrease comfort.
Reinforce the stitching around the closure area because this section receives the most stress with repeated daily use.
Take your time when pressing each step. Professional sewists often say that ironing is just as important as sewing because crisp seams create a polished final appearance.
Creative Ideas and Everyday Uses for Your Seat Belt Cushion Pattern
One of the greatest benefits of a handmade Seat Belt Cushion Pattern is its versatility. It can be customized for every family member using different colors and prints.
Children often enjoy colorful themes featuring animals, stars, flowers, or playful patterns that make car rides more enjoyable.
Elegant floral fabrics, similar to the example shown, create a sophisticated accessory that complements many vehicle interiors while remaining timeless.
Holiday fabrics allow you to make seasonal cushions that can be changed throughout the year, adding a festive touch to your vehicle.
These cushions also make excellent handmade gifts for birthdays, holidays, Mother’s Day, Father’s Day, or as thoughtful presents for new drivers.
Because they require relatively little fabric, they are ideal projects for using leftover quilting cotton and reducing waste while creating something practical.
Frequently Asked Questions About the Seat Belt Cushion Pattern
What is a Seat Belt Cushion Pattern used for?
A Seat Belt Cushion Pattern is designed to create a soft padded cover that wraps around a vehicle’s seat belt, reducing pressure and friction on the shoulder and neck during travel.
Is this project suitable for beginners?
Yes. This is one of the easiest sewing projects for beginners because it uses straight seams, simple construction techniques, and basic sewing supplies.
Which fabric works best?
Medium-weight quilting cotton is usually the best choice because it is durable, comfortable, easy to sew, and available in countless beautiful prints.
Can I wash the finished cushion?
Yes. If made with washable cotton fabric and polyester batting, the cushion can usually be machine washed on a gentle cycle and air dried or tumble dried on low heat.
What size should I make?
Most seat belt cushions measure approximately 9 x 5 inches (23 x 13 cm), but you can adjust the dimensions depending on your comfort preferences or the width of the seat belt.
Should I quilt the layers?
Quilting is optional. Light quilting helps stabilize the batting and gives the finished project a more decorative appearance, but a simple padded version works very well too.
Can children use these cushions?
Yes. They are popular for children’s car rides because they provide additional comfort. However, the cushion should never interfere with the proper positioning or function of the seat belt.
What type of closure is recommended?
Hook-and-loop tape is the most popular option because it allows the cushion to be easily removed for washing while staying securely attached during everyday use.
Conclusion
Creating your own Seat Belt Cushion Pattern is an enjoyable sewing project that combines comfort, practicality, and creativity. Throughout this guide, you learned how to choose appropriate materials, prepare your fabric, cut the pattern pieces accurately, sew the cushion, add comfortable padding, install a secure closure, and apply finishing techniques that give the project a polished, professional appearance. You also discovered useful tips for selecting fabrics, improving durability, and personalizing the finished accessory with decorative touches that reflect your own style.
Whether you are making one for yourself, your family, or as a thoughtful handmade gift, this Seat Belt Cushion Pattern is a rewarding project that can be completed with basic sewing skills while producing a practical item you’ll use every day. Its simple construction, customizable design, and everyday usefulness make it an excellent addition to any sewing or quilting project list.