If you’re looking for a creative, functional, and beginner-friendly project, the Crochet Coaster – Pattern is a perfect choice.
These small yet practical pieces are not only great for protecting your furniture but also serve as a stylish accent for any room.
Whether you’re a crochet enthusiast or just getting started, crafting coasters offers a fun way to play with color, texture, and design.
One of the best things about the Crochet Coaster – Pattern is its versatility. You can create them in countless shapes—round, square, hexagonal, or even floral. You can also experiment with stitches and colors to match your personal taste or home decor. These coasters are also great stash-busters, allowing you to use up small amounts of leftover yarn from other projects.
From giving your table a cozy handmade vibe to creating thoughtful, handcrafted gifts, the Crochet Coaster – Pattern is a tiny project that brings a big reward. In this article, we’ll guide you through understanding the pattern, selecting the right materials, following step-by-step instructions, and even customizing your coasters for any occasion or style.
1. What Makes the Crochet Coaster – Pattern So Popular?
The Crochet Coaster – Pattern has gained immense popularity among crafters for a number of reasons. It’s a small-scale project, which means it’s ideal for quick crafting sessions and doesn’t require a lot of materials. You can easily make a set of coasters in a single afternoon.
Because they’re so quick to make, coasters are an excellent project for beginners. If you’re learning how to crochet, this pattern helps you practice the basic stitches without feeling overwhelmed by a large, time-consuming project. You’ll gain confidence while creating something useful and pretty.
Coasters also make thoughtful, handmade gifts. Whether it’s for a housewarming, birthday, or holiday, a set of colorful crochet coasters can brighten someone’s day. You can customize them with colors that match your recipient’s style or even embroider initials or motifs for a personal touch.
From a sustainability perspective, making your own coasters from leftover yarn is an eco-friendly alternative to buying plastic or synthetic options. Cotton yarn in particular is absorbent, washable, and perfect for this type of household item.
This pattern is also popular because of its portability. You don’t need a lot of tools or space to crochet a coaster. You can take your project on the go, whether you’re commuting, watching TV, or relaxing at a coffee shop.
Lastly, coasters are great for showcasing creativity. Even though they’re small, they provide a blank canvas for trying new stitch techniques, colorwork, or even combining yarn types. The Crochet Coaster – Pattern is a fun way to expand your skills while creating something practical.
2. Materials and Tools Needed for a Crochet Coaster – Pattern
Creating a Crochet Coaster – Pattern requires just a few basic tools and materials, making it both affordable and accessible for crafters of all skill levels. Let’s take a closer look at what you’ll need to get started.
The most important material is yarn. Cotton yarn is the top choice for coasters because it’s absorbent, durable, and easy to clean. It also holds its shape well, which is important for maintaining a flat surface. You can use solid colors or variegated yarns for interesting effects.
You’ll also need a crochet hook that matches your yarn. For most cotton yarns, a size G/6 (4.0 mm) or H/8 (5.0 mm) hook works well. Always check the yarn label for the recommended hook size and adjust as needed for your desired tension.
Other essential tools include scissors, a yarn needle, and stitch markers (optional). Scissors will help you trim your ends neatly, while a yarn needle is used to weave in loose ends and join pieces if necessary.
If you’re planning to follow a detailed Crochet Coaster – Pattern, consider printing it out or saving it to your device. Choose a pattern with clear instructions and diagrams or photos, especially if you’re trying a new shape or stitch for the first time.
You might also want a measuring tape to ensure your coasters are the same size, especially if you’re making a set. Uniformity adds a polished, professional look to your finished pieces.
Lastly, if you’re gifting or selling your coasters, consider using blocking mats and pins to shape them perfectly before packaging. Blocking helps define stitch patterns and gives your coasters a clean, crisp look.
3. Step-by-Step Instructions for Making a Basic Crochet Coaster
Now let’s walk through how to create a simple round Crochet Coaster – Pattern. This version uses double crochet stitches, which are easy for beginners and create a nice, absorbent fabric.
Start with a magic ring or chain 4 and join to form a circle. This will be the center of your coaster. Into this ring, crochet 12 double crochets. Join with a slip stitch to the first stitch to close the round.
In Round 2, chain 2 (does not count as a stitch), then crochet 2 double crochets into each stitch around. This will double your stitch count and expand the circle evenly. Join with a slip stitch to the top of the first double crochet.
Round 3 continues to increase. Chain 2, then do 2 double crochets in the first stitch, 1 double crochet in the next stitch, and repeat this pattern around. Join with a slip stitch at the end of the round.
For Round 4, follow a similar pattern: 2 double crochets in the first stitch, 1 double crochet in the next two stitches, repeating around. This step helps the coaster lay flat while expanding in size.
Once your coaster reaches about 4 to 5 inches in diameter, you can finish it off with a round of single crochet stitches for a neat edge. Fasten off your yarn and use the yarn needle to weave in the ends.
Block your coaster if needed to help it hold its shape. Repeat the process to create matching coasters or experiment with different yarn colors for a vibrant set.
4. Creative Variations and Personalization Ideas
The Crochet Coaster – Pattern is incredibly adaptable, and there are many fun ways to personalize your designs. If you’re feeling adventurous, try some of these creative ideas.
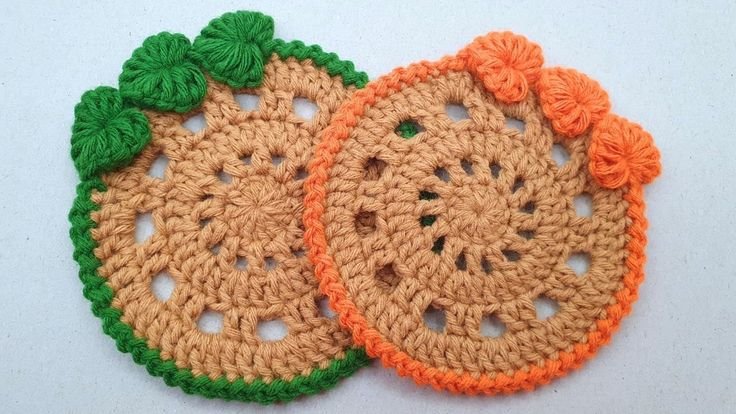
Experiment with shapes. While circles and squares are the most common, you can make hearts, stars, or even fruit-shaped coasters for a whimsical touch. There are patterns available for just about every shape you can imagine.
Use color changes to add interest. Try stripes, ombré effects, or a two-tone look with a contrasting border. Color blocking can also add a modern flair to your coasters, especially when done in neutral or trendy shades.
Incorporate textured stitches like bobble, puff, or popcorn stitches to add dimension. These create a fun tactile experience and can turn a simple coaster into a conversation piece.
Try appliqué or embroidery for added charm. You can stitch on flowers, initials, or small motifs like leaves or hearts. These personal touches are great for gifts or special occasions.
Use themed patterns for holidays or events. Make red and green coasters for Christmas, pastel coasters for Easter, or spooky designs for Halloween. You can also create custom sets for weddings or baby showers.
Lastly, consider making reversible coasters with two different designs on each side. Use coordinating colors and complementary stitches to create a functional yet fun piece that looks great no matter which way it’s facing.
FAQ: Frequently Asked Questions About the Crochet Coaster – Pattern
Q1: What is the best yarn for making crochet coasters?
Cotton yarn is the best choice for coasters because it’s absorbent, durable, and holds its shape. Avoid acrylic yarns, which may melt under heat and are less absorbent.
Q2: How big should a crochet coaster be?
Most coasters are 4 to 5 inches in diameter, which fits standard mugs and glasses. You can adjust the size depending on your needs or the style of the coaster.
Q3: Are crochet coasters machine washable?
Yes, most cotton coasters are machine washable. Use a gentle cycle with cold water and lay flat to dry for best results.
Q4: Can I sell the coasters I make from these patterns?
Yes, in most cases you can sell finished items, but check the original pattern’s licensing terms. Many designers allow selling as long as you credit them.
Q5: How many coasters should I include in a set?
A standard set includes four or six coasters. You can adjust this based on customer preferences if you’re selling them or the occasion if you’re gifting them.
Q6: How do I keep coasters from curling or warping?
Ensure your stitch tension is even and consider blocking your finished coasters. Flat stitches like single or half-double crochet help maintain shape.
Conclusion
The Crochet Coaster – Pattern is a delightful and accessible project that combines functionality with creativity. Whether you’re crafting for yourself, giving thoughtful gifts, or creating handmade items to sell, coasters are a perfect introduction to the world of crochet and a great way to experiment with new techniques.
We hope this guide has inspired you to try your own set of crochet coasters. If you enjoyed this article or have questions or suggestions, please leave a sincere opinion in the comments below. We’d love to hear about your creations and what you’d like to see next!