Rectangle Rhapsody Quilt Pattern – An Easy Strip Quilt – Pattern is a beautiful and approachable design that suits quilters of all skill levels.
In this guide, you’ll discover everything you need—materials, tips, and step-by-step instructions—to create your own stunning rectangle rhapsody quilt masterpiece.
Whether you’re brand new to quilting or a seasoned stitcher, this pattern offers simplicity and creativity in one rewarding project.
With this Rectangle Rhapsody Quilt Pattern – An Easy Strip Quilt – Pattern, you’re working with easy-to-sew rectangles and long strips. The layout is forgiving and flexible, meaning you can adjust the size, color palette, or fabric choices without stressing. Because it’s an easy strip quilt, it’s perfect for using up scraps or creating a bold, modern look.
This article dives deep into the rectangle rhapsody quilt pattern, explains the techniques involved, and helps you optimize your sewing time. You’ll also learn how SEO-related design techniques, like repetition and keyword placement, parallel quilting best practices—consistent, structured, and easily found by the eye (and Google!).
1. Materials Breakdown and Quilt Planning
When starting the Rectangle Rhapsody Quilt Pattern – An Easy Strip Quilt – Pattern, begin with a clear plan and the right tools. Think fabrics, tools, and prep.
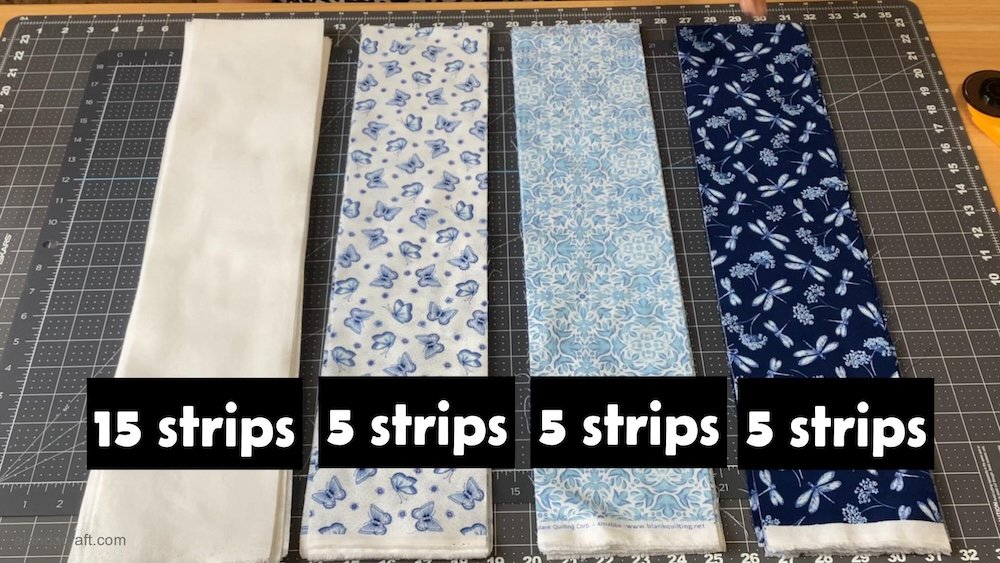
First, choose your fabric collection. This pattern shines with medium to large prints because the rectangles showcase designs beautifully. Select complementing colors to create visual harmony—think coordinating tones like navy, coral, mustard, and cream, or go bold with high-contrast pairings.
Next, gather quilting tools: a reliable rotary cutter, acrylic rulers (at least one 6″ × 24″), a self-healing mat, and quality cotton threads. Don’t forget specialty rulers for strips if you have them—they speed up cutting and ensure precision.
Finally, plan your quilt size. The beauty of this easy strip quilt pattern is its versatility. Want a baby quilt? Cut shorter strips. A lap quilt? Add more rows. A king-size masterpiece? Simply repeat the rectangle units until you reach your desired dimensions. Write down your desired finished size and calculate the number of rectangles––standard rectangles measure 3″ × 6″ unfinished, but you can adjust.
2. Cutting Fabric: Precision Meets Playfulness
Cutting is half the fun and sets the tone for a neat finish. Here’s how to approach it.
- Press your fabric well before cutting. Wrinkles lead to inaccurate pieces.
- Place the fabric on a self-healing mat and align it with the grid to square up the edges.
- Position your ruler precisely, ensuring you have the exact width and length for your rectangle strips.
- Use a sharp blade. Dull blades produce jagged edges and inaccurate cuts.
- Label your strips by fabric or color group. This avoids mix-ups when piecing.
- Keep scrap bits—this pattern is forgiving and often delicious for creative border ideas.
Cut enough strips to match your intended layout. For example, to create a 60″ × 70″ quilt composed of 7 rows of 15 rectangles, you’ll need 105 rectangles total. That’s 15 rectangles per row (15 × 7 = 105).
3. Piecing the Rectangles: Stitch with Confidence
Piecing is relaxing, rhythmic work. You’re sewing A to B, row by row.
Start by pairing your rectangles: choose two strips that look pleasing together—maybe a floral and a stripe, a solid and a print. Right sides together, align edges and stitch a ¼″ seam. Press seams open or to the darker side—your preference.
Repeat this 105 times. Lining up perfectly accurate ¼″ seams ensures the quilt top fits together like a puzzle. Don’t worry if your rectangles vary slightly—this pattern is forgiving and meant to look organic—like a rhapsody of color.
After pairs are sewn, press them carefully. Then lay out all your strip-pairs row by row. Shuffle placements to balance colors and textures. Once satisfied, sew the rectangles end-to-end to create long strip-rows. Press seams, then join strip-rows to create the quilt top.
4. Quilting, Binding, and Finishing Touches
Now that your Rectangle Rhapsody Quilt Pattern – An Easy Strip Quilt – Pattern quilt top is assembled, let’s bring it to life through quilting and presentation.
Layering and Basting
Spread your backing fabric (wrong side up), then lay batting on top, and finally the quilt top (right side up). Use safety pins or basting spray to hold the layers together smoothly—no puckers allowed!
Quilting Design
Straight-line quilting works beautifully here. Use the seams in your strip rows as guides. Quilt in the ditch (along the seam line) or add an echo by quilting ¼–½″ from each seam. This stitch pattern highlights the rectangular layout and gives texture without overwhelming the design.
Alternatively, free-motion quilting adds whimsy—curves, loops, swirls—like musical notes playing against your rectangles. It’s a “rhapsody” in thread.
Trimming and Binding
Once quilting is done, square up your edges. Trim off uneven borders, ensuring all sides are straight and even. Cut binding strips (2½″ wide strips of your chosen fabric), join them into a long strip, fold, and stitch around the perimeter. Miter the corners for a clean, professional look.
5. SEO & Quilt Blogging Tips (Bonus Section)
Yes, there’s quilting—and then there’s quilt blogging. If you’re creating content around the Rectangle Rhapsody Quilt Pattern – An Easy Strip Quilt – Pattern, here’s how to boost search visibility while delighting readers.
- Use your keywords naturally: incorporate Rectangle Rhapsody Quilt Pattern – An Easy Strip Quilt – Pattern in your post URL, first paragraph, headings, and alt text of images.
- Structure content well: use numbered H2 headings (like we have here) and subheadings (H3, H4) to break information into digestible parts.
- Include vivid images: photo tutorials of stages—cutting, piecing, quilting—encourage engagement. Use descriptive filenames like “rectangle-rhapsody-cutting.jpg” and descriptive alt text.
- Add internal links: link to related sewing posts (“strip quilting basics,” “binding tutorial”), which improve SEO and session duration.
- Provide a print-friendly PDF download of cutting and piecing charts—adds value and encourages sharing. Use keyword-rich anchor text like “Download free Rectangle Rhapsody Quilt Pattern – An Easy Strip Quilt – Pattern PDF.”
- Encourage comments: ask readers to share their color choices or ask questions. User-generated content boosts ranking.
FAQ
Q: What fabrics work best for the Rectangle Rhapsody Quilt Pattern?
A: 100% cotton quilting fabrics in medium to large prints look stunning. Use high-quality cotton for durability and easy pressing.
Q: How do I scale the quilt to a different size?
A: Adjust the number of rectangle units per row or the number of rows. Each rectangle is typically 3″ × 6″ unfinished (2½″ × 5½″ finished). Use math: desired width ÷ 5½″ = rectangles per row; desired length ÷ 2½″ = number of rows.
Q: Can I use leftover scraps?
A: Absolutely! The forgiving nature of the easy strip quilt makes it perfect for scrap-busting. Just cut to length and width and mix prints.
Q: Is straight-line quilting sufficient or do I need advanced quilting?
A: Straight-line quilting (along seams or a few echo lines) suits this design beautifully. Free-motion quilting is optional and adds personal flair, but isn’t necessary.
Q: How do I ensure my binding corners are neat?
A: Use a mitered corner technique: stop sewing ¼″ from the edge, backstitch, clip thread, fold binding strip up and then down to form a 45° fold, continue sewing. Press binding before hand-sewing the underside.
Q: Can I sell quilts made from this pattern?
A: Generally yes—most quilt patterns allow use for personal and small-scale commercial use unless explicitly restricted. Always check the designer’s licensing terms.
Conclusion
In this guide, you’ve learned step-by-step how to create the Rectangle Rhapsody Quilt Pattern – An Easy Strip Quilt – Pattern: from choosing fabrics, cutting precise rectangles, sewing beautiful strip units, to quilting and finishing your masterpiece. You also received SEO tips for sharing your work online.
Give this pattern a try—mix your favorite prints, experiment with layout, and sew with joy. If you’ve made one already, we’d love to hear your experience. Please leave a sincere review below, share your suggestions, and let us know how this easy strip quilt journey went. Happy quilting!