If you’re a fan of handmade crafts and love your favorite mug enough to take it everywhere, then the Mug Bag Pattern & Tutorial – Pattern is exactly what you need.
This fun and functional project is a creative way to make sure your cup of tea or coffee always travels in style—and safety. Designed to hold mugs snugly while protecting them from bumps and scratches, this pattern is a hit with sewists and crafters of all skill levels.
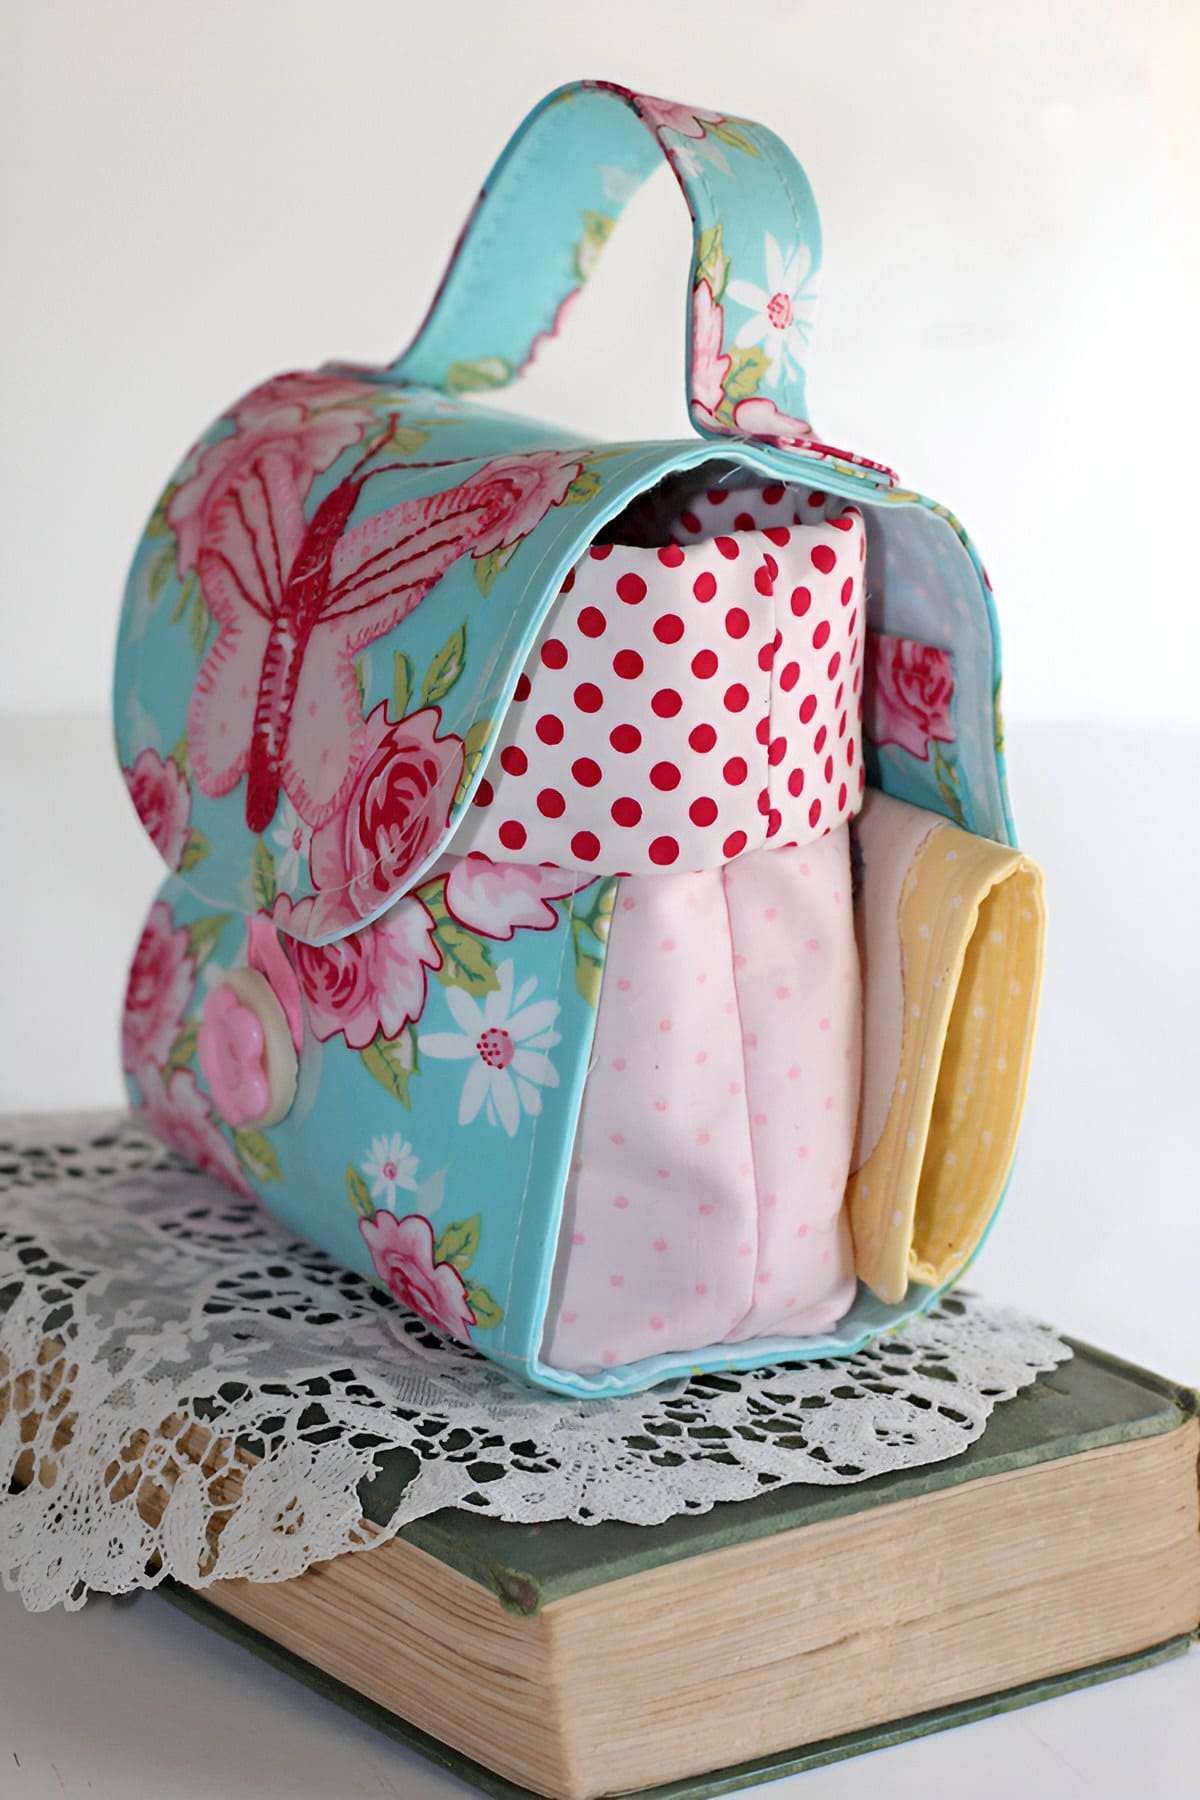
Creating a mug bag is not only practical but also a rewarding DIY project. These little bags are compact yet sturdy, with customizable pockets for tea bags, spoons, napkins, or even sugar packets.
They make excellent gifts for tea lovers, coworkers, teachers, and fellow crafters. And because the process follows a clear Mug Bag Pattern & Tutorial – Pattern, it’s easy to replicate again and again.
Whether you’re sewing to sell, gift, or use yourself, having a reliable pattern and tutorial can make all the difference. In this guide, we’ll break down why this pattern is so popular, what you’ll need to complete your own mug bag, step-by-step crafting tips, and ways to personalize your project. Let’s dive into the world of mug bags!
1. Why Choose a Mug Bag Pattern & Tutorial – Pattern?
Using a Mug Bag Pattern & Tutorial – Pattern helps simplify the sewing process, allowing you to create a functional item with confidence and ease. Whether you’re a beginner or a seasoned sewist, working from a clear pattern eliminates the guesswork.
First, the pattern provides exact measurements and cutting guidelines, ensuring all your fabric pieces align perfectly. This is especially helpful when making a bag that needs to fit a mug securely without being too tight or too loose.
Second, tutorials that come with the pattern often include step-by-step photos or diagrams. This visual guidance is invaluable, especially when assembling multiple layers or adding inner pockets and linings.
A good pattern is also reusable and scalable. Once you’ve mastered the basics, you can easily adjust the size to accommodate travel mugs, wide-handle mugs, or even thermoses.
One major benefit of following a pattern is the consistency it offers. If you’re planning to make multiple mug bags—for gifts, markets, or online sales—you can ensure every one of them looks and functions the same.
Finally, a Mug Bag Pattern & Tutorial – Pattern allows for creativity. The structure is just the beginning. You can personalize your mug bag with fun fabrics, appliqués, embroidery, or quilting techniques, making each creation uniquely yours.
2. Materials and Tools You’ll Need to Get Started
Before starting your Mug Bag Pattern & Tutorial – Pattern, gather the necessary materials and tools. Having everything ready beforehand ensures a smoother, more enjoyable crafting experience.
Start with your main fabric. Cotton is a popular choice for both its durability and print variety. Choose a fabric that reflects your personality—floral, geometric, or even novelty prints featuring coffee cups or teapots.
You’ll also need lining fabric, which can be coordinating or contrasting. This layer protects the interior and adds strength to the overall structure of the bag. Lightweight quilting cotton works perfectly for this purpose.
For padding, use fusible interfacing or batting. These materials give the bag structure and help cushion the mug. Fusible fleece is especially popular because it sticks to the fabric and adds both softness and stability.
Don’t forget essential notions: scissors or rotary cutter, sewing machine, pins or clips, a fabric marker or chalk, and thread that matches or complements your fabric. A ruler or measuring tape is also important for accuracy.
Optional but helpful extras include bias tape for a clean edge finish, Velcro or snap fasteners for the flap, and decorative buttons or trims. A small handle or wrist strap can also make your mug bag easier to carry.
Of course, the key item is your Mug Bag Pattern & Tutorial – Pattern. Print it out, keep it nearby, and follow each step carefully. The best patterns will even include tips and troubleshooting suggestions for beginners.
3. How to Follow the Mug Bag Pattern & Tutorial Step by Step
Now that you have your supplies ready, it’s time to follow your Mug Bag Pattern & Tutorial – Pattern and bring your project to life. Here’s a general step-by-step breakdown of what the process might look like.
Start by cutting your fabric pieces according to the measurements in the pattern. Typically, you’ll have outer panels, lining panels, padding pieces, and optional pockets. Make sure to mark any notches or seam allowances noted in the tutorial.
Fuse your interfacing or batting to the wrong side of the outer panels. This adds structure to the fabric and helps protect the mug. If you’re using batting, it may need to be basted in place with a few machine or hand stitches.
Next, assemble the pocket pieces if your design includes them. Attach them to the inner lining, making sure to topstitch along the edge to keep the pocket secure. This is where you can stash a teabag or spoon.
Sew the outer pieces together to form the bag shape, and do the same with the lining. Leave a small gap in the lining for turning the bag right-side out later. If your bag includes a flap, handle, or strap, attach those now.
Insert the lining into the outer bag, right sides together, and sew around the top edge. Turn the bag right side out through the gap in the lining, then press and topstitch the opening shut. Give the whole bag a final press to neaten the seams.
Finally, add any closures like Velcro, snaps, or buttons. Try fitting your mug to ensure it slides in comfortably and stays secure. You’ve now completed your Mug Bag Pattern & Tutorial – Pattern project and created a beautiful, functional item!
4. Personalizing Your Mug Bag for Style and Function
One of the joys of working with a Mug Bag Pattern & Tutorial – Pattern is that it’s incredibly easy to personalize. You’re not just making a bag—you’re crafting a small piece of art with both utility and charm.
Start by choosing fabric themes that speak to your interests or the recipient’s personality. For example, use cat prints for an animal lover, or autumn leaves for someone who enjoys cozy fall afternoons with tea.
Add quilting to the outer layer for texture and a premium feel. You can follow the fabric’s design lines or create your own geometric stitching patterns. This not only looks great but adds structure and durability.
Embroider a name, quote, or tiny image on the front flap or pocket. “But first, coffee” or “Tea time!” are popular choices. Personalizing with initials also makes the mug bag a memorable gift.
Experiment with different closures and finishing touches. Instead of Velcro, try magnetic snaps or even a loop-and-button closure for a more vintage feel. Contrast bias tape around the edges can make colors pop.
You can also adapt the pattern slightly to fit other uses. Some makers use the Mug Bag Pattern & Tutorial – Pattern to create bags for thermoses, small bottles, or even crafting tools. A few tweaks can change the function entirely.
Finally, if you’re gifting or selling, package the mug bag with a cute mug, a few tea bags, and a stirring spoon. Wrap it with ribbon or place it in a box for a thoughtful and handmade gift set.
FAQ – Mug Bag Pattern & Tutorial – Pattern
Q1: What size mug fits in the mug bag?
Most Mug Bag Pattern & Tutorial – Pattern designs accommodate standard 11–12 oz mugs. However, many patterns include measurements for resizing based on your mug’s height and width.
Q2: Is this a beginner-friendly sewing project?
Yes! Many mug bag patterns are simple enough for beginners. They often use basic sewing techniques like straight stitching, turning, and topstitching, making them ideal for learning.
Q3: Can I wash the mug bag?
Absolutely. If made with cotton fabrics and standard interfacing, your mug bag should be machine washable. Just be sure to use a gentle cycle and lay flat to dry.
Q4: What’s the best padding for protecting the mug?
Fusible fleece or quilt batting works best. These materials add structure and provide enough cushioning to protect the mug from minor bumps.
Q5: Can I sell items made from a purchased mug bag pattern?
That depends on the pattern’s licensing. Some patterns allow for commercial use with credit to the designer, while others are for personal use only. Always check the terms before selling.
Q6: Can the bag hold more than just a mug?
Yes! Many makers add pockets for tea bags, spoons, sugar packets, or even a small snack. Some patterns can be adapted to hold reusable water bottles or tumblers.
Conclusion
The Mug Bag Pattern & Tutorial – Pattern is a perfect blend of creativity, functionality, and personalization. It’s a beginner-friendly sewing project with big impact—great for gifting, selling, or simply carrying your own favorite mug in style. With the right fabric, tools, and a little imagination, you can turn a few pieces of cloth into a charming accessory that speaks volumes about your personality and craftsmanship.
We hope this guide has inspired you to try the mug bag for yourself. If you’ve made one, we’d love to hear
your thoughts! Share your experience, tips, or suggestions in the comments. Your feedback helps keep the handmade community creative and connected.