If you’re looking for a fun, adorable, and sustainable way to organize your plastic bags, then this Crochet Pig Recycle Bag Holder – Pattern is the perfect project for you.
Whether you’re a crochet enthusiast or just starting out, this charming pig-shaped bag holder will not only brighten up your kitchen or laundry room but also help you keep things tidy in an eco-friendly way.
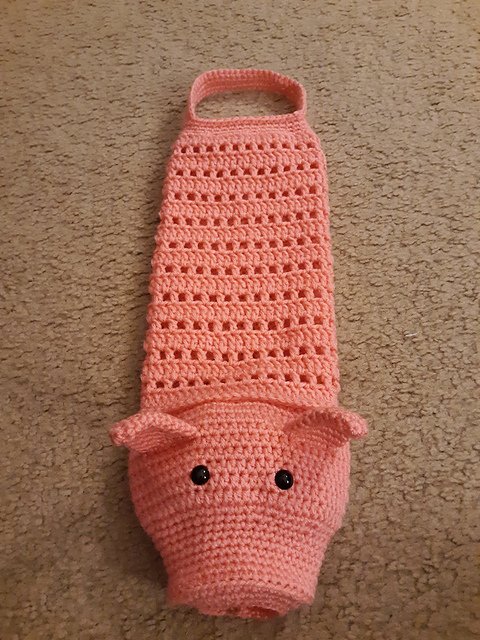
The Crochet Pig Recycle Bag Holder – Pattern allows you to transform yarn into a cute pig that doubles as a clever storage solution. With its playful snout, curly tail, and functional body, it serves as both decor and utility. This guide will walk you through all the key steps, materials, and techniques required to create your own reusable plastic bag holder that promotes sustainability without compromising on style.
Throughout this article, you’ll learn how to create your own Crochet Pig Recycle Bag Holder from scratch. We’ll explore the materials needed, essential stitches, the benefits of using recycled materials, and tips to customize your project. This DIY project is great for gifting too, and once you’ve made one, you’ll likely want to make several more!
1. Materials and Tools Needed
To begin your Crochet Pig Recycle Bag Holder – Pattern, you’ll need a few basic supplies that are commonly used in other crochet projects. Selecting the right materials will ensure your pig bag holder is durable and easy to use.
First, you’ll need medium-weight (worsted) yarn in light pink for the pig’s body and darker pink or brown for accents like ears and hooves. Choose soft yarn that has some stretch to accommodate stuffing and the bag-holding functionality.
A 4.0 mm (G) crochet hook is ideal for this pattern. It provides tight stitches without being too difficult to maneuver. You can go a size up or down depending on your crochet tension.
You’ll also need polyester fiberfill stuffing to give your pig shape, especially in the head and feet. The body section, which holds the plastic bags, remains open and flexible.
Basic accessories include a yarn needle for sewing pieces together, safety eyes for a playful look, and scissors. If you prefer a more child-safe option, you can embroider the eyes instead.
Some crafters add a small elastic band or ribbing at the bottom opening to easily pull out bags without them falling out. You can stitch this in during the finishing steps of the project.
Lastly, if you’re planning to hang the holder, consider adding a small crochet loop at the top of the pig’s head or use a wooden or plastic ring for easy wall attachment.
2. Step-by-Step Guide to Making the Pig Bag Holder
Creating your own Crochet Pig Recycle Bag Holder – Pattern may seem complicated, but with a structured approach, it’s manageable and fun. Below are simplified steps to follow.
Start with the pig’s head. This is usually crocheted in the round using single crochet (sc) stitches. Begin with a magic ring and increase evenly until the circle reaches the desired size, then work several rounds even before decreasing.
Next, create the body tube that holds the bags. This is often a long cylinder using half-double crochet (hdc) stitches. It should be wide enough to stuff with plastic bags and long enough to store several.
Attach the head to the top of the cylinder. Use whip stitch or invisible stitch to join the two sections seamlessly. Ensure the opening in the head is closed properly after stuffing it with fiberfill.
Crochet the limbs separately: two arms and two legs. These small oval or cylindrical shapes are stuffed lightly and sewn onto the sides and bottom of the body for a cute, balanced look.
For the facial features, sew or attach safety eyes, and add a snout using a small circle with embroidered nostrils. Small triangle-shaped ears can be made flat or 3D, and a curly tail adds the perfect finishing touch.
Lastly, add the bottom opening. This can be finished with ribbing, elastic, or left as is depending on how tight you want the opening to be. Don’t forget to create a loop for hanging your adorable new bag holder!
3. Benefits of a Recycle Bag Holder
Beyond being adorable, a Crochet Pig Recycle Bag Holder – Pattern is a useful household item that promotes organization and sustainability. Let’s explore its key benefits.
It helps reduce clutter. Instead of stuffing plastic bags in drawers or cupboards, you have a centralized storage spot that’s easy to access and visually pleasing.
This project encourages sustainability. While plastic bags aren’t ideal, many households still accumulate them. Having a holder allows you to reuse them efficiently for trash liners, pet waste, or lunch bags.
It’s a great way to practice your crochet skills. Whether you’re new to crochet or experienced, this pattern helps build techniques like increasing, decreasing, joining, and shaping.
You’ll love the customization options. Change the yarn color to match your kitchen, add embellishments like bows or flowers, or even turn the pig into a different animal with simple tweaks.
This handmade item also makes a thoughtful gift. Imagine giving a handmade pig bag holder to a friend or family member who values cute decor or zero-waste living.
Finally, it’s a project that brings joy. There’s something about creating something both functional and cute that brings satisfaction and boosts mental wellness.
4. Customization and Styling Tips
Your Crochet Pig Recycle Bag Holder – Pattern doesn’t have to be one-size-fits-all. There are many ways to tailor it to your preferences or decor theme.
Experiment with colors. Pigs don’t have to be pink! Try gray, white, or even patterned yarn for a unique look. This also lets you use leftover yarn from other projects.
Change the size. Make a smaller version for tiny spaces or a jumbo one for households that use a lot of plastic bags. Adjust stitch counts proportionally to keep the shape balanced.
Add accessories. Crochet a little bow for the pig’s ear, a heart on its chest, or even a tiny vest. These extras give personality and character to your creation.
Make it part of a set. Why stop at pigs? Create an entire farm animal collection—cows, chickens, or sheep—for different rooms or gifting purposes.
Incorporate eco-friendly yarns. Look for yarn made from recycled cotton or bamboo. This makes your project even more aligned with eco-conscious values.
If you’re experienced, turn the pattern into a more complex amigurumi project by adding movable limbs, or making the pig sit down instead of hang vertically.
FAQ: Crochet Pig Recycle Bag Holder – Pattern
Q1: What skill level is required for this pattern?
This project is beginner to intermediate friendly. If you know basic crochet stitches like single crochet, half-double crochet, increasing, and decreasing, you’ll do great.
Q2: How long does it take to complete the pig bag holder?
It usually takes 4–6 hours depending on your speed and experience. You can break it up into sections and complete it over a weekend.
Q3: Can I wash the pig bag holder?
Yes! Just make sure to use machine-washable yarn. Hand-washing is ideal to keep its shape, especially if it contains fiberfill stuffing.
Q4: How many plastic bags can it hold?
On average, the pig holder can store between 20 to 40 plastic bags, depending on how tightly they are folded or stuffed inside.
Q5: Can I sell finished pig bag holders made from this pattern?
Yes, you can sell your handmade items. If the pattern you use is from a designer, make sure to credit them if required in the usage policy.
Q6: Where should I hang my recycle bag holder?
Popular spots include the kitchen, pantry, laundry room, or garage—anywhere you tend to use or store plastic bags frequently.
Conclusion
Creating a Crochet Pig Recycle Bag Holder – Pattern is more than just a fun craft—it’s a step toward a more organized and eco-conscious home. You’ve learned about materials, how to build your pig from head to tail, and creative ways to personalize it. This project combines functionality with charm and is a perfect addition to any handmade home.
If you’ve enjoyed this tutorial, we’d love to hear from you. Please leave a sincere opinion in the comments and share any suggestions you have for improvements or new ideas. Happy crocheting!