If you’re looking for a creative and fun way to add charm to your home décor or prepare for seasonal festivities, a crochet scarecrow – pattern might be exactly what you need.
This delightful project is perfect for crafters of all levels and offers the opportunity to mix colors, textures, and expressions in one whimsical character. Whether you’re decorating for autumn, Halloween, or simply love farmhouse-style crafts, a crochet scarecrow brings warmth and personality to your handmade collection.
Creating a crochet scarecrow – pattern can be both relaxing and rewarding. It allows you to express creativity through yarn and stitches, and the final product often becomes a conversation starter or a treasured gift. With so many designs and styles available online, from beginner-friendly options to intricate amigurumi versions, there’s something for everyone. The best part? Most scarecrow patterns use basic stitches, so you don’t need to be a crochet expert to bring one to life.
In this article, you’ll learn how to start your own crochet scarecrow project, explore different pattern ideas, get material and stitch tips, and discover how to personalize your scarecrow to reflect your own style. Whether you’re making a tabletop decoration, a door hanger, or a full-sized plush scarecrow, this guide will walk you through it.
1. Choosing the Right Crochet Scarecrow Pattern
Selecting the right crochet scarecrow – pattern is the first step in crafting your new seasonal friend. With so many styles and variations available, it’s important to choose a pattern that suits your skill level, available time, and the purpose of your project.
Beginner patterns often focus on simple shapes and basic stitches like single crochet and double crochet. These are perfect if you’re new to crocheting or just want a quick weekend project. Many free patterns online cater to this skill level while still producing adorable results.
If you’re more experienced, you can explore amigurumi-style crochet scarecrow patterns that include fine details like facial features, accessories, and movable limbs. These often use techniques such as magic circles, invisible decreases, and color changes.
Think about the size of your scarecrow as well. Do you want something small for a mantel or shelf? Or a larger doll for a child to play with or display during fall festivities? The pattern will usually indicate the approximate size based on the yarn and hook size used.
Don’t forget about pattern format. Some crafters prefer written instructions, while others may want patterns with diagrams or video tutorials. Choose the format that helps you understand the steps clearly and keeps you engaged.
Lastly, pay attention to reviews or community feedback. Many sites like Ravelry, Etsy, and Pinterest feature patterns that have been tested and rated by other crocheters. These insights can help you avoid confusing instructions or unclear steps.
By carefully selecting the ideal crochet scarecrow – pattern, you’ll set yourself up for success and a joyful crafting experience from the very first stitch.
2. Materials and Tools You’ll Need
Before diving into your project, gather the right materials and tools to bring your crochet scarecrow – pattern to life. Using quality supplies will make a noticeable difference in your final product’s appearance and durability.
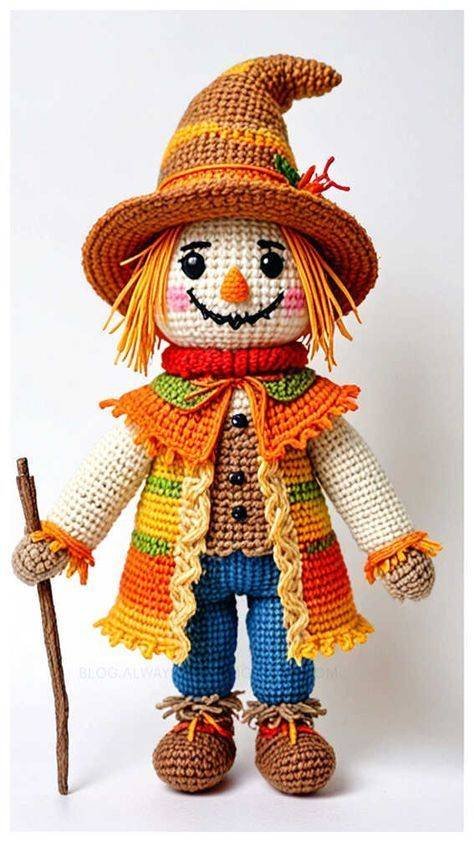
Start with the yarn. Most scarecrow patterns recommend worsted weight (medium) yarn, which balances flexibility and structure. Choose earth tones for the body, such as beige, tan, or brown, and brighter colors like orange, red, and yellow for accents like the hat, patches, or scarf.
You’ll also need a suitable crochet hook—typically 3.5mm to 5.5mm depending on your yarn and pattern. A smaller hook gives tighter stitches, which is ideal for stuffed figures, while larger hooks are better for flatter, decorative scarecrows.
Stuffing material is essential for amigurumi or plush-style scarecrows. Use polyester fiberfill for a soft, lightweight interior. For flat projects, like wall hangings, interfacing or felt may be used instead of stuffing.
Accessories like safety eyes, buttons, and embroidery thread help add personality and charm. A scarecrow isn’t complete without a smile or a quirky expression, so invest in the right facial features and embellishments.
A tapestry needle is another must-have for sewing parts together and weaving in loose ends. Scissors and stitch markers will also make your crafting more efficient and organized.
Finally, it’s helpful to have a printed or digital version of your pattern nearby while you work. Keeping track of your rows and rounds is crucial, especially when working on intricate parts of the scarecrow.
With your materials ready, you’ll be able to enjoy a smooth and satisfying crafting experience, ensuring your crochet scarecrow looks polished and professional.
3. Bringing Your Crochet Scarecrow to Life
Now comes the fun part—actually crocheting your scarecrow! Following your crochet scarecrow – pattern step-by-step will ensure a charming result, whether it’s a simple doll or a detailed amigurumi masterpiece.
Begin with the body or head as most patterns start here. Work in the round using a magic circle for seamless construction. Maintain even tension to avoid lumps or holes in the stuffing.
Continue by crocheting the limbs, hat, and other body parts. Many patterns suggest assembling these separately before stitching them together. This allows for more detailed shaping and adjustments as needed.
Take your time when it comes to stuffing and sewing. Overstuffing can distort the shape, while under-stuffing may leave it limp. Use pins to temporarily attach parts and visualize the final product before sewing permanently.
Decorating your scarecrow is where your creativity can shine. Add a little patch to the pants, embroider a stitched smile, or give your scarecrow a mini scarf. These finishing touches add personality and make each creation unique.
Be sure to follow the pattern closely, especially when it comes to stitch counts and placement. A misplaced stitch can change the look dramatically, especially in smaller pieces like noses or eyes.
Once all parts are assembled, do a final inspection. Weave in loose ends, fix any uneven seams, and adjust stuffing if needed. Your completed crochet scarecrow is now ready to be displayed or gifted with pride.
4. Creative Ideas to Customize Your Crochet Scarecrow
Personalizing your crochet scarecrow – pattern is what makes it truly special. No two scarecrows need to look alike, and with a little imagination, you can create characters that reflect seasons, holidays, or even family members.
Consider changing the color palette. While autumn colors are traditional, you can try pastel shades for spring or bold hues for Halloween. A blue-themed scarecrow with snowflake accents could even double as a winter mascot!
Add seasonal props or accessories. A miniature pumpkin, broomstick, or even a crocheted bird on the shoulder adds a fun twist. These extras make your scarecrow feel part of a themed display.
Try giving your scarecrow a name and story. Maybe he’s “Sammy the Sunflower Farmer” or “Lola the Leaf Collector.” Giving your creation a backstory makes it more engaging, especially for kids.
Use different yarn textures. Mix smooth acrylic with boucle or tweed yarns to create a rustic, worn look that fits the scarecrow aesthetic. It adds depth and a handmade touch that people will notice.
Adjust the pattern slightly to create a series. Make a family of scarecrows with varying sizes, hats, and outfits. These can become part of your annual seasonal decorations or sold as collectible items.
Finally, document your progress and share it online. The crochet community loves seeing personalized creations, and you might inspire others to try the same crochet scarecrow – pattern with their own twist.
Frequently Asked Questions (FAQ)
Q1: Is the crochet scarecrow pattern suitable for beginners?
Yes! Many crochet scarecrow – pattern options are designed with beginners in mind. Look for patterns using basic stitches like single crochet and clear instructions.
Q2: How long does it take to make a crochet scarecrow?
Depending on the size and complexity, it can take anywhere from a few hours to several days. Smaller scarecrows are quicker to complete, while detailed amigurumi versions may take longer.
Q3: What yarn is best for a crochet scarecrow?
Worsted weight acrylic yarn is commonly used due to its durability and color range. For a more rustic look, you can try cotton or wool blends.
Q4: Can I sell crochet scarecrows made from purchased patterns?
In most cases, yes—if the designer allows it. Always check the pattern’s licensing terms before selling your creations.
Q5: How do I stuff and shape the scarecrow correctly?
Use polyester fiberfill and avoid overstuffing. Distribute the stuffing evenly and shape each part before sewing it together for the best result.
Q6: Where can I find the best crochet scarecrow patterns?
Trusted sites like Ravelry, Etsy, and Yarnspirations offer a wide range of patterns. Look for patterns with positive reviews and clear step-by-step instructions.
Conclusion
Creating a crochet scarecrow – pattern is more than just a fun project—it’s a way to celebrate creativity, bring joy to others, and add handmade charm to your surroundings.
From selecting the right pattern to putting on the final embellishments, each step is an opportunity to learn and express your personal style.
Whether you’re crafting for the fall season, a themed event, or just for the
love of crochet, your scarecrow can become a beloved piece of art. And remember, there’s no right or wrong way to bring your scarecrow to life—only stitches full of care and imagination.
If you enjoyed this guide, feel free to leave your honest opinion and suggestions below.We’d love to hear how your scarecrow turned out or what you’d like to see in future crochet articles!