Amigurumi Crochet Pennant – Pattern projects are a delightful way to decorate spaces with handmade charm, color, and personality. Starting this article with the main keyword is essential for SEO, and throughout the text, the term Amigurumi Crochet Pennant – Pattern will appear naturally to ensure a well-optimized and fully Google AdSense–friendly guide. These pennants are fun to make, beginner-friendly, and incredibly versatile. They can be used for parties, children’s rooms, craft fairs, nurseries, or simply as a cheerful decoration for your creative space.
One of the best aspects of working on a Amigurumi Crochet Pennant – Pattern is that it blends the cuteness of amigurumi with the simplicity of pennant-making. While traditional amigurumi involves shaping stuffed figures, pennants allow crocheters to explore flat or slightly three-dimensional forms without the complexity of stuffing, shaping limbs, or working complicated details. This makes them perfect for anyone who loves amigurumi aesthetics but prefers a simpler construction.
These pennants can also be transformed into banners by joining several triangles or shapes together. Whether you want soft pastel colors, bold primary tones, themed designs for holidays, or personalized letters, your Amigurumi Crochet Pennant – Pattern can easily be adapted. By choosing the right materials and techniques, you can create beautiful decorations that last for years and suit nearly any occasion.
1. Understanding the Structure of an Amigurumi Crochet Pennant (H2)
A Amigurumi Crochet Pennant – Pattern typically begins with a triangular or rounded triangular shape worked from the top down or bottom up. This triangular base forms the main structure of the pennant. The shape is achieved through consistent increases or decreases, depending on the direction you choose to work.
The beauty of this structure is its simplicity. A basic triangle can be made with single crochet stitches, which provide firmness and stability. The dense texture often associated with amigurumi also ensures the pennant holds its shape well, even without additional stiffening materials. This makes the base ideal for embroidery, small appliqués, or decorative edging.
Once the main triangle is completed, details can be added. Some creators like to attach small amigurumi faces, flowers, hearts, stars, or letters to personalize the pennant. These elements are crocheted separately and sewn onto the base, allowing for endless customization.
Another structural feature is the top edge, which usually includes a row of stitches that can be threaded onto a string or cord. This makes it easy to assemble a banner with multiple pennants. You can leave the edge simple or add a decorative border using picots or shells for a more textured look.
Understanding the structure of the Amigurumi Crochet Pennant – Pattern also allows you to adjust its dimensions. For example, working more rows will create a longer pennant, while adding width will make it fuller. This flexibility helps you design pennants that match the proportions and style of your project.
Lastly, the simplicity of the structure makes this project suitable for crocheters of all levels. Even beginners can create polished, professional-looking pennants once they master basic stitches and shaping.
2. Materials and Tools Needed for the Pennant (H2)
Creating an Amigurumi Crochet Pennant – Pattern requires only a few materials, making it an accessible and budget-friendly project. The most important element is yarn. Acrylic yarn is a popular choice due to its durability, vibrant color options, and easy maintenance. Cotton yarn is also excellent if you want crisp stitches and a cleaner look.
The hook size will depend on the yarn you choose, but amigurumi-style pennants typically use a slightly smaller hook than recommended. This ensures the fabric stays tight and sturdy. For worsted-weight yarn, a 4.0 mm or 4.5 mm hook is usually ideal. Using a smaller hook helps achieve a dense texture similar to standard amigurumi textures.
A yarn needle is essential for sewing details onto the pennant and weaving in ends. Because these pennants often feature decorative elements like flowers or mini amigurumi faces, a yarn needle will help secure everything neatly and firmly. Clean finishing contributes greatly to the overall appearance.
Scissors are also necessary for trimming yarn ends and changing colors cleanly. Keeping a small, sharp pair of scissors nearby makes the process smoother and more professional.
For banners, you may also want a cord, ribbon, or string to assemble multiple pennants together. Natural materials like cotton cord look great with crochet, but satin ribbon or twine can also add a stylish touch. You can secure the pennants by threading the string through the top or sewing them onto the cord.
Optional materials include safety eyes (for pennants with faces), felt pieces, buttons, embroidery thread, or mini pompoms. Each of these additions enhances the charm of your Amigurumi Crochet Pennant – Pattern and allows for endless styling variations.
3. Step-by-Step Overview of Making the Crochet Pennant (H2)
To begin your Amigurumi Crochet Pennant – Pattern, start by creating the base triangle. You can work from the tip upward or from the wide top down. If working from the bottom, begin with a few stitches and increase evenly on both sides to create a symmetrical triangle.
Continue increasing until the triangle reaches your desired size. Depending on how tight your stitches are and the yarn weight you’re using, this might take anywhere from 10 to 25 rows. Keep your tension consistent to ensure smooth edges and clean lines.
Once the triangle is complete, finish the top with a row of single crochet stitches. This creates a firm, straight edge. To transform the pennant into part of a banner, you can crochet a chain loop or leave an open row to thread a cord through later. This small design detail enhances the versatility of your pennant.
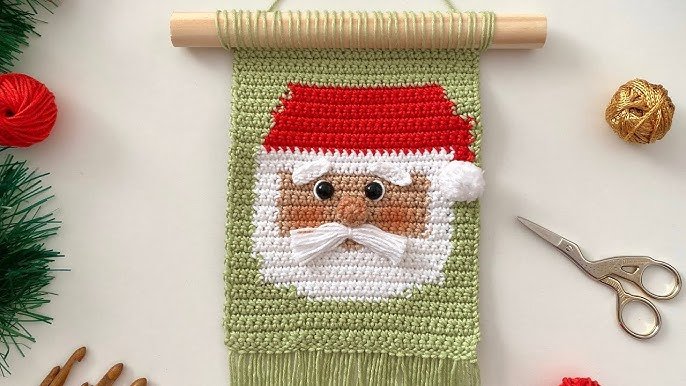
After finishing the base, it’s time to add decoration. Many Amigurumi Crochet Pennant – Pattern designs feature adorable amigurumi-style faces. You can crochet small circles for cheeks, embroider a smile, or attach safety eyes. For infant or nursery décor, embroidered eyes are safest.
If you want to personalize the pennant with letters, crochet simple appliqué letters or embroider initials onto the triangle. This makes the pennant perfect for gifts, name banners, or holiday-themed messages.
Finally, assemble your pennants into a banner by threading them onto a cord or crocheting a long chain that connects them all. Space them evenly and secure them with small knots if needed. Once finished, your pennant banner becomes a beautiful handcrafted decoration ready to hang anywhere.
4. Creative Themes and Customization Ideas (H2)
One of the most enjoyable aspects of making a Amigurumi Crochet Pennant – Pattern is the freedom to explore creative themes. You can design pennants for baby showers, birthdays, holidays, seasons, or motivational messages. Each pennant becomes a small canvas where your creativity can shine.
Seasonal pennants are especially fun. Try pastel flowers for spring, bright suns for summer, leaves for fall, or snowflakes for winter. Each theme can transform your banner into a decorative piece that matches the season perfectly.
Another popular idea is animal-themed pennants. You can create little faces inspired by bears, cats, owls, or foxes. These designs are charming for nurseries, classrooms, or children’s playrooms. The combination of amigurumi features and the pennant structure creates an adorable, minimalist aesthetic.
Color palettes are another great way to personalize your Amigurumi Crochet Pennant – Pattern. Matching colors to home décor, event themes, or personal preferences helps your pennants blend beautifully with their surroundings. Monochrome designs create a modern, clean look, while multicolor pennants bring energy and playfulness.
You can also experiment with textured stitches. While traditional amigurumi uses primarily single crochet, adding bobbles, slip-stitch lines, or surface embroidery can elevate the design dramatically. These textures bring depth and uniqueness to your pennant.
If you enjoy crafting special messages, try adding letters to create names, greetings, or positive affirmations. This makes your pennants meaningful and memorable, perfect for gifting or displaying in your favorite space.
Finally, consider using embellishments like tassels, pompoms, or beads. These small add-ons can transform a simple design into a professional-looking decoration that stands out in any room.
FAQ – Amigurumi Crochet Pennant
1. Is an amigurumi crochet pennant beginner-friendly?
Yes, a Amigurumi Crochet Pennant – Pattern is great for beginners because it uses simple stitches and predictable shaping.
2. What yarn works best for pennants?
Acrylic or cotton yarn works well, depending on the texture you prefer.
3. Do I need stuffing?
Usually no. Pennants are mostly flat, though some small appliqués may require a tiny amount.
4. Can I make a banner with multiple pennants?
Absolutely! Thread them onto a cord or crochet a chain to join them.
5. How big should the pennant be?
Size is flexible—you can make small or large pennants depending on your project.
6. Are amigurumi details safe for babies?
Yes, as long as you use embroidered features instead of safety eyes or detachable pieces.
Conclusion
In this article, we explored everything you need to know about creating a delightful Amigurumi Crochet Pennant – Pattern, including structure, materials, step-by-step instructions, and creative customization ideas.
These pennants are fun, versatile, and perfect for decorating any space with handmade charm.