If you’re a fan of crochet and enjoy creating cute, functional pieces for your home, then the Crochet Chicken Potholder – Pattern is a perfect project for you.
Potholders are essential items in every kitchen, and making your own can be both a rewarding and practical experience.
Not only will you be adding a handmade touch to your kitchen decor, but you’ll also be creating something that serves a functional purpose.
In this article, we will explore everything you need to know about creating your very own crochet chicken potholder, from the materials to the techniques used in the pattern.
So, let’s dive right into the world of crochet and explore how you can make this charming chicken-shaped potholder for your home.
The Crochet Chicken Potholder – Pattern is a great project for crocheters of all skill levels, from beginners to more advanced crafters. This fun, whimsical design brings a touch of personality to your kitchen while also keeping your hands protected from hot pots and pans. Whether you are new to crochet or have been crafting for years, the steps and techniques involved in creating this pattern are easy to follow and can be customized based on your preferences. The versatility of the design allows you to adjust the colors, size, and details of your potholder to suit your unique taste and kitchen decor.
As with any crochet project, selecting the right materials is key to achieving the best results. For the Crochet Chicken Potholder – Pattern, you will need basic crochet supplies such as yarn, a crochet hook, and a tapestry needle. The type of yarn you choose will impact both the appearance and durability of your potholder. Cotton yarn is commonly used for potholders because it’s heat-resistant and easy to work with. By following the pattern and using the right tools, you’ll be able to create a charming chicken potholder that is not only functional but also adds a bit of fun to your kitchen.
1. Materials Needed for the Crochet Chicken Potholder – Pattern
To begin your Crochet Chicken Potholder – Pattern, you’ll need to gather a few essential materials. The most important items include cotton yarn, a crochet hook, and a tapestry needle for sewing in the ends. Cotton yarn is ideal for potholders because it has great heat resistance, which is essential for protecting your hands when handling hot pots or pans. Choose a medium-weight cotton yarn that is comfortable to work with and holds its shape well.
The crochet hook you use should match the yarn weight. For most cotton yarn, a 4mm (G-6) crochet hook works perfectly. You may also need a smaller hook for detailing parts like the beak or feet of the chicken, depending on the pattern you are following. Additionally, you’ll want to use a tapestry needle to weave in the ends of the yarn once your potholder is complete.
If you want to make your potholder extra special, consider adding embellishments like fabric or felt for the chicken’s comb and wattle, or use buttons for eyes. These small details can help bring your crochet chicken potholder to life and give it more personality.
2. Step-by-Step Instructions for the Crochet Chicken Potholder – Pattern
Now that you have your materials, it’s time to start crocheting your Crochet Chicken Potholder – Pattern. Begin by creating a small circle for the chicken’s body. You can use a basic magic ring or chain to start your circle, and then increase as necessary to shape the body. Keep in mind that potholders need to be thick enough to provide insulation, so you may want to double up your yarn or use a thicker yarn to achieve this.
Once you’ve completed the body, crochet the chicken’s wings and tail separately. Attach these pieces to the main body using a whip stitch or slip stitch. Be sure to position them carefully to ensure your chicken looks balanced and cute. Afterward, you’ll crochet the beak, feet, and comb for the chicken’s head. These smaller elements can be done in contrasting colors to make them stand out.
As you work, make sure to follow the pattern closely, adjusting the size and shape of the elements to your liking. If you’re a beginner, don’t hesitate to refer to instructional videos or diagrams to help you understand how to crochet specific pieces of the chicken. This is a fun, relaxing project that can be customized in many ways, from changing colors to adding unique touches to the design.
3. Tips for Personalizing Your Crochet Chicken Potholder – Pattern
One of the best things about crocheting your own potholder is the ability to personalize it. The Crochet Chicken Potholder – Pattern can easily be customized to reflect your personal style and preferences. Here are a few tips for making your potholder unique:
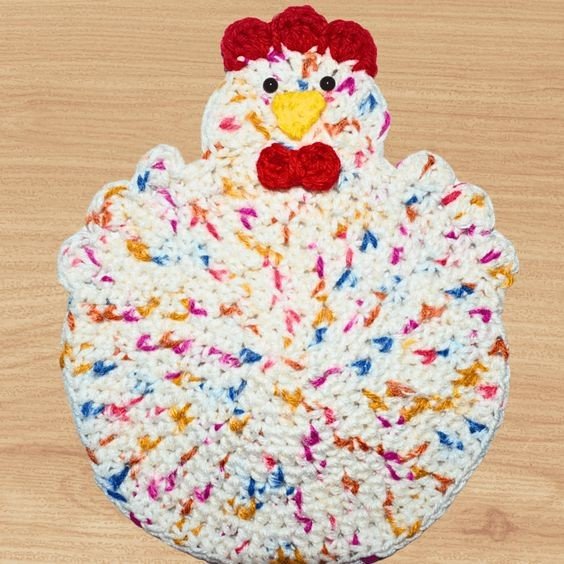
- Color Selection: While the chicken design typically uses yellow or white yarn for the body, you can choose any color that suits your kitchen decor. Consider using a multicolored yarn for the body or adding bright accents for the comb and feet. You can even make a rainbow-colored chicken for a fun twist!
- Size Variations: The pattern can be adjusted to create a larger or smaller potholder, depending on your needs. If you want a more substantial potholder, use thicker yarn or add extra rows to the body. Alternatively, a smaller version can work perfectly as a decorative piece or a trivet.
- Adding Embellishments: You can add extra details to your potholder to give it a more personalized touch. Try adding a small flower or a heart on the chicken’s body for an added layer of charm. You could also sew on a small bow or use fabric to create a more 3D effect for the chicken’s comb and wattle.
- Changing the Shape: While the chicken design is quite standard, you can experiment with different shapes for the body or even create other animal designs using the same pattern. A rooster or a duck could easily be adapted from the same concept, allowing you to create a whole set of quirky animal potholders.
4. How to Care for Your Crochet Chicken Potholder
Once you’ve completed your Crochet Chicken Potholder – Pattern, it’s important to take care of it to ensure it lasts for a long time. Since potholders are used for handling hot pots, they need to be durable and able to withstand frequent washing.
Cotton yarn is generally machine washable, but it’s always a good idea to check the care instructions on the yarn label. To keep your potholder in the best condition, wash it in cold water and air dry it. If you prefer, you can hand wash the potholder to ensure it doesn’t get damaged in the wash.
Additionally, if your potholder becomes soiled or starts to lose its shape, you can gently reshape it by blocking it while it dries. Blocking helps the potholder retain its intended shape, and it also keeps the stitchwork looking neat and clean. By following these simple care instructions, your crochet chicken potholder will remain in great condition for many uses.
FAQ
1. Can I use a different type of yarn for my crochet chicken potholder?
Yes, while cotton yarn is ideal for potholders due to its heat resistance, you can use other yarns if you prefer. Just make sure the yarn you choose is durable and can withstand heat, as potholders need to provide insulation.
2. How do I make my potholder thicker for better heat protection?
To make your potholder thicker, consider using two strands of yarn at once or choosing a thicker yarn. You can also add extra rows to the body of the chicken to ensure it’s thick enough to protect your hands from heat.
3. Can I use the same pattern to make other animals?
Absolutely! The Crochet Chicken Potholder – Pattern can easily be adapted to create other animals. You can change the body shape, colors, and features to make a variety of creatures like ducks, roosters, or even pigs.
4. Is this pattern suitable for beginners?
Yes, this pattern is beginner-friendly, especially if you’re familiar with basic crochet techniques like making a magic ring, crocheting in the round, and increasing stitches. Detailed instructions are often available in pattern guides or online tutorials to help beginners.
5. How long does it take to make a crochet chicken potholder?
The time it takes to make a crochet chicken potholder depends on your experience level and the complexity of the design. On average, a beginner may take a few hours to complete the potholder, while a more experienced crocheter may finish it in a shorter amount of time.
Conclusion
In this article, we’ve walked you through everything you need to know about the Crochet Chicken Potholder – Pattern, from gathering materials to following the step-by-step instructions. We’ve also covered tips for personalizing your potholder and how to care for it to ensure its longevity. Crocheting your own potholder is a fun and creative way to add a handmade touch to your kitchen, and with this pattern, you can make a chicken-shaped potholder that’s both functional and charming. We encourage you to try it out and experiment with different colors and designs to make it uniquely yours. Feel free to leave a sincere opinion or suggestion in the comments section below!