
If you are looking for a cozy, stylish, and rewarding DIY project, learning how to make a Crochet Hat – Tutorial is the perfect place to start. Crocheting your own headwear is not just a wonderful way to express your personal style, but it also serves as a deeply relaxing hobby that reduces stress and sparks creativity. In this comprehensive guide, we will walk you through everything you need to know to create a beautiful, comfortable beanie from scratch, ensuring that even absolute beginners can follow along with ease.
This Crochet Hat – Tutorial is designed to demystify the process of working in the round, choosing materials, and mastering the fundamental stitches required for a flawless finish. By making your own accessories, you gain complete control over the size, color, texture, and fit, allowing you to craft the perfect gift for a loved one or a staple piece for your own wardrobe. All you need is a little patience, a hook, and your favorite yarn to embark on this rewarding crafting journey.
Throughout this Crochet Hat – Tutorial, we will explore essential terminology, provide a step-by-step breakdown of the construction process, and share expert tips to ensure your project looks professionally made. From understanding how yarn weight affects the drape of your beanie to learning the magic of the slip stitch, this guide covers all the vital ground. Let’s dive into the wonderful world of crochet and get your hands moving on your next favorite handmade project.
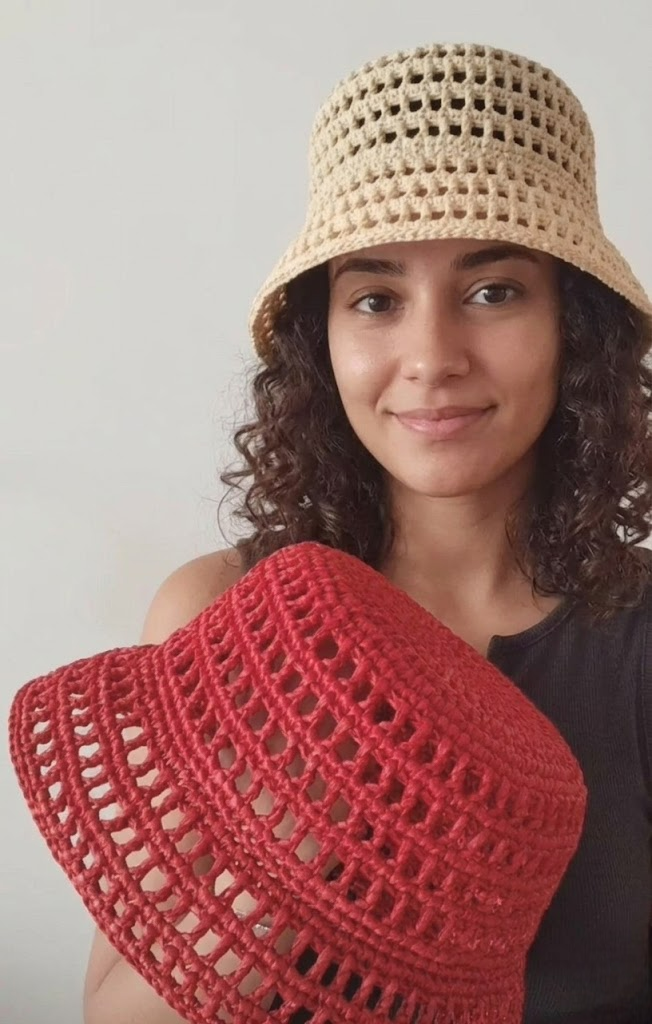
1. Essential Materials for Your First Crochet Hat
Choosing the right crochet hook is the foundational step of any successful yarn project. For beginners tackling this Crochet Hat – Tutorial, a medium-sized hook, such as a 5.0 mm (H/8) hook or a 5.5 mm (I/9) hook, is highly recommended because it is comfortable to hold and works beautifully with standard yarn thicknesses.
The next critical element is selecting the perfect yarn weight, which refers to the thickness of the yarn strand. For a classic, warm, and structured beanie, using worsted weight yarn (often labeled as medium number 4) is ideal because it yields quick results and makes it very easy to see your stitches as you work.
In addition to your hook and yarn, you will need a few basic notions to keep your work organized and professional. A reliable stitch marker is absolutely essential when crocheting a hat in continuous rounds, as it helps you identify the exact beginning of each row without losing count.
You will also need a sharp pair of yarn scissors to cleanly cut your working yarn when finishing your project. A blunt-tipped tapestry needle (or yarn needle) is another non-negotiable tool, used specifically for weaving in loose ends so your hat doesn’t unravel during wear or washing.
When picking your yarn material, look for acrylic yarn or a wool blend because these fibers offer excellent elasticity, warmth, and durability. Acrylic is particularly beginner-friendly, budget-friendly, and machine-washable, making it a fantastic choice for everyday winter accessories.
Before you begin crocheting, always check the yarn label for care instructions and recommended hook sizes. Matching your hook size to the yarn manufacturer’s recommendation ensures that your tension remains consistent and your final handmade beanie achieves the perfect balance of softness and structure.
2. Fundamental Stitches and Techniques Explained
To successfully complete this Crochet Hat – Tutorial, you need to master the magic ring (or magic circle), which is the ultimate technique for starting hats worked from the top down. This adjustable loop allows you to pull the center hole completely shut, ensuring there is no awkward gap at the very crown of your beanie.
The foundation of your hat’s height and texture relies heavily on the double crochet (dc) stitch. This classic stitch is twice as tall as a single crochet, meaning your project will grow rapidly, saving you time while creating a soft, flexible fabric that stretches comfortably over the head.
Another vital building block in this process is the chain stitch (ch), which acts as the initial stepping stone for your rows and height transitions. Knowing how to maintain even tension on your chains prevents the edges of your work from becoming too tight or puckered.
To join your rounds seamlessly without adding unwanted bulk to the design, you will utilize the slip stitch (sl st). This technique does not add height to your rows but simply connects the last stitch of a round to the first stitch, creating a clean, continuous circle.
As your hat expands from the crown downward, you must learn the concept of an increase (inc). An increase simply means placing two stitches into a single stitch from the previous row, which expands the circumference of the circle so it matches the width of a human head.
Once the crown reaches the correct diameter, you will transition to working even rounds, which means placing exactly one stitch into each stitch from the row before. Stopping the increases allows the flat circle to naturally curve downward, forming the classic, snug shape of a cozy beanie.
3. Step-by-Step Construction and Sizing Guide
The first phase of construction involves creating the crown by initiating your magic ring and securing it with a chain. From there, you will work a specific number of double crochet stitches directly into the ring, usually starting with 10 or 12 stitches for a standard adult size.
Once your base round is secure, you will follow a systematic increase pattern to widen the circle. For example, in round two, you will place an increase in every stitch, doubling your count, and in round three, you will alternate between one normal stitch and one increase.
Achieving the correct size requires measuring the circle diameter before you stop increasing. For an average adult head, you want the flat crown circle to measure approximately 6.5 to 7 inches across before you stop adding increases and start working straight down.
After reaching the target diameter, you enter the easiest and most relaxing phase: crocheting the hat body. By working one stitch per stitch around and around, the fabric will automatically shape itself into a bucket form, which you can continue until the hat measures about 8 inches from the crown to the bottom edge.
If you desire a stylish, snug fit around the forehead, you can incorporate a ribbed brim at the very bottom of your project. This is achieved by alternating front post and back post double crochets, creating a stretchy, elasticized edge that keeps the cold wind out.
The final construction step is the fastening off process, where you cut the yarn, pull the tail through the last loop to create a secure knot, and use your tapestry needle to weave the remaining yarn tails invisibly into the inside stitches of the hat.
4. Pro Tips for a Professional Finish and Customization
One of the most common issues beginners face is a visible, messy seam running down the back of their hat. To avoid this, you can practice seamless crochet rounds, where you use a stitch marker to work in a continuous spiral rather than joining each row with a slip stitch.
Paying close attention to your crochet gauge is the secret weapon of advanced crafters. Take a few minutes to crochet a small test swatch to ensure your individual tension matches the project requirements, preventing your hat from turning out accidentally microscopic or giant.
If you notice that your stitches look loose or have gaps where wind can blow through, consider dropping down a half millimeter on your crochet hook size. A smaller hook pulls the yarn fibers tighter together, resulting in a denser, warmer fabric that holds its shape for years.
Expressing your personal style is easy when you learn to execute a clean color change at the end of a round. Simply pull the new color through the final loops of your last stitch to create vibrant stripes, color-blocked patterns, or a contrasting brim color.
To elevate your handmade creation to boutique quality, consider adding a trendy yarn pom-pom or a faux-fur pom-pom to the very top. This simple embellishment instantly adds charm, balances the proportions of the beanie, and gives it a fun, winter-ready aesthetic.
Lastly, don’t overlook the power of blocking your finished project. Gently soaking your completed hat in lukewarm water with a mild wool wash, shaping it on a mannequin head or a folded towel, and letting it air dry will relax the fibers and smooth out any minor tension unevenness.
FAQ – Frequently Asked Questions
How long does it take a beginner to complete this Crochet Hat – Tutorial?
For an absolute beginner, completing a full beanie typically takes between 2 to 4 hours. Once you become familiar with the double crochet stitch and the rhythm of working in rounds, you can easily finish a custom hat in under 90 minutes.
Which yarn is best for sensitive skin that gets itchy easily?
If wool or standard acrylic makes your forehead itchy, look for 100% cotton, bamboo blends, or ultra-soft premium anti-pilling acrylic yarns. These fibers are incredibly smooth, hypoallergenic, and gentle on sensitive skin.
How do I know how many stitches I need for a child’s size hat?
To make a smaller hat, you simply stop doing increase rounds earlier. For a child, you generally stop increasing when the flat crown circle measures around 5.5 to 6 inches in diameter, and then you proceed to work the body rounds until it reaches the desired length.
Why is my crochet hat turning into a wavy bowl instead of a flat circle?
If your work is becoming wavy or ruffled, it means you are adding too many increases too quickly for your specific tension. Ensure you are following the increase pattern precisely, or try using a slightly smaller hook to tighten up the structure.
Can I wash my handmade crochet beanie in a standard washing machine?
This depends entirely on the fiber content listed on your yarn label. If you used 100% acrylic or superwash wool, you can wash it on a gentle cycle inside a mesh laundry bag, but standard wool items must be hand-washed to prevent shrinking and felting.
Conclusion
In this Crochet Hat – Tutorial, we have covered all the fundamental steps required to create a beautiful, functional winter accessory from scratch.
We explored the vital tools you need, such as the correct yarn weight and crochet hook, mastered foundational techniques like the magic ring and double crochet, and detailed the precise formula for building the crown, body, and brim of your beanie. With these skills in your crafting toolkit, you can confidently produce high-quality headwear tailored perfectly to your personal style.