Crochet Headband – Tutorial is a wonderful starting point for anyone looking to dive into the world of handmade fashion while creating something both stylish and functional. This project is perfect because a Crochet Headband requires very little yarn, making it an ideal choice for using up your leftover stash while practicing new stitches. Whether you are a seasoned pro or a beginner picking up a hook for the first time, this Tutorial will guide you through the process of making a professional-quality accessory that rivals anything found in a high-end boutique.
Crafting a Crochet Headband allows for endless customization, from the width and warmth of the fabric to the intricate texture of the crochet stitches used. In this Tutorial, we focus on creating a piece that is stretchy enough to be comfortable but firm enough to stay in place throughout a busy day. By following this guide, you will learn how to select the right yarn weight and hook size to ensure your final product has the perfect drape and elasticity.
As we move through this Crochet Headband – Tutorial, you will discover that these accessories are not just for keeping your hair back; they are versatile staples for every season. A thick, wool-blend Crochet Headband is a lifesaver during chilly autumn walks, while a thin, cotton version acts as a chic boho accent for summer festivals. This article is designed to give you the technical confidence to master the crochet pattern and produce a giftable, wearable piece of art.
1. Selecting Materials for Your Crochet Headband – Tutorial
The foundation of a great Crochet Headband begins with choosing the right fiber, as the material dictates the comfort and durability of your work. For a soft, breathable feel, many crafters prefer merino wool or a high-quality acrylic yarn that won’t irritate the skin on the forehead. Selecting a medium weight yarn (worsted) is often recommended in this Tutorial because it works up quickly and provides excellent stitch definition.
Your crochet hook size is the next critical component to consider before starting the project. Most worsted weight yarns pair beautifully with a 5.0mm (H) hook, which creates a fabric that is flexible yet dense. If you tend to crochet very tightly, you might want to move up half a size to ensure the Crochet Headband has enough stretch to fit comfortably around the head.
Don’t forget the essential notions that make the finishing process much smoother and more professional. You will need a pair of sharp yarn scissors and a tapestry needle (also known as a darning needle) for weaving in your ends securely. Having a flexible measuring tape on hand is also vital for checking the length of your work against your specific head circumference as you progress through the Tutorial.
Color choice can completely transform the aesthetic of your Crochet Headband, moving it from classic to contemporary. Neutral tones like oatmeal, slate, or cream are timeless and pair well with any outfit, making them great for selling at craft fairs. On the other hand, vibrant jewel tones or variegated yarns can turn your Crochet Headband into a bold statement piece that catches the eye.
Texture is another element that materials can influence, especially if you experiment with bouclé or velvet yarns. While these can be trickier for beginners to see their stitches, they provide a luxury feel that is very popular in modern crochet tutorials. For the purpose of this Crochet Headband – Tutorial, we suggest starting with a smooth plied yarn to make the learning process as clear as possible.
Lastly, always check the yarn label for care instructions, especially if you plan on wearing your headband during outdoor activities. Since headbands sit close to the skin, they may need occasional washing, so choosing a machine-washable yarn is a practical tip for longevity. Preparation is the key to success, and having your materials ready ensures a flow state once you start the actual crochet stitches.
2. Mastering the Basic Stitches and Gauge
To begin the construction phase of this Crochet Headband – Tutorial, you must first master the slip knot and the foundation chain. The number of chains you create will determine the width of your headband, with a standard width usually ranging between three to four inches. Maintaining an even tension on your foundation chain prevents the edges of your Crochet Headband from curling or looking distorted.
The Half Double Crochet (HDC) is a favorite stitch for headbands because it offers more height than a single crochet but is denser than a double crochet. This stitch creates a warm, solid fabric that provides excellent coverage while remaining soft against the ears. Practicing the HDC consistently will ensure that your Crochet Headband has a uniform look across every row of the pattern.
Another technique explored in this Tutorial is working in the back loops only (BLO) to create a ribbed effect. This ribbing is what gives a Crochet Headband its necessary elasticity, allowing it to stretch over the head and snap back into shape. By alternating rows or focusing on specific loops, you add a professional, store-bought texture to your handmade accessory.
Understanding gauge is often overlooked by beginners, but it is essential for a project that needs to fit a specific measurement. This Crochet Headband – Tutorial encourages you to make a small swatch to see how many stitches fit into a four-inch area. If your swatch is too small, your headband will be tight; if it is too large, the Crochet Headband will likely slide off your head.
As you work through the rows, counting your stitches is the most effective way to avoid the common “shrinking” or “growing” edge problem. It is easy to accidentally skip the last stitch of a row or add an extra one at the turning chain, which ruins the straight lines of your Crochet Headband. Using stitch markers at the beginning and end of each row is a pro tip that saves time and frustration.
The rhythm of crocheting is one of the most relaxing aspects of this Tutorial, and once you get the hang of the repeating rows, the project moves very fast. Many crafters find they can finish a complete Crochet Headband in a single evening while watching a movie. This quick turnaround makes the Crochet Headband – Tutorial a satisfying project for those who enjoy seeing immediate results from their labor.
3. Step-by-Step Construction and Sizing Guide
Sizing is a critical part of the Crochet Headband – Tutorial, as a “one size fits all” approach rarely works perfectly for everyone. For a standard adult woman, a length of 19 to 20 inches is usually ideal, considering that the crochet fabric will stretch about an inch or two when worn. Always measure your work-in-progress flat on a table without pulling it to get an accurate reading of the Crochet Headband length.
If you are making a Crochet Headband for a child or a toddler, you will need to significantly reduce the number of rows. A child’s headband usually measures between 17 and 18 inches, while an infant’s size might be as small as 14 inches. This Tutorial is easily adaptable, allowing you to create a “mommy and me” set by simply adjusting the row count while keeping the same stitch pattern.
Once you have reached your desired length, it is time to join the two ends of your Crochet Headband to create a continuous loop. There are several ways to do this, including the slip stitch join or the invisible seam method using a tapestry needle. The method you choose will depend on whether you want a visible decorative seam or a smooth, hidden transition in your Tutorial project.
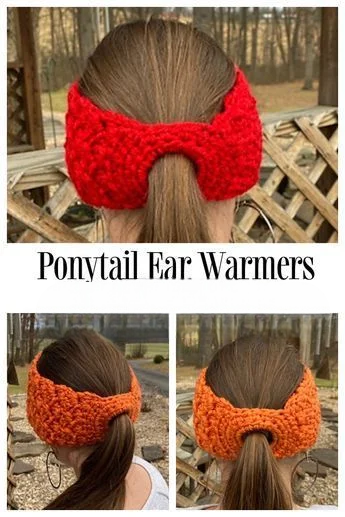
A popular variation in any Crochet Headband – Tutorial is the “Twisted” or “Turban” style join. To achieve this, you fold the ends of your rectangle into “C” shapes and interlock them before sewing across all four layers of fabric. When you flip the Crochet Headband right side out, it creates a beautiful, trendy knot detail that adds a touch of sophistication to the design.
Securing your yarn is the final structural step, and it is important to do it correctly so the Crochet Headband doesn’t unravel during use. Use your tapestry needle to weave the yarn tail back and forth through the stitches at least three times. This creates enough friction that even with the stretching and pulling of daily wear, the ends of your Crochet Headband will stay tucked away.
After completing the assembly, you might notice that your edges look a little uneven or the stitches are slightly stiff. This is where blocking comes in—a technique mentioned in this Tutorial to help relax the fibers and set the final shape. Simply pinning the Crochet Headband to a foam mat and lightly steaming it with an iron (without touching the yarn) can give it a high-end, polished finish.
4. Customizing and Troubleshooting Your Design
Customization is where your creativity truly shines after following the basic Crochet Headband – Tutorial. You can add crochet flowers, decorative buttons, or even weave a contrasting ribbon through the stitches for a unique look. Adding these embellishments makes your Crochet Headband stand out as a personalized gift or a signature item in your digital shop.
If you find that your Crochet Headband is too wide for your liking, you can easily adjust the width by decreasing the number of starting chains. Many people prefer a “ear warmer” style, which is much wider and covers the ears entirely, while others prefer a narrow “hairband” style. This Tutorial is flexible enough to accommodate both preferences by simply altering the initial foundation row.
Troubleshooting common issues is part of the learning process in any Crochet Headband – Tutorial. If your headband feels too “holy” or gappy, try using a smaller hook size or a thicker yarn to close up the spaces between stitches. Conversely, if the Crochet Headband feels like a piece of cardboard, your tension is likely too tight, and you should focus on relaxing your grip on the hook.
Changing colors is a great way to use up “scrap” yarn and create a striped Crochet Headband. To make a clean color change, finish the last pull-through of the final stitch in the old color with the new color. This technique, highlighted in this Tutorial, prevents a “jog” in the pattern and keeps the color transitions looking sharp and intentional.
For those looking to sell their work, branding your Crochet Headband with a small leather or faux-leather tag is a game changer. These tags can be sewn onto the front or the side of the headband to give it a professional, boutique-ready appearance. Following a Crochet Headband – Tutorial to the letter is great for learning, but adding these small touches is what builds a brand.
Finally, remember that practice makes perfect, and your second Crochet Headband will likely look even better than your first. Crochet is a journey of muscle memory and patience, and this Tutorial is just the beginning of what you can create. Keep experimenting with different yarn textures and stitch combinations to keep your craft fresh and exciting for yourself and your audience.
FAQ: Common Questions About the Crochet Headband
What is the best yarn for a Crochet Headband?
For the best results, use a soft acrylic or cotton-blend yarn. These fibers are durable, usually machine washable, and gentle on the skin. Avoid 100% wool if you have sensitive skin, as it can be itchy when worn directly against the forehead.
How long does it take to complete this Crochet Headband – Tutorial?
Most crafters can finish a headband in about 1 to 2 hours. It is a perfect “palette cleanser” project between larger works like blankets or sweaters because of its quick completion time.
How do I make my Crochet Headband more stretchy?
To increase stretch, use the Back Loop Only (BLO) technique for your stitches. This creates a “ribbed” texture that acts like an accordion, allowing the Crochet Headband to expand and contract without losing its shape.
Can I wash my handmade Crochet Headband?
Yes, but the method depends on the yarn. Acrylic and cotton can usually go in a delicate machine cycle, but it is always safer to hand wash in cool water and lay the headband flat to dry to prevent stretching.
What size hook should I use if I don’t have a 5.0mm?
If you don’t have a 5.0mm hook, you can use a 4.5mm or 5.5mm hook, but you must adjust your stitch count accordingly. Always check your measurements against a measuring tape rather than just counting rows to ensure a perfect fit.
How many yards of yarn do I need for one headband?
A standard adult Crochet Headband typically uses between 50 to 80 yards of yarn. This makes it an excellent “scrap buster” project for using up partial skeins from your collection.
Conclusion
This Crochet Headband – Tutorial has covered everything from selecting the right yarn and hook to mastering the ribbed stitch and assembly techniques.
We have explored how to size your project for adults and children, how to troubleshoot tension issues, and how to add professional finishes like the twisted join or decorative tags. By now, you should feel confident in your ability to create a beautiful, functional Crochet Headband that is perfect for personal use, gifting, or selling.