
Crochet Honeycomb Beanie Pattern is one of the most beautiful and rewarding projects for crochet enthusiasts who love combining elegant texture with everyday functionality. The signature honeycomb stitch creates a lightweight yet cozy fabric, making this beanie perfect for cool mornings, chilly evenings, and seasonal fashion. Whether you are creating your first textured hat or adding another timeless accessory to your handmade collection, this project offers an enjoyable experience from beginning to end. Throughout this guide, you will learn every important step to complete a stunning Crochet Honeycomb Beanie Pattern using easy-to-follow instructions and beginner-friendly explanations.
One of the reasons the Crochet Honeycomb Beanie Pattern has become increasingly popular is its sophisticated appearance despite using simple crochet techniques. The raised honeycomb texture gives the hat a professional finish while remaining comfortable and flexible enough for daily wear. This pattern works beautifully with solid-colored yarns because the textured stitches become the main decorative element. At the same time, variegated yarns can create a completely different visual effect, making every finished beanie unique.
Another advantage of this Crochet Honeycomb Beanie Pattern is its versatility. It can easily be customized for babies, children, teenagers, and adults simply by adjusting the crown diameter and the overall height. You can also personalize the project with folded brims, pom-poms, leather labels, or decorative buttons. Because the construction is straightforward, crocheters can confidently experiment with colors, yarn fibers, and stitch combinations while maintaining the beautiful honeycomb texture that defines this timeless design.
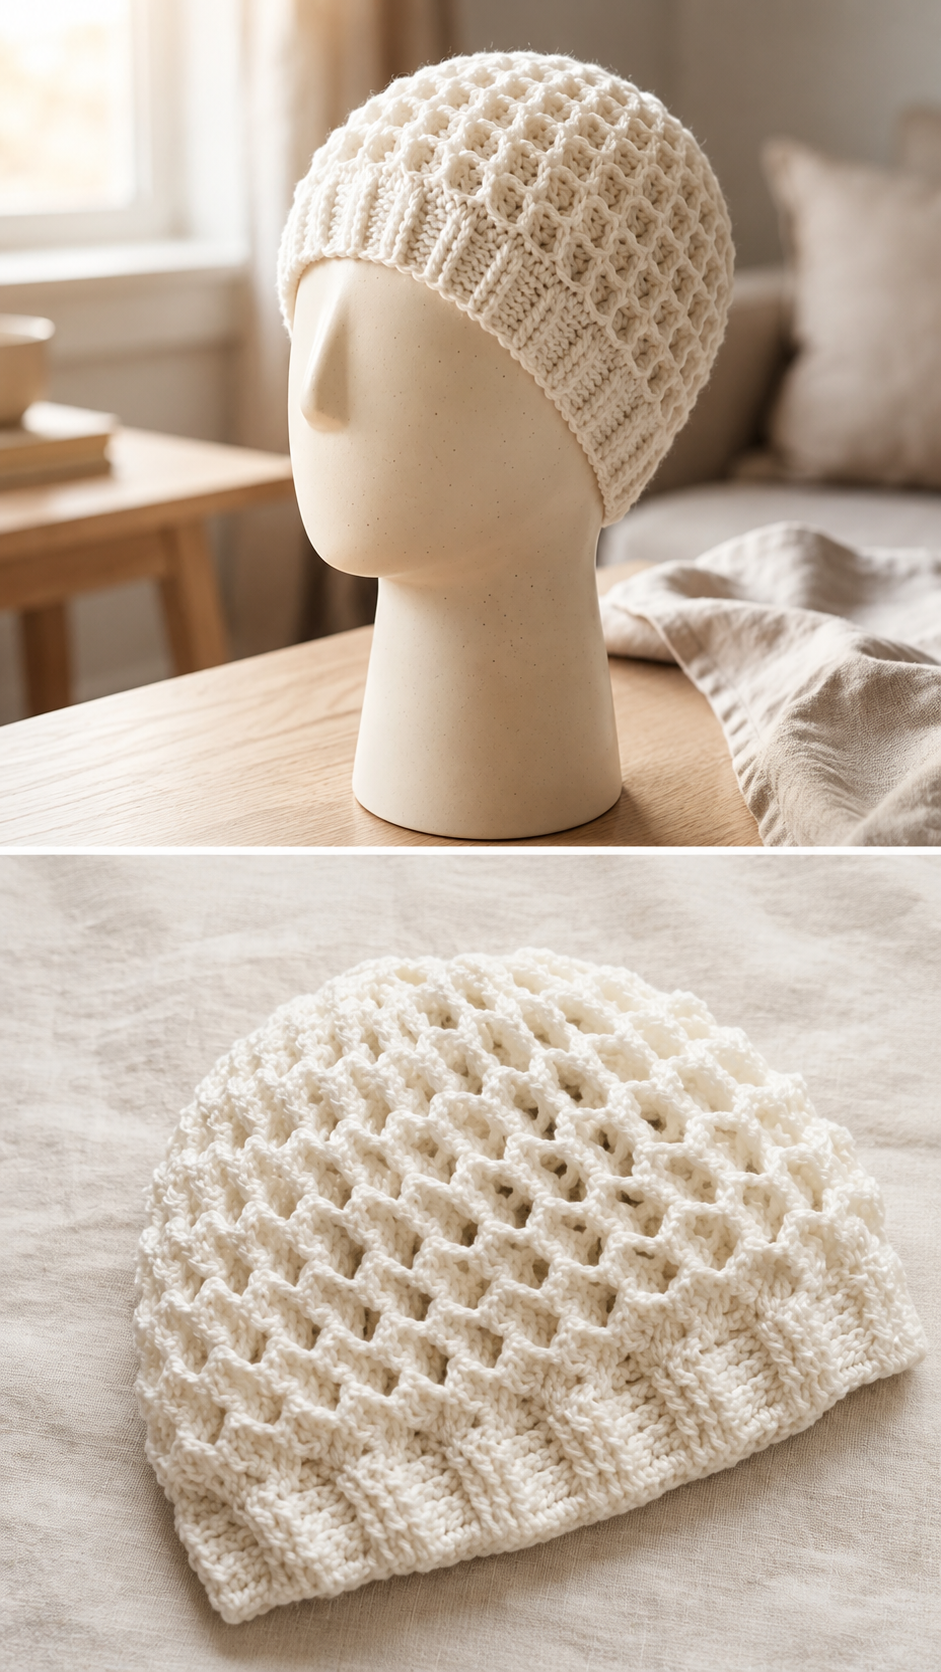
Materials and Preparing Your Crochet Honeycomb Beanie Pattern
Before beginning your Crochet Honeycomb Beanie Pattern, gather all your supplies to ensure a smooth crocheting experience. A medium-weight (#4) yarn is one of the best choices because it highlights the stitch definition while providing warmth and durability. Cotton blends, acrylic, wool, or merino yarn all work wonderfully depending on the season and your personal preference.
Select the crochet hook recommended on your yarn label, typically a 5.0 mm (H-8) or 5.5 mm (I-9) hook for worsted-weight yarn. A comfortable hook helps maintain even tension throughout the project, especially when creating textured stitches repeatedly.
You will also need stitch markers, a yarn needle for weaving in ends, scissors, and a measuring tape. These simple tools make shaping the crown much easier and help maintain consistent sizing.
Before starting the actual hat, crochet a small gauge swatch. Although many crocheters skip this step, checking your gauge ensures the finished beanie fits correctly without being too loose or too tight.
The ribbed brim forms the foundation of this Crochet Honeycomb Beanie Pattern. Most versions begin with rows of back-loop-only single crochet or half double crochet, creating a stretchy band that comfortably hugs the head.
Once the brim reaches the desired circumference, join the short edges together to create a continuous band. From this point forward, the body of the beanie is worked upward into the beautiful honeycomb texture.
Step-by-Step Crochet Honeycomb Beanie Pattern Instructions
Begin the first round by evenly placing stitches all around the top edge of the completed brim. Consistent stitch spacing is important because it determines how evenly the honeycomb pattern develops across the hat.
Round one is usually worked with regular half double crochet or double crochet stitches to establish a solid base. This foundation supports the textured stitch pattern and helps the honeycomb design remain symmetrical.
The honeycomb texture is commonly created by alternating front post stitches, back post stitches, chain spaces, and skipped stitches depending on the chosen stitch combination. Work carefully and count your stitches after every round to avoid shifting the pattern.
Continue repeating the textured rounds while maintaining even tension. The honeycomb cells will gradually become more visible after several rounds, creating the distinctive three-dimensional appearance that makes this project so attractive.
As the beanie reaches approximately two-thirds of its total height, begin preparing for the crown shaping. Proper timing is essential because starting decreases too early or too late can affect the final fit.
Reduce stitches gradually by incorporating evenly spaced decrease rounds while preserving as much of the honeycomb texture as possible. Continue decreasing until only a small opening remains, then thread the yarn through the remaining stitches, pull tightly, and securely fasten the top.
Tips for Perfect Texture and Professional Finishing
Maintaining consistent yarn tension is one of the most important factors when making a Crochet Honeycomb Beanie Pattern. Uneven tension can distort the honeycomb cells and reduce the overall visual impact of the finished project.
Choose solid or lightly heathered yarn colors if you want the stitch definition to stand out clearly. Cream, ivory, gray, navy, forest green, burgundy, and dusty blue are excellent choices that beautifully showcase the textured fabric.
If you notice your stitches becoming tighter as you work, pause occasionally to relax your hands. Comfortable hand positioning helps maintain consistent stitch size throughout the project.
Blocking is optional for many acrylic yarns but highly recommended for wool and natural fibers. Gentle blocking smooths the stitches while preserving the raised honeycomb texture without flattening it.
Weave yarn ends securely through the inside of the hat using a yarn needle. Avoid trimming them too closely, as slight movement during wear could cause loose ends to become visible.
Finally, consider adding optional embellishments like faux fur pom-poms, handmade leather tags, wooden buttons, or decorative labels. These finishing touches give your Crochet Honeycomb Beanie Pattern a polished handmade appearance suitable for gifts, craft fairs, or personal use.
Customizing Your Crochet Honeycomb Beanie Pattern for Every Season
One of the greatest strengths of the Crochet Honeycomb Beanie Pattern is how easily it adapts to different climates. Lightweight cotton versions work wonderfully during spring and early autumn, while thicker wool blends provide excellent insulation throughout winter.
For children’s hats, reduce the crown diameter while maintaining the same honeycomb repeat. The textured pattern remains proportional even when worked in smaller sizes.
If you prefer a slouchy style, simply continue adding several extra pattern repeats before beginning the decrease rounds. The additional height creates a relaxed silhouette without altering the beautiful stitch texture.
A folded brim adds extra warmth around the ears while giving the beanie a modern appearance. To achieve this look, crochet a taller ribbed band before joining it into a circle.
Color experimentation is another enjoyable way to personalize your project. While solid shades highlight the stitch definition, subtle color changes every few rounds create unique visual effects without distracting from the honeycomb texture.
The finished Crochet Honeycomb Beanie Pattern also makes an excellent handmade gift. Because it combines elegance, comfort, and durability, it appeals to people of all ages and remains fashionable year after year.
FAQ
Is the Crochet Honeycomb Beanie Pattern suitable for beginners?
Yes. Beginners who already know basic crochet stitches such as chain, single crochet, half double crochet, and front post stitches can successfully complete this project by working carefully through each round.
What yarn works best?
Medium-weight (#4) yarn offers excellent stitch definition and creates a comfortable beanie suitable for everyday wear.
Can I make the hat larger or smaller?
Absolutely. Adjust the crown diameter, overall height, and number of stitches while maintaining the honeycomb stitch repeat.
Does the honeycomb stitch use a lot of yarn?
It generally uses slightly more yarn than flat stitches because of its raised texture, but the extra yardage creates a richer, more luxurious fabric.
How long does it take to finish?
Most crocheters can complete the project within one or two evenings, depending on their experience and the amount of uninterrupted crafting time available.
Can I wash the finished beanie?
Yes. Follow the care instructions recommended for your chosen yarn. Many acrylic yarns are machine washable, while wool blends often require gentle hand washing.
Is blocking necessary?
Blocking is optional but recommended for natural fibers because it enhances stitch definition and gives the finished beanie a polished appearance.
Can I sell finished hats made from this pattern?
Yes. Handmade beanies created from your own work are commonly sold at craft fairs, online shops, and local markets. Always ensure you respect any licensing terms if you are following a separately published commercial pattern.
Conclusion
The Crochet Honeycomb Beanie Pattern is an outstanding project for crocheters who want to create a stylish, comfortable, and beautifully textured hat using classic crochet techniques. Throughout this guide, you learned how to choose the right materials, build a sturdy ribbed brim, create the signature honeycomb stitch pattern, shape the crown smoothly, and finish your beanie with professional details. You also discovered practical customization ideas for different sizes, seasons, and personal styles, making this pattern versatile enough for every crochet collection.
Whether you are making your very first textured beanie or expanding your handmade wardrobe, this project offers the perfect balance of beauty, simplicity, and creativity. With patience, consistent tension, and careful attention to the stitch pattern, you can create a finished hat that looks elegant, feels comfortable, and lasts for years.