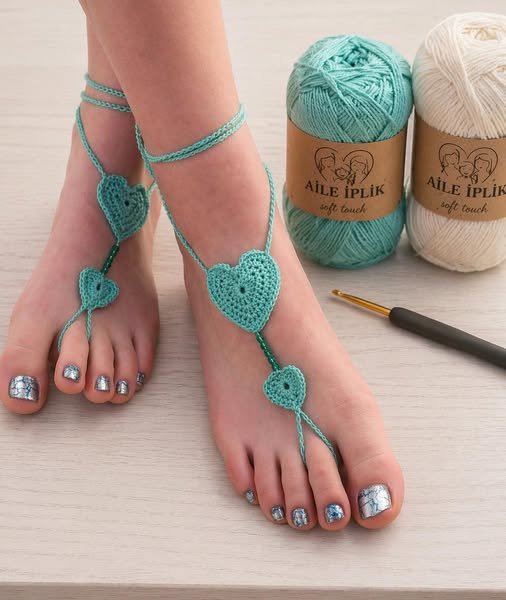
Crochet Sandals For The Feet – Tutorial is the perfect way to combine your passion for fiber arts with functional, stylish footwear that you can wear all summer long. Whether you are walking along a sandy beach or lounging in your backyard, a pair of handmade sandals offers a level of comfort and personalization that store-bought shoes simply cannot match. In this comprehensive guide, we will explore how to create durable, breathable, and beautiful footwear using basic crochet techniques that any enthusiast can master with a bit of practice and the right materials.
Making your own Crochet Sandals For The Feet – Tutorial allows you to customize the fit perfectly to your unique foot shape, ensuring that you never have to deal with uncomfortable straps or soles that are too narrow. This project is not only a fantastic way to expand your crafting skills but also an eco-friendly alternative to fast fashion, as you can choose sustainable yarns like cotton or hemp. Throughout this article, we will delve into the structural requirements of footwear, ensuring that your finished project is as sturdy as it is aesthetically pleasing.
As we begin this Crochet Sandals For The Feet – Tutorial, it is important to remember that footwear requires a slightly different approach than making a blanket or a sweater. Since these will be in constant contact with the ground and subject to the weight of your body, choosing the right sole material and maintaining high stitch tension are the secrets to success. Get ready to transform a simple ball of yarn into a sophisticated pair of sandals that will have everyone asking, “Where did you get those?”
1. Choosing the Best Materials for Your Crochet Sandals For The Feet – Tutorial
The foundation of a successful Crochet Sandals For The Feet – Tutorial starts with the yarn selection, and for footwear, 100% mercerized cotton is the gold standard. Cotton is non-stretch, highly durable, and handles moisture well, which is essential for something worn on the feet during warm weather. Unlike wool or acrylic, cotton won’t lose its shape after a few hours of walking, keeping your straps secure and your feet properly aligned.
When following this Crochet Sandals For The Feet – Tutorial, you also need to consider the base of the shoe, often referred to as the flip-flop sole method. Many crafters choose to use the rubber soles from an inexpensive pair of flip-flops as their foundation, poking holes around the edge to crochet directly into the base. This provides the necessary grip and protection from the pavement while allowing the upper portion to be entirely handmade and decorative.
The crochet hook size is another critical factor in ensuring your sandals are functional and long-lasting. For this Crochet Sandals For The Feet – Tutorial, I recommend using a hook that is one size smaller than what is recommended on your yarn label to create a very dense, tight fabric. Tight stitches provide better support for the foot and prevent the straps from stretching out over time, which is the most common issue with DIY footwear.
In addition to yarn and hooks, you will need a few specialized tools such as a sharp awl or a leather punch if you are working with rubber or leather soles. These tools allow you to create clean, evenly spaced holes for your initial foundation row. You will also want a high-quality tapestry needle to weave in your ends securely, as the friction of walking can easily loosen knots that aren’t properly hidden.
For the straps and closures in this Crochet Sandals For The Feet – Tutorial, you might want to incorporate sturdy buttons, buckles, or even leather cord. Adding these elements not only enhances the visual appeal but also provides adjustable security for the ankle. Think about the functionality: will you be walking long distances? If so, prioritize wider straps that distribute pressure evenly across the top of the foot.
Finally, don’t overlook the importance of stitch markers and a measuring tape during the preparation phase. Because feet are rarely identical in size, you will need to measure both feet and adjust your stitch count accordingly for each sandal. This Crochet Sandals For The Feet – Tutorial emphasizes precision, as a sandal that is even a quarter-inch too large can become a tripping hazard or cause blisters from excessive movement.
2. Constructing the Sole and Foundation Row
The first active step in our Crochet Sandals For The Feet – Tutorial is establishing the connection between the yarn and the sole. If you are using the flip-flop base, you will start by using your awl to punch holes approximately 1 cm apart around the entire perimeter of the sole. Once the holes are ready, you will join your yarn using a slip stitch and work a row of single crochet into each hole to create a sturdy border.
This initial border is the most important part of the Crochet Sandals For The Feet – Tutorial because it acts as the anchor for the entire upper structure. If these stitches are too loose, the fabric will pull away from the rubber base. Make sure to use a strong, reinforced thread if necessary for this specific row, as it will endure the most stress during daily use. This is the stage where you set the “footprint” for your design.
If you prefer a completely yarn-based approach for indoor slippers, this Crochet Sandals For The Feet – Tutorial can be adapted by crocheting a double-thick sole. To do this, you would crochet two identical oval shapes using half double crochet and then slip stitch them together. This creates a padded effect that is comfortable for walking on hardwood floors or carpets, though it isn’t recommended for outdoor use without a rubber coating.
Once your foundation row is complete, you will need to identify the “anchor points” for your straps. In this Crochet Sandals For The Feet – Tutorial, we usually mark two points near the toes and two or three points around the heel. Using removable stitch markers helps you visualize where the straps will emerge from the sole, ensuring that they sit comfortably between the toes or over the instep without rubbing against sensitive skin.
The beauty of the Crochet Sandals For The Feet – Tutorial is the ability to test the fit as you go. After finishing the foundation row, place your foot on the sole and check the alignment of your markers. The straps should ideally start just behind the widest part of your foot to provide maximum stability. If the markers look off, simply move them a few stitches over until the symmetry feels perfect for your specific anatomy.
To finish this stage, work one more row of slip stitches around the top of your foundation row. This creates a “ledge” that hides the holes in the rubber and gives the base a professional, finished look. It also adds a layer of reinforcement that prevents the yarn from fraying against the edges of the sole. Now, your base is ready for the decorative and functional straps that define the Crochet Sandals For The Feet – Tutorial.
3. Designing and Crocheting the Upper Straps
Now we move into the creative heart of the Crochet Sandals For The Feet – Tutorial: the straps. Depending on your style preference, you can choose between a simple “thong” style, cross-over gladiators, or a wide boho-style band. For beginners, I recommend a basic V-strap that connects the toe area to the sides of the foot. This design is classic, easy to adjust, and provides excellent security for the foot.
For a more intricate Crochet Sandals For The Feet – Tutorial look, you can incorporate lace patterns or shell stitches into the straps. However, remember that the strap must remain functional. A very “holey” lace pattern might look beautiful, but it may stretch too much. A good compromise is to use a solid single crochet base for the structural parts of the strap and add decorative edging or beadwork on top for visual flair.
When crocheting the straps in this Crochet Sandals For The Feet – Tutorial, it is helpful to work directly onto the foundation row you created earlier. This eliminates the need for sewing later on, which makes the sandals much stronger. Use foundation single crochet stitches to build the straps out from the sole, as this technique provides more “give” than a traditional chain-and-sc method, preventing the yarn from snapping under tension.
The heel support is the next vital component of our Crochet Sandals For The Feet – Tutorial. A secure heel strap prevents the sandal from “flopping” and makes walking much more natural. You can create a “cup” for the heel by working several rows of double crochet around the back third of the sole and then extending two long chains that can be tied around the ankle in a stylish bow.
One pro-tip for this Crochet Sandals For The Feet – Tutorial is to make the straps slightly shorter than you think you need. Cotton yarn will naturally expand slightly after the first hour of wear. By starting with a snug fit, the sandals will eventually settle into a perfect, custom mold of your foot. If you start with loose straps, you will likely find yourself tripping over them by the end of the day.
Finally, consider the “toe post” if you are making a flip-flop style. In this Crochet Sandals For The Feet – Tutorial, we suggest wrapping the yarn several times around the area that goes between the toes to make it smooth and comfortable. You can even slide a small plastic bead or a soft piece of fabric over the yarn at this point to prevent any chafing, ensuring your handmade footwear is a joy to wear all day long.
4. Finishing Touches and Durability Hacks
The final stage of the Crochet Sandals For The Feet – Tutorial involves securing all ends and ensuring the sandals are weather-resistant. Weaving in your ends is not just about aesthetics here; it’s a safety requirement. Use a “weaving in three directions” technique with your tapestry needle to ensure that no matter how much the fabric moves, the yarn tails stay hidden and locked in place within the crochet fabric.
To make your Crochet Sandals For The Feet – Tutorial truly durable, you can apply a thin layer of shoe glue or liquid latex to the bottom of your stitches where they meet the sole. This acts as a secondary bond and protects the yarn from being cut by sharp rocks or friction from the ground. It’s a small extra step that can double the lifespan of your handmade sandals.
If you find that your straps are still stretching more than you’d like, this Crochet Sandals For The Feet – Tutorial has a simple fix: slip stitch along the edges of the finished straps. This “bordering” technique creates a non-stretch perimeter that acts like a structural skeleton. It’s also an excellent opportunity to introduce a contrasting color for a “pop” of design that highlights the handmade nature of the shoes.
For those living in wetter climates, you might consider treating your finished Crochet Sandals For The Feet – Tutorial project with a fabric protector spray. This will help repel water and prevent stains from mud or grass. Since cotton is absorbent, a protective coating ensures that your light-colored sandals stay looking fresh and vibrant through many summer adventures.
Comfort is the ultimate goal, so don’t be afraid to add a crochet insole. If the rubber sole feels too hard, you can crochet a soft pad using the same cotton yarn and glue it inside the shoe. This extra layer provides cushioning and absorbs sweat, making your Crochet Sandals For The Feet – Tutorial the most comfortable pair of shoes in your closet. It also gives you another surface to add a personalized “Made by…” label.
Lastly, take a moment to admire your work! You have successfully navigated the complexities of footwear construction. Whether you made them for yourself or as a gift, these sandals represent a high level of skill and creativity. Mastering the Crochet Sandals For The Feet – Tutorial opens up a world of possibilities, from bridal footwear to rugged outdoor sandals, all crafted with your own two hands.
FAQ – Frequently Asked Questions
1. Can I use acrylic yarn for this Crochet Sandals For The Feet – Tutorial?
While you can, it is not recommended. Acrylic has a lot of “spring” and will stretch significantly as you walk. This can lead to the sandals becoming loose and unsafe. Stick to cotton, hemp, or linen yarns for the best structural results and foot health.
2. How do I clean my handmade crochet sandals?
If you used a rubber sole, the best method is to hand wash the crochet upper with a mild detergent and a soft brush. Avoid putting them in the washing machine, as the agitation can weaken the bond between the yarn and the sole. Always air dry them out of direct sunlight to prevent the colors from fading.
3. Are these sandals suitable for long-distance walking?
The sandals created in this Crochet Sandals For The Feet – Tutorial are perfect for casual wear, beach trips, and light walking. However, because they lack the arch support of orthopedic shoes, they aren’t intended for hiking or high-impact activities. They are fashion footwear with a focus on comfort and style.
4. What if I don’t want to use old flip-flops as a base?
You can purchase professional rubber shoe soles online specifically designed for makers. These often come pre-punched with holes, saving you the step of using an awl. Alternatively, leather soles are a great high-end option for a more sophisticated, artisanal look.
5. My straps are digging into my skin, what can I do?
This usually happens if the stitches are too rough or the yarn is too stiff. In your next Crochet Sandals For The Feet – Tutorial attempt, try using a softer cotton blend or lining the inside of the straps with a thin strip of felt or soft fabric. You can also try making the straps wider to distribute the pressure more evenly.
Conclusion
This Crochet Sandals For The Feet – Tutorial has guided you through the essential steps of creating custom, handmade footwear that balances style with functionality.
We have learned the importance of selecting mercerized cotton yarn, the technical process of anchoring yarn to a rubber sole, and the creative ways to design straps that fit perfectly. By focusing on tight tension and secure assembly, you have created a pair of sandals that are uniquely yours and built to last the summer season.