If you’re stepping into the world of crocheting or are already familiar with it, chances are you’ve encountered the term Crochet squares – Pattern more than once.
These modular, timeless motifs have been a beloved foundation for everything from cozy blankets to stylish garments and home décor.
The charm of crochet squares lies in their versatility, ease of customization, and ability to bring colors and textures together seamlessly.
Using a Crochet squares – Pattern allows crafters to build small sections over time, making it perfect for those who enjoy manageable projects. Whether you’re piecing together a memory-filled afghan or crafting intricate pillow covers, squares provide structure and creative freedom. They’re beginner-friendly yet full of potential for complexity and beauty.
In this article, you’ll learn the essentials of making crochet squares, explore materials, delve into creative variations, and see how these versatile shapes can be transformed into functional art. We’ll also answer common questions and wrap things up with a thoughtful summary. So let’s unravel the beauty and practicality of this essential crochet staple.
1. What Makes Crochet Squares So Popular
The Crochet squares – Pattern is more than just a beginner project—it’s a gateway to countless crochet designs and applications. One of the key reasons behind its popularity is how accessible it is for new crocheters. With a few basic stitches, anyone can create a beautiful square that feels satisfying from the very first row.
Another reason crochet squares are beloved is because they’re portable. You can make a square just about anywhere—on the couch, at the park, or during a commute. This makes it easy to slowly build up to larger projects without the need to carry a full blanket or garment with you.
The modular nature of crochet squares also means you can mix and match patterns, colors, and textures. Want a boho vibe? Mix earthy tones and textured stitches. Prefer something modern? Try crisp whites and geometric designs. The creative combinations are endless.
Additionally, squares are forgiving. If a single square doesn’t quite come out the way you wanted, you can redo just that piece rather than having to rip out an entire project. This modular approach not only saves time but also reduces frustration.
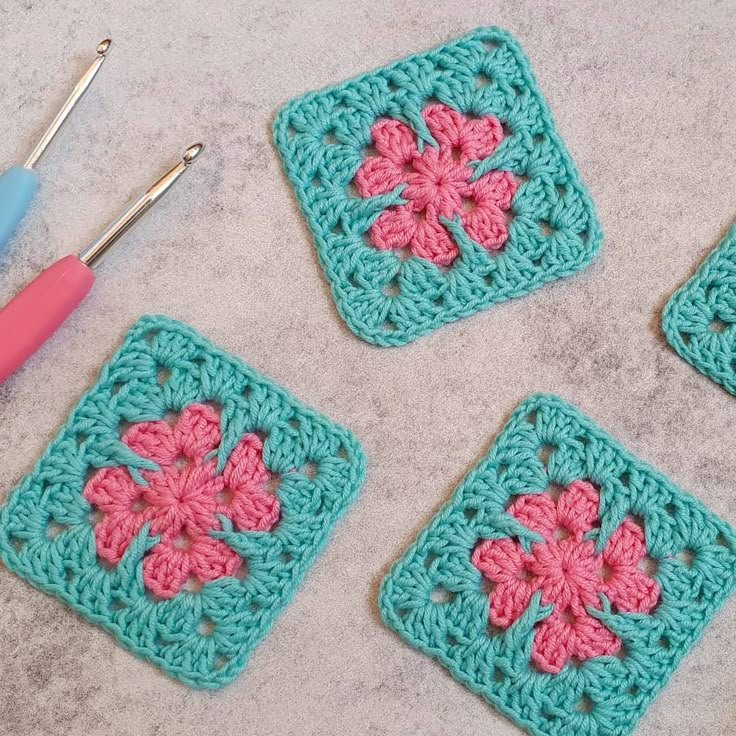
Many classic and modern patterns are based on squares—such as the famous Granny Square. This iconic motif has been reimagined countless times and remains a beloved choice for all kinds of projects, from retro sweaters to chic tote bags.
Finally, crochet squares are ideal for upcycling and stash-busting. Have a few leftover yarn skeins from past projects? A Crochet squares – Pattern gives those scraps new life and reduces waste in a creative way.
2. Essential Tools and Yarn for Crochet Squares
Before diving into your next Crochet squares – Pattern, it’s important to gather the right materials. Having quality tools and the appropriate yarn makes a noticeable difference in your finished product’s look and durability.
Start with yarn that matches your project’s purpose. Cotton yarn is great for household items like dishcloths and coasters because of its absorbency and durability. Acrylic yarn works well for blankets and garments because it’s soft, lightweight, and affordable. Wool yarn adds warmth and texture, perfect for winter projects.
Next, choose the right hook size. Most patterns will specify this, but a general rule is that your hook should match the yarn’s weight. For example, worsted-weight yarn typically works best with a 5.0mm (H/8) hook. If you want looser, drapier squares, try going up a hook size.
You’ll also need scissors, a yarn needle, and a stitch marker. Scissors ensure clean cuts, while a yarn needle helps you weave in ends neatly. Stitch markers are great for keeping track of corners or stitch counts, especially when working more intricate patterns.
For best results, always check your gauge. Crocheting a test square ensures your tension matches the pattern’s expectations, so all your squares come out the same size. This step is particularly important if your project includes multiple joined squares.
Consider blocking your finished squares. Blocking helps shape your squares to a uniform size and makes joining easier later. You can block using steam, water, or pins—whatever method is safest for your yarn type.
Lastly, stay organized. Keep a zip pouch or small tote with your squares, yarn, and tools so you can easily pick up where you left off, no matter where inspiration strikes.
3. Step-by-Step Instructions for a Classic Crochet Square
A standard Crochet squares – Pattern typically starts from the center and works outward in rounds. Let’s walk through how to create a classic Granny Square, one of the most well-loved crochet squares around.
Step 1: Make a Magic Ring or Chain Loop
Begin by creating a magic ring or chaining 4 and joining with a slip stitch to form a loop. This will be the center of your square.
Step 2: First Round
Chain 3 (counts as the first double crochet), then work two more double crochets into the ring. Chain 1, then work three more double crochets. Repeat this process two more times, ending with a chain 1 and a slip stitch into the top of the starting chain-3.
Step 3: Second Round
Slip stitch over to the first chain-1 space. Chain 3, work two double crochets, chain 1, and then three more double crochets into the same space. This creates your first corner. Move to the next corner space and repeat the process. Continue around and join with a slip stitch.
Step 4: Continue Building Rounds
Each new round increases the square by placing corner groups into the chain spaces. Chain 3, then work around placing 3 double crochets into each space with chain-1 corners.
Step 5: Customize the Size
Stop when your square reaches the desired size. You can change colors at any round by fastening off and adding new yarn, which adds visual interest.
Step 6: Finishing Touches
Once done, weave in all ends with a yarn needle. Optionally, block your square to straighten the edges and ensure uniformity if you plan to join it with others.
This pattern can be adapted endlessly by using different stitches or layouts. Explore puff stitches, shells, or cluster stitches to make it your own.
4. Creative Projects Using Crochet Squares
One of the most exciting parts of using a Crochet squares – Pattern is transforming those individual motifs into something functional and beautiful. Let’s look at several ways to put your squares to good use.
Blankets and Throws
Probably the most common use, a patchwork-style afghan is both comforting and artistic. You can mix square types or keep it uniform for a sleek look. Great for gifting!
Pillows and Cushions
Join four or more squares to create stylish pillow covers. Add a lining or zipper for removable, washable options. Try alternating colors or stitch textures.
Garments
From boho vests to chic cardigans, you can turn squares into stunning wearable art. Assemble a front panel, back, and sleeves using square motifs. Add ribbing or borders to complete.
Tote Bags and Purses
Crochet squares make sturdy and fashionable bags. Reinforce them with lining fabric and straps for durability. Try color blocking for modern flair.
Table Runners and Placemats
Squares can also shine in home décor. Use cotton yarn for durable table linens. Alternate colors or add edging for a polished finish.
Wall Art and Decor
Mount a single stunning square in a frame or create a wall hanging with joined motifs. Add tassels or fringe to take your wall art to the next level.
The only limit is your imagination—and perhaps your yarn stash!
FAQ – Crochet Squares – Pattern
Q1: What is the best size for a crochet square?
It depends on your project. Common sizes range from 4″ to 12″. Smaller squares are ideal for baby items or accessories, while larger ones work well for blankets.
Q2: How do I join crochet squares?
You can use methods like whipstitch, slip stitch, or the join-as-you-go technique. Each creates a different texture and flexibility depending on your desired finish.
Q3: How can I avoid curved or uneven squares?
Consistent tension and blocking are key. Be sure to count your stitches and check corners each round to keep the shape even.
Q4: Can I use leftover yarn for crochet squares?
Absolutely. They’re perfect for scrap-busting. Just make sure the yarn weights are similar so your squares remain consistent.
Q5: How do I make my crochet squares lay flat?
Blocking your squares after crocheting them will help immensely. It shapes the square, relaxes the stitches, and evens out tension issues.
Q6: Are crochet squares good for learning new stitches?
Yes! Squares are the perfect canvas for practicing new stitch patterns. Each square becomes a small, manageable practice project.
Conclusion
The Crochet squares – Pattern is a foundation that opens the door to endless creativity. Whether you’re crafting simple granny squares or complex textured motifs, the flexibility, portability, and visual appeal of these blocks are unmatched. With just a bit of yarn and time, you can create something both functional and beautiful.
Throughout this article, we’ve explored the reasons
crochet squares remain beloved, the tools and materials you need, step-by-step instructions, and creative ways to use them. We also answered your top questions to help guide your projects to success.
Now it’s your turn—try out a pattern, mix colors, explore new stitches, and most importantly, enjoy the process. We’d love to hear your feedback! Leave a sincere comment below with your thoughts, experiences, or suggestions. What’s your favorite way to use crochet squares? Let’s keep this community growing, one square at a time.