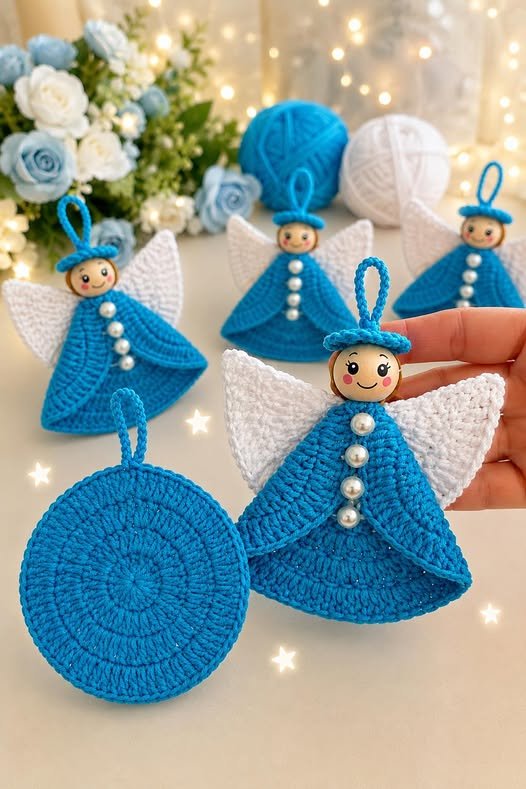
The Easy Angel keychain – Tutorial is your ultimate guide to creating a beautiful, meaningful, and budget-friendly accessory that makes for a perfect gift or a charming addition to your craft shop collection. Crafting your own handmade accessories has never been more popular, and this specific project stands out because it combines simplicity with an elegant, timeless design that appeals to people of all ages. Whether you are a seasoned crafter looking for a quick and satisfying afternoon project or a complete beginner dipping your toes into the world of DIY jewelry and charms, this step-by-step guide is tailored to help you succeed without any stress.
Angels have always carried a deep symbolic meaning, often representing protection, hope, comfort, and guidance, which makes an easy angel keychain incredibly special to receive. By following this tutorial, you will learn how to transform basic, readily available crafting supplies into a stunning keepsake that can be attached to keys, backpacks, purses, or even used as a unique holiday ornament. The beauty of this project lies in its immense versatility, allowing you to customize the colors, sizes, and textures to match your personal style or the specific theme of a special event you might be celebrating.
In this comprehensive Easy Angel keychain – Tutorial, we are going to break down the entire process from start to finish, ensuring that you understand every single technique needed to achieve a professional-looking result. We will explore the best materials to use, how to avoid common crafting mistakes, and how you can even turn this fun hobby into a profitable small business if you choose to sell your finished creations. Grab your crafting tools, clear off your workspace, and let’s dive into the wonderful, rewarding world of handmade angel charms.
1. Gathering Your Essential Crafting Supplies
To get started on this easy angel keychain, you will first need to gather a few essential materials that form the core structure of your delicate little angel charm. The most critical component is the choice of beads, as you will need a larger bead for the angel’s body and a slightly smaller, coordinating bead to represent the head. Many crafters prefer using high-quality faux pearls, faceted crystal beads, or even polished wooden beads depending on the specific aesthetic they want to achieve for their project.
In addition to the main beads, you will need a set of specialized angel wing beads, which are widely available in metal, acrylic, or silver-plated finishes at any local craft store or online marketplace. These wing spacers are the magical element that instantly transforms ordinary beads into a recognizable, heavenly figure, fitting perfectly between the body bead and the head bead. To hold all these beautiful pieces together securely, a sturdy metal headpin or eyepkin is required, serving as the central spine of your entire charm.
Beyond the beads and wings, you cannot forget the actual hardware that makes this piece a functional accessory rather than just a decorative ornament. A reliable, durable keychain ring or a lobster clasp is necessary to ensure that your finished angel can be easily attached to keys or bags without the risk of falling off. Having the right tools on hand, such as round-nose pliers, chain-nose pliers, and wire cutters, will make the assembly process incredibly smooth and enjoyable for you.
Selecting high-quality components is very important because a keychain experiences a lot of daily wear and tear as it gets tossed into bags or pockets constantly. Opting for tarnish-resistant metals and sturdy, well-made loops will guarantee that your beautiful handmade creation remains intact and gorgeous for a very long time to come. Taking the extra time to source beautiful, durable elements will instantly elevate the perceived value of your finished product, whether it is a gift or an item for sale.
If you are planning to make these charming pieces in large quantities for party favors, wedding souvenirs, or holiday gifts, purchasing your supplies in bulk is a fantastic way to save money. Bulk packs of beads, wing spacers, and jewelry findings are highly affordable and allow you to mix and match colors creatively across your entire project run. This cost-effective approach makes the Easy Angel keychain – Tutorial one of the best low-overhead projects available for modern craft enthusiasts.
Now that you have all your tools and supplies organized on your crafting table, you are fully prepared to begin the assembly process with total confidence and ease. Remember to keep your workspace clear and well-lit so you can see the small details of your wirework and bead placement clearly as we move forward. With everything in place, let’s explore how to combine these simple elements into a cohesive, structurally sound, and beautiful piece of handmade art.
2. Step-by-Step Assembly and Wire Wrapping Techniques
The assembly of your easy angel keychain begins by threading your chosen body bead onto the metal headpin, making sure it sits flush against the bottom stopper. Next, slide the angel wing spacer down the headpin so that it rests directly on top of the body bead, orienting the wings so they curve in the direction you prefer. Finish the basic bead stacking by adding the smaller head bead directly above the wings, completing the classic silhouette.
Once your beads are properly stacked, it is time to secure them in place using a fundamental jewelry-making technique known as creating a wrapped loop. Using your round-nose pliers, grasp the wire immediately above the head bead and bend it at a sharp 90-degree angle to create a solid base. Then, wrap the wire up and over the barrel of the pliers to form a clean, perfectly round circle that will hold your attachment ring.
After forming the loop, hold it firmly with your pliers and take the remaining tail of the wire, wrapping it tightly around the neck of the pin just below the loop. Making two or three neat wraps around the base ensures that the beads cannot slide around and provides an exceptionally secure finish that won’t unravel over time. Use your wire cutters to snip off any excess wire as close to the wraps as possible to maintain a clean appearance.
After cutting the wire, you might notice a tiny, sharp edge protruding from the wraps, which could potentially snag on fabric or scratch your skin during daily use. Take your chain-nose pliers and gently tuck that raw wire end into the main wrap until it is completely smooth to the touch. This attention to small details is what separates amateur DIY projects from truly professional-looking, high-quality boutique items.
With your angel charm securely formed and wrapped, the final assembly step is to connect it directly to your primary keychain ring or finding. You can achieve this easily by using a sturdy jump ring, opening it with your pliers using a lateral twist rather than pulling the ends apart, which weakens the metal. Slide both the loop of your angel charm and the keychain hardware onto the open jump ring, then twist it firmly back into place.
Take a moment to admire your finished work, checking that all connections are tight, the loop is straight, and the beads are held snugly without any unwanted wobbling. Learning this basic assembly method through our tutorial unlocks endless creative possibilities, as the very same wire-wrapping skills can be applied to earrings, necklaces, and bracelets. Now that you know how to build the physical structure, let’s discuss how to infuse your unique creativity into each piece.
3. Creative Customization and Color Themes
One of the most delightful aspects of mastering this Easy Angel keychain – Tutorial is the unlimited freedom you have to customize the design to suit any occasion. By simply changing the color of the body bead, you can create customized birthstone angels that make incredibly thoughtful, personalized birthday gifts for friends and family members. For instance, using a bright blue bead for March or a deep red crystal for July adds a layer of personal meaning that everyone appreciates.
Beyond birthstones, you can easily adapt your color choices to match specific seasonal holidays or themes throughout the calendar year. Clear crystal beads combined with silver accents create a magical, snowy winter aesthetic that is absolutely perfect for holiday stocking stuffers or tree decorations. On the other hand, soft pastel beads like lavender, mint green, and pale pink are wonderful for springtime celebrations, baby showers, or Easter basket surprises.
You can also experiment with a wide variety of bead textures and materials to change the overall style from classic elegance to rustic charm. Matte ceramic beads or natural gemstones offer an earthy, bohemian look that pairs beautifully with antique brass or copper wire and wing components. If you prefer a glam, eye-catching style, using high-quality faceted glass beads will ensure your easy angel keychain catches and reflects the light beautifully wherever it goes.
Don’t limit your creativity strictly to the beads themselves; you can also add extra embellishments to the keychain assembly for a richer, more layered look. Attaching a small metal charm with an initial, a stamped inspiring word, or a delicate silk tassel alongside the angel enhances the visual appeal significantly. These extra touches make the accessory feel more substantial and luxurious, allowing you to showcase your personal flair as a designer.
If you are creating these items as favors for a major milestone event like a baptism, confirmation, or wedding, consider coordinating the colors with the event’s official theme. Packaging each finished charm in an organza bag with a custom printed thank-you tag creates an unforgettable presentation that guests will cherish as a reminder of the day. The simple elegance of the angel design ensures it fits seamlessly into both formal and casual event settings.
As you become more comfortable with the basic process, you can try combining different sizes of wing spacers and beads to create an entire family of angels. There are no rigid rules when it comes to expressing your creativity, so feel free to experiment with unexpected color combinations and unique findings. Next, let’s look at how you can share your passion with others and potentially build a successful venture around these beautiful creations.
4. Tips for Marketing and Packaging Your Handmade Charms
If you find yourself falling in love with making these charms, you might want to consider turning your new hobby into an exciting, profitable online craft business. Because an easy angel keychain requires a relatively low initial investment in supplies and takes only a few minutes to complete, the potential profit margins are excellent. To succeed in the competitive handmade market, focusing on your branding, product presentation, and photography is absolutely essential.
High-quality photography is the most critical element when selling your crafts online, as customers rely entirely on visuals to judge the quality of your work. Take your product photos in bright, natural daylight, avoiding harsh artificial shadows or blurry close-ups that hide the details of your craftsmanship. Display the keychains against a clean, clutter-free background, or feature them attached to a stylish bag to help customers visualize the actual size and utility.
Your packaging plays a massive role in creating a memorable unboxing experience that encourages customers to leave glowing reviews and return to your shop. Instead of simply dropping the keychain into a plain envelope, mount the angel charm onto a beautifully designed cardstock backing displaying your brand logo. You can also write a short, handwritten thank-you note to include in every package, which adds a warm, personal touch that large commercial retailers simply cannot replicate.
When writing your online product listings, make sure to optimize your titles and descriptions with relevant search terms to help potential buyers find your shop easily. Use descriptive phrases that highlight the handmade nature, quality materials, and potential uses of the item, such as a guardian angel gift or a confirmation favor. This careful approach to SEO ensures your listings rank higher on search engines and attract steady organic traffic to your store.
Social media platforms are incredibly powerful tools for promoting your craft business and connecting directly with fellow handmade enthusiasts around the world. Share short video clips or reels showing behind-the-scenes moments of your crafting process, showing exactly how you assemble an angel from start to finish. Audiences love watching raw, authentic creative processes, and these engaging videos are an excellent way to build trust and excitement around your brand.
Finally, always maintain excellent customer service by responding promptly to questions, shipping orders on time, and addressing any concerns with kindness and professionalism. Building a loyal community around your unique handmade creations takes patience and consistency, but the rewards of sharing your art are truly unparalleled. With these professional tips in mind, you are fully equipped to take your crafting journey to a whole new level of success.
Frequently Asked Questions (FAQ)
What is the best wire gauge to use for making a bead angel?
For this specific project, a 20-gauge or 22-gauge headpin or wire is highly recommended. A 20-gauge wire is sturdy enough to hold its shape perfectly under daily use on a keychain, while still being malleable enough to bend and wrap without straining your hands. If your beads have exceptionally small holes, a 22-gauge wire is a great alternative that still offers adequate structural strength.
Can I make this project if I have absolutely no prior jewelry-making experience?
Yes, absolutely! This project is widely considered one of the absolute best entry points for beginners because it uses a very straightforward stacking method and requires only basic wire loops. The simple steps outlined in this tutorial are designed to help you build confidence with jewelry pliers quickly, allowing you to achieve beautiful results on your very first try.
Where can I find the specific angel wing spacer beads needed for this project?
Angel wing spacers are highly popular items that can be found easily at local craft and bead shops, as well as major online retailers and specialty jewelry supply stores. They are available in a massive variety of sizes, metal finishes (like silver, gold, and bronze), and highly detailed designs, making it easy to find options that match your project style.
How long does it typically take to make a single angel keychain?
Once you have organized your tools and practiced the basic wire-wrapping loop a few times, a single keychain can be completed in less than five to ten minutes. Because the assembly process is so incredibly fast and efficient, it is a fantastic project for assembly-line style production when you need to create dozens of items for large group gifts or craft fairs.
Are these keychains durable enough to be carried in a pocket every day?
Yes, provided you use high-quality metal findings and secure your wire loops correctly with a proper wrap. Using a wrapped loop instead of a simple open loop prevents the wire from pulling open under pressure, ensuring your angel remains safely attached to the hardware even with heavy daily handling.
Conclusion
To summarize what we have covered, this Easy Angel keychain – Tutorial has guided you through the entire process of sourcing quality beads, assembling the angel silhouette, and mastering the essential wire-wrapping techniques needed to create a durable, gorgeous accessory.
We also explored how simple adjustments to colors and textures can completely transform the design for personalized gifts, and discussed professional strategies for packaging and marketing your items to build a successful handmade business.