Granny Squares Crochet – Tutorial is perhaps the most iconic and timeless project any crafter can undertake, serving as a gateway for beginners and a nostalgic staple for experts. These classic blocks are the foundation of the crochet world, offering a versatile way to create everything from cozy blankets to trendy summer tops. Whether you are looking to clear out your yarn stash or start a structured heirloom project, learning the art of the Granny Squares Crochet – Tutorial provides you with a portable, modular, and incredibly satisfying creative outlet that has remained popular for generations.
The beauty of a Granny Squares Crochet – Tutorial lies in its simplicity and the infinite possibilities for customization. Traditionally, these squares are worked from the center outward, using a combination of double crochet stitches and chain spaces to create a lace-like, geometric pattern. By mastering this basic unit, you unlock the ability to design complex patterns by simply joining different colors and textures together. It is an accessible craft that requires very few tools—just a crochet hook, some yarn, and a little bit of patience to get your tension just right.
In this comprehensive Granny Squares Crochet – Tutorial, we will dive deep into the essential techniques and terminology needed to master this craft. From understanding the magic ring to perfecting the slip stitch join, every step is designed to help you produce professional-looking squares. We will focus on high-quality SEO-optimized advice to ensure your projects are not only beautiful but structurally sound. Let’s explore the fundamental building blocks that make these squares a beloved favorite in the fiber arts community.
1. Understanding the Foundation of Granny Squares Crochet – Tutorial
The core of any Granny Squares Crochet – Tutorial begins with the “Granny Cluster.” This term refers to a group of three double crochet (dc) stitches worked into the same space. These clusters create the signature “blocky” look of the square. Understanding how to space these clusters with chain stitches is vital for maintaining a flat, even shape that doesn’t curl at the edges.
Another essential term is the Magic Ring (or Magic Circle). While some patterns suggest starting with a chain-four loop, the magic ring allows you to pull the center of your square tight, leaving no visible hole. In a Granny Squares Crochet – Tutorial, using a magic ring gives your work a polished, modern finish. It is the preferred method for contemporary designers who want a seamless look.
Chain Spaces (ch-sp) are the “windows” between your clusters. In a standard Granny Squares Crochet – Tutorial, you typically chain two to create a corner and chain one to separate clusters on the sides. These spaces are where you will insert your hook in the subsequent rounds. Mastering the count of these chains ensures that your square remains a perfect 90-degree geometry rather than turning into a circle.
The Slip Stitch (sl st) is the unsung hero of crochet construction. It is used to join the end of a round to the beginning, creating a continuous loop. In our Granny Squares Crochet – Tutorial, the slip stitch is also used to “travel” across the top of stitches to reach a corner space. This technique allows you to start your next round in the correct position without cutting the yarn.
Yarn Over (yo) is the fundamental movement of the hook that precedes almost every stitch. While it sounds basic, the consistency of your yarn over determines the height and tension of your clusters. In this Granny Squares Crochet – Tutorial, keeping your yarn over pressure consistent is the secret to making sure all your squares are exactly the same size when it comes time to join them.
Lastly, Fastening Off is the process of securing your yarn once the square is complete. A clean finish is crucial for Granny Squares Crochet – Tutorial success, as loose ends can unravel over time. We recommend leaving a “tail” of at least six inches. This ensures you have enough length to weave the end back into the stitches using a tapestry needle for maximum security and neatness.
2. Essential Tools and Materials for Your Crochet Journey
To follow a Granny Squares Crochet – Tutorial effectively, you must choose the right hook size. Most beginners find success with a 5.0mm (H) hook, which pairs perfectly with worsted weight (level 4) yarn. The hook size influences the “drape” of your square; a larger hook creates a floppier, softer square, while a smaller hook creates a stiff, dense fabric ideal for bags or coasters.
Yarn Weight is a critical factor in the outcome of your project. For this Granny Squares Crochet – Tutorial, we emphasize using acrylic or cotton blends for their durability and stitch definition. Variegated yarn can create an automatic color-change effect, but using solid colors for each round helps you see the “anatomy” of the stitches more clearly while you are still learning the rhythm of the pattern.
Stitch Markers are highly recommended for keeping track of your corners. In a Granny Squares Crochet – Tutorial, it is easy to accidentally skip a corner or add an extra cluster on a side. Placing a small plastic marker in the corner chain-two space helps you visualize the four-sided structure. This prevents the “spiraling” effect where a square starts to look like a lopsided hexagon.
A sharp pair of Craft Scissors and a Tapestry Needle (also called a darning needle) are non-negotiable. Because a Granny Squares Crochet – Tutorial often involves multiple color changes, you will have many ends to weave in. A blunt-tipped needle allows you to hide the yarn tails within the “bulky” part of the clusters, making the front and back of your work look almost identical.
Blocking Mats and T-pins are advanced tools that elevate your Granny Squares Crochet – Tutorial results. Blocking is the process of wetting your finished squares and pinning them to a specific measurement to dry. This “sets” the fibers and ensures every square is perfectly uniform. If you plan on joining fifty squares for a blanket, blocking is the difference between a wavy mess and a professional heirloom.
Finally, consider your Yarn Tension. This isn’t a physical tool, but rather a skill developed during a Granny Squares Crochet – Tutorial. Holding the yarn too tightly will make your hook difficult to insert, while holding it too loosely will result in “gappy” clusters. Practice maintaining a relaxed but firm grip to ensure your double crochet stitches are uniform in height and width throughout the piece.
3. Step-by-Step Execution of the Classic Pattern
To begin your Granny Squares Crochet – Tutorial, create your magic ring and chain three (this counts as your first double crochet). Work two more double crochets into the ring, then chain two. Repeat the pattern of “three double crochets, chain two” three more times until you have four clusters. Pull the ring tight and slip stitch to the top of your initial chain-three to close the first round.
For the second round of this Granny Squares Crochet – Tutorial, you need to reach the corner space. You can either turn your work or slip stitch across. In the corner space, work “three double crochets, chain two, three double crochets.” This creates the increase that allows the square to grow. Repeat this in all four corners, separating the corner groups with a single chain stitch if desired for a more open look.
As you progress to round three, the Granny Squares Crochet – Tutorial introduces “side spaces.” You will now have spaces on the flat sides of the square that are not corners. In these side spaces, you only work one cluster of three double crochets. In the corners, you always work the “two cluster” grouping to maintain the 90-degree angles. This logic continues indefinitely for larger squares.
Color changes are where a Granny Squares Crochet – Tutorial gets exciting. To change colors, finish your final slip stitch of the round with the new color. Alternatively, fasten off the old color and join the new yarn directly into any corner space. Using a variety of colors emphasizes the “vintage” aesthetic that has made these squares a staple of bohemian fashion and home decor for decades.
One common mistake in a Granny Squares Crochet – Tutorial is “flipping” the square. To keep your work looking crisp, some crocheters prefer to turn the square over after every round. This prevents the square from developing a slight “slat” or twist that can happen when working only on the right side. It ensures that the stitch definition remains balanced on both the front and the back.
Joining your squares is the final phase of the Granny Squares Crochet – Tutorial. You can use a whip stitch with a tapestry needle for a flat seam, or a single crochet join for a decorative, raised ridge. The method you choose depends on the desired texture of your final project. Always ensure your clusters line up perfectly before you begin joining to maintain the geometric integrity of the design.
4. Advanced Variations and Creative Applications
Once you have mastered the basic Granny Squares Crochet – Tutorial, you can experiment with the “Solid Granny Square.” Unlike the traditional version, this variation eliminates the large holes by working double crochets into every stitch from the previous row. It creates a much warmer, denser fabric that is perfect for winter coats or heavy cushions while still following the modular “square” logic.
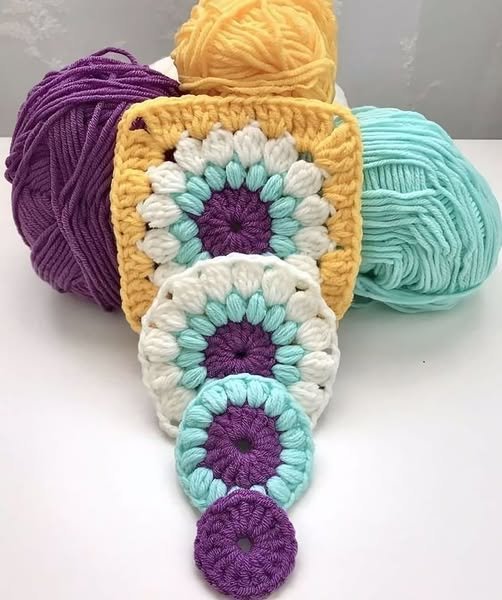
The “Sunburst” or “Sunflower” square is another popular evolution of the Granny Squares Crochet – Tutorial. This version starts with a circular center using puff stitches or popcorn stitches to create texture. The final rounds then “square off” the circle. These are incredibly popular for modern “cottagecore” aesthetics and allow for beautiful color gradients that mimic real floral patterns.
Incorporating Post Stitches (front post or back post double crochet) into your Granny Squares Crochet – Tutorial adds a 3D architectural element. These stitches wrap around the “stem” of the stitch below rather than the top loops. This creates ridges and valleys, giving the square a tactile quality that is very appealing for sensory blankets or high-end interior design accents.
Size variation is a key takeaway from this Granny Squares Crochet – Tutorial. You don’t have to stop at five or six rounds. You can continue the pattern until you have one “Giant Granny Square” that functions as a full-sized baby blanket. This eliminates the need for joining and allows the yarn’s color transitions to take center stage, especially when using “cake” yarns with long color changes.
In terms of SEO for crafters, searching for “Granny Square Patterns” will yield thousands of results, but the most successful projects often combine different styles. You can mix a traditional Granny Squares Crochet – Tutorial block with a solid block to create a “checkered” effect. This contrast in texture makes the final piece look more intricate and professionally designed than a monochromatic project.
Finally, remember that the Granny Squares Crochet – Tutorial is a sustainable way to use “scrap yarn.” Even the smallest leftover balls of yarn can be turned into a colorful center or a final border. This eco-friendly approach to crafting not only saves money but also results in unique, one-of-a-kind items that cannot be replicated by mass production, celebrating the true spirit of handmade art.
FAQ – Frequently Asked Questions
How long does it take to learn the Granny Squares Crochet – Tutorial?
Most beginners can learn the basic steps in about 30 to 60 minutes. Mastering the tension and achieving a perfect square shape usually takes a few days of practice.
What is the best yarn for a beginner’s Granny Squares Crochet – Tutorial?
A smooth, light-colored worsted weight acrylic yarn is best. Light colors make it easier to see where to insert your hook, and acrylic is forgiving if you need to unravel and start over.
Why is my granny square curling at the edges?
Curling usually happens because your tension is too tight or you have missed the chain stitches in the corners. Make sure you are adding enough stitches in the corners to allow the fabric to lie flat.
Can I make a granny square without the holes?
Yes! You can follow a “Solid Granny Square” variation of the Granny Squares Crochet – Tutorial where you work stitches into every available space instead of using chain gaps.
How do I wash a project made from Granny Squares?
It depends on the yarn fiber. If you used acrylic, you can usually machine wash on a gentle cycle. If you used wool, hand washing and laying flat to dry is essential to prevent shrinking or felting.
Do I have to change colors every round?
Not at all. While the traditional Granny Squares Crochet – Tutorial looks great with many colors, a “monochrome” square in a single solid color looks very modern and sophisticated.
Conclusion
This Granny Squares Crochet – Tutorial has covered everything from the foundational magic ring and double crochet clusters to advanced joining techniques and material selection. By understanding the rhythm of the corners and side spaces, you have gained the skills to create an endless array of textile projects.
Crochet is a journey of patience and creativity, and the granny square is your most reliable companion on that path. We hope this guide empowers you to pick up your hook and start your next masterpiece today.