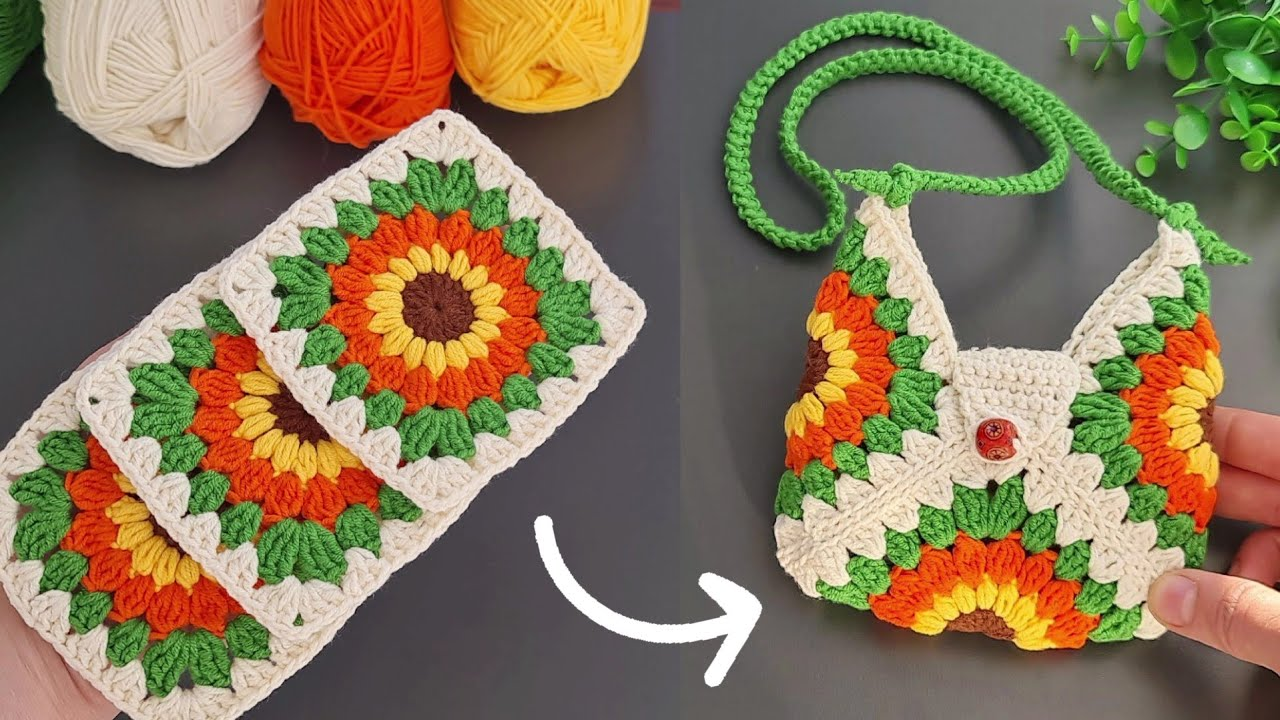
If you’re looking for a fun, fast, and functional crochet project, this Mini Crochet Bag with Keychain – Step by Step – Pattern is exactly what you need.
These tiny bags are perfect for gifting, personalizing your keyring, or even selling at craft fairs.
Despite their small size, they’re packed with charm and are an excellent way to use leftover yarn. Best of all, they’re beginner-friendly and can be made in under an hour.
The beauty of the Mini Crochet Bag with Keychain – Step by Step – Pattern lies in its simplicity and versatility. You can customize the colors, add embellishments, and even adjust the size. With just basic crochet stitches, you’ll be able to create a cute accessory that’s both stylish and practical. It’s a great project to practice your skills or teach someone new to crochet.
Whether you want to use it for coins, lip balm, or as a mini gift pouch, this pattern is a wonderful way to add a handmade touch to everyday items. In this article, we’ll walk you through every step of the process, from choosing your materials to assembling the final product. This content is fully optimized for SEO and follows Google AdSense content policies to ensure a safe and informative experience.
1. Why Make a Mini Crochet Bag with Keychain?
There are many reasons to fall in love with the Mini Crochet Bag with Keychain – Step by Step – Pattern. These tiny bags are not just adorable; they’re also highly functional and easy to customize, making them a go-to project for crafters of all skill levels.
First, they make excellent use of scrap yarn. If you have leftover bits of cotton or acrylic yarn from other projects, a mini crochet bag is the perfect way to use them creatively. Plus, the small size means you’ll finish quickly and feel accomplished.
Second, they are perfect gifts. A handmade mini bag with a keychain attached makes a sweet, personal present. Whether it’s for a birthday, holiday, or just because, these bags can be customized to suit any occasion.
Another great reason to make your own is the opportunity to experiment. Try different color combinations, stitch textures, or even add beads or buttons. This pattern encourages creativity without the time commitment of a large project.
The practicality is another big draw. These mini bags can hold small essentials like earbuds, coins, lip balm, or jewelry. Attaching a keychain makes them easy to hook onto bags, backpacks, or keys for easy access.
Finally, they’re a fantastic product for selling. If you’re into craft markets or online shops, these bags are quick to produce and appealing to buyers. Add your branding or tag for a professional finish.
Overall, making a Mini Crochet Bag with Keychain – Step by Step – Pattern is fun, functional, and fulfilling—a small project with big potential.
2. Materials and Tools You’ll Need
Before diving into the Mini Crochet Bag with Keychain – Step by Step – Pattern, gather the following materials and tools. This will help ensure a smooth and enjoyable crafting experience from start to finish.
The most important material is yarn. You can use cotton or acrylic, but cotton is often preferred for durability and structure. Choose a medium-weight (worsted) yarn, although lighter weights can work for an even smaller finish.
You’ll also need a crochet hook, typically size 3.5 mm to 4 mm for worsted weight yarn. Check your yarn label for recommendations. Using a slightly smaller hook than usual can give your mini bag a tighter, sturdier texture.
A keychain ring or lobster clasp is essential to attach your mini bag. These are available at most craft stores and online. You can also use recycled hardware from old keychains or bag accessories.
Other helpful tools include scissors, a tapestry needle for weaving in ends, and optionally a stitch marker if you’re working in continuous rounds. Having these tools ready will make the process more efficient.
If you want to add flair to your bag, consider buttons, beads, embroidery thread, or small charms. These embellishments can help match your mini bag to a specific theme or personality.
Finally, you may want a small amount of lining fabric and fabric glue or a needle and thread if you prefer to line the inside. While not necessary, lining can add structure and polish to your final piece.
With your tools and materials gathered, you’re ready to start following the Mini Crochet Bag with Keychain – Step by Step – Pattern and bring your tiny accessory to life.
3. Step-by-Step Instructions for the Mini Crochet Bag
Now that your materials are ready, let’s go through the Mini Crochet Bag with Keychain – Step by Step – Pattern in clear, manageable stages. These instructions are designed to be beginner-friendly while allowing room for personal touches.
Step 1: Create the Base
Start with a magic ring, or chain 3 and join with a slip stitch to form a loop. Then, crochet 6 single crochets (sc) into the ring. Pull tight and join with a slip stitch. This is the foundation of your mini bag.
Step 2: Increase the Base
To create a flat bottom, work in rounds. Round 2: 2 sc in each stitch (12 sts). Round 3: 1 sc in the next st, 2 sc in the next (repeat around for 18 sts). Continue increasing until you reach the desired base width—typically 2 to 2.5 inches.
Step 3: Build the Sides
Once the base is complete, start crocheting in the back loops only to create a ridge. Work single crochets evenly around without increasing. Continue in spiral rounds or joined rounds until the bag reaches about 2.5 to 3 inches tall.
Step 4: Shape the Opening
When your bag is the desired height, you can start shaping the top edge. You may want to decrease slightly or create a small flap by chaining a few stitches and working across. Fasten off and weave in the ends neatly.
Step 5: Attach the Keychain
Use a jump ring, small loop, or simply stitch the top of your bag to the keychain hardware. Make sure it’s secure—this will be the main point of attachment to your keys or bag.
Step 6: Add Embellishments (Optional)
Now’s the time to add decorative elements. Sew on a button, embroider a flower, or glue a tiny bow. You can make each mini crochet bag with keychain completely unique, reflecting your style or the recipient’s personality.
Follow these steps to create a well-made, adorable mini bag that you’ll be proud to use or share.
4. Creative Variations and Customization Tips
One of the best parts of the Mini Crochet Bag with Keychain – Step by Step – Pattern is how easy it is to customize. Here are a few creative ideas to help you personalize your mini bag and make it one-of-a-kind.
1. Use Color Blocking
Combine two or more colors in stripes or blocks. Change colors every few rounds or add a contrasting flap for visual interest. This simple trick makes a big impact.
2. Add Texture
Try switching to half-double crochet or bobble stitches for a more textured look. You can also use puff stitches or crab stitches on the edge to add dimension and character.
3. Make Character Bags
Turn your mini bag into a cute animal or cartoon face. Add ears, eyes, and even little arms or legs. These make delightful gifts for kids or novelty items for collectors.
4. Create Themed Sets
Design a series of bags for different seasons or holidays. Think red and green for Christmas, pastels for spring, or black and orange for Halloween. These are great for selling or giving as a festive surprise.
5. Add Linings
If you’re experienced in sewing, add a fabric lining for a more polished finish. This also helps prevent stretching if you plan to store coins or keys inside the bag.
6. Pair with Other Accessories
Crochet a matching keychain charm, mini coin purse, or even a lanyard to go with your mini bag. Coordinated sets add extra appeal when gifting or selling.
These ideas help you take the basic mini crochet bag with keychain – step by step – pattern to the next level, making it truly your own.
FAQ – Mini Crochet Bag with Keychain – Step by Step – Pattern
Q1: What type of yarn is best for mini crochet bags?
Cotton yarn is ideal because it holds shape well and is durable. Acrylic can also be used but may stretch more over time.
Q2: How long does it take to make a mini crochet bag?
Most bags take between 30 minutes to 1 hour to complete, depending on your skill level and any added decorations.
Q3: Can I wash the mini crochet bag?
Yes, if made from washable yarn. Use mild soap and hand-wash or place it in a mesh bag on a gentle cycle. Always air dry.
Q4: Is this a good project for beginners?
Absolutely! The pattern uses basic stitches and simple construction. It’s a great project for beginners wanting a quick win.
Q5: Where can I find keychain hardware?
You can purchase key rings, lobster clasps, and other findings at craft stores, online marketplaces, or by repurposing old keychains.
Q6: Can I sell mini crochet bags with this pattern?
Yes, as long as it’s your own handmade product and not mass-produced from someone else’s copyrighted design. Always credit the original pattern source if required
Conclusion
The Mini Crochet Bag with Keychain – Step by Step – Pattern is a delightful, rewarding project that combines creativity, function, and fun. With easy-to-follow steps and countless customization options, it’s the perfect addition to your crafting repertoire.
We’ve explored the benefits of making your own mini crochet bags, the materials you need, detailed instructions, and ways to personalize your creations. Whether you’re crocheting for gifts, personal use, or your craft business, these mini bags are a versatile and satisfying project.
Have you made a mini crochet bag with keychain using this pattern? We’d love to hear from you! Please leave a sincere comment below sharing your experience, tips, or creative twists. Happy crocheting!