Starting a new craft project like the Strawberry Fields Bracelet Crochet – Tutorial is a wonderful way to blend your love for nature-inspired aesthetics with the meditative art of needlework. There is something profoundly satisfying about seeing a simple skein of red and green yarn transform into a delicate piece of jewelry that looks like it was plucked straight from a summer garden. This specific pattern has gained massive popularity in the DIY jewelry community because it offers a perfect balance of whimsical charm and technical simplicity, making it a favorite for both seasoned creators and those just picking up a hook for the first time.
If you have been searching for a project that is quick to finish but yields professional-looking results, the Strawberry Fields Bracelet Crochet – Tutorial is exactly what you need to level up your accessory game. Crochet jewelry is often overlooked in favor of larger garments, but the fine detail required for a strawberry stitch or a picot edge can truly showcase your skill level. These bracelets make for incredible personalized gifts, summer fair inventory, or just a bright pop of color to wear on your own wrist during those sunny afternoon walks.
In this comprehensive guide, we are going to dive deep into every loop and stitch required to master the Strawberry Fields Bracelet Crochet – Tutorial. We will cover everything from selecting the right mercerized cotton yarn to ensuring your tension is consistent enough to keep those tiny berries looking plump and vibrant. By the end of this read, you will not only have a beautiful piece of handmade jewelry but also the confidence to experiment with your own variations of this classic botanical crochet theme.
1 Understanding the Strawberry Fields Bracelet Crochet – Tutorial Essentials
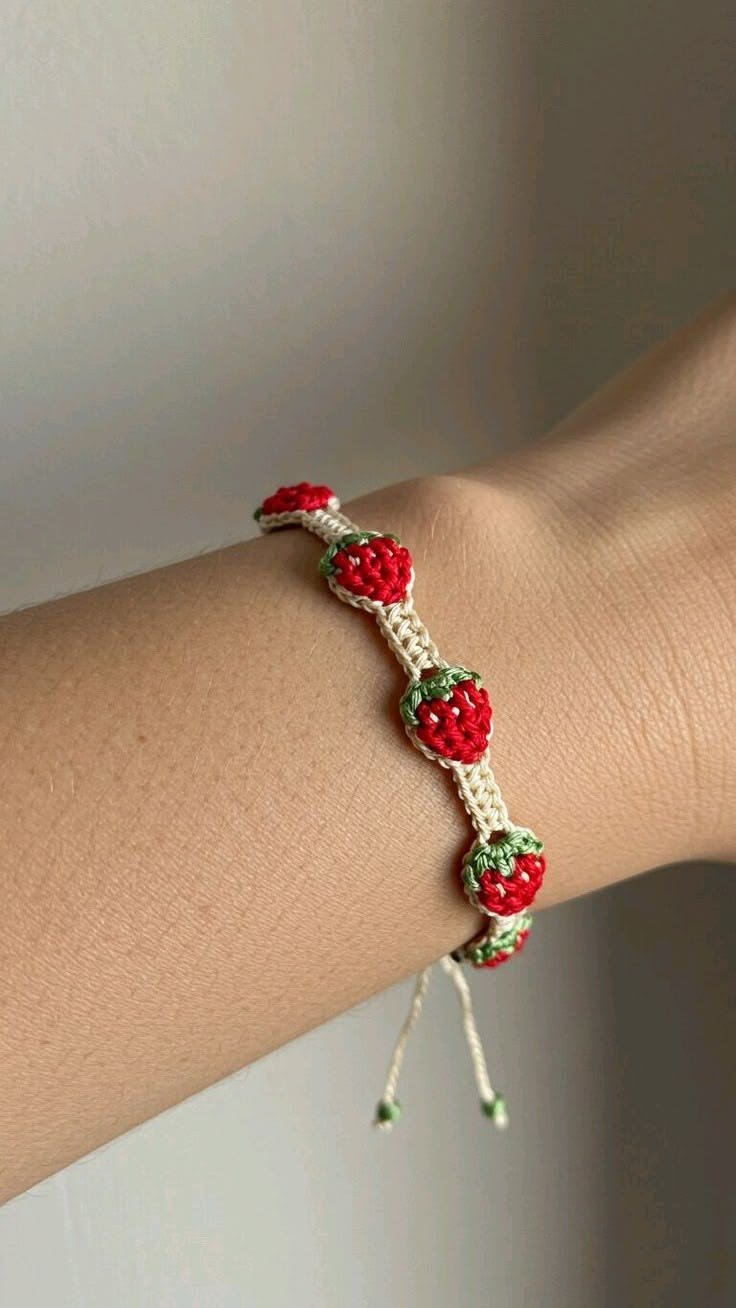
The first step in mastering the Strawberry Fields Bracelet Crochet – Tutorial is understanding exactly what this project entails. At its core, this is a micro-crochet or small-scale project that uses cluster stitches to mimic the texture of real strawberries. The “Strawberry Fields” aesthetic refers to a repeating pattern of red “berries” nestled between green “leaves” or vines, creating a continuous band that wraps comfortably around the wrist.
To get started with this crochet jewelry pattern, you need to understand the concept of the bobble stitch. In the context of this tutorial, the bobble creates the 3D effect of the fruit. By working multiple incomplete double crochets into a single stitch and then closing them together, you create a raised bump that serves as the star of your handmade accessory. It is the foundation of the entire visual appeal of the piece.
Another essential element is the foundation chain. Because a bracelet needs to be durable, we often use a cord-style base or a very tight chain to ensure it doesn’t stretch out over time. When following a Strawberry Fields Bracelet Crochet – Tutorial, you will learn that the length of your starting chain determines the fit, but the “give” of the yarn must be accounted for to prevent the bracelet from slipping off.
We must also discuss the importance of thread weight. Most standard tutorials for this bracelet suggest using Size 10 crochet thread or a very fine fingering weight yarn. Using a standard worsted weight would result in a “strawberry” that is too bulky for a delicate wrist. This tutorial focuses on the “micro” aspect, ensuring that your crochet strawberries look elegant rather than chunky.
Color transitions are the secret sauce of the Strawberry Fields Bracelet Crochet – Tutorial. You aren’t just working with one color; you are frequently switching between “Strawberry Red,” “Leaf Green,” and often a “Cream” or “White” for the connecting vines. Learning to carry your yarn or join new colors seamlessly is a skill this step-by-step crochet guide will help you refine, ensuring no messy knots are visible.
Lastly, the “Tutorial” aspect means we are looking at a structured set of instructions. This isn’t just about winging it; it’s about following a specific stitch count and row repeat. Consistency is key in handmade crochet jewelry, as even one extra stitch can make one strawberry look significantly larger than the others, throwing off the symmetry of your beautiful strawberry fields creation.
2 Selecting Materials for Your Strawberry Fields Bracelet Crochet – Tutorial
Choosing the right materials is arguably the most important part of the Strawberry Fields Bracelet Crochet – Tutorial process. You want to look for mercerized cotton. This type of cotton has been treated to give it a slight sheen and, more importantly, to make it stronger and less likely to pill. Since a bracelet experiences a lot of friction against skin and clothing, high-quality cotton yarn is a non-negotiable for longevity.
The hook size you choose will make or break your Strawberry Fields Bracelet Crochet – Tutorial experience. For fine thread, you will typically use a steel crochet hook, ranging from 1.25mm to 1.75mm. If the hook is too large, your berries will have gaps where the stuffing (or just the air) shows through. If it’s too small, you’ll struggle to catch the thread, leading to frayed ends and frustration.
Don’t forget the jewelry findings. While some people prefer an all-yarn closure (like a button and loop), others prefer to use lobster claws and jump rings. If you want a more “high-end” look for your crochet bracelet, integrating metal hardware is a great way to do it. You will need a pair of jewelry pliers to attach these securely to the ends of your crocheted piece.
Color selection allows for creative expression within the Strawberry Fields Bracelet Crochet – Tutorial. While classic red and green are the standard, many crafters are now opting for “Wild Strawberry” pinks or even deep burgundy for a “Blackberry” variation. Ensure your green yarn is a vibrant, leafy shade to provide enough contrast against the red, making the crochet fruit pop visually.
Stitch markers are your best friend when working on such a small scale. In a Strawberry Fields Bracelet Crochet – Tutorial, it is very easy to lose track of where your “leaf” ends and your “berry” begins. Using mini stitch markers or even a scrap piece of contrasting thread will help you keep your place in the stitch pattern without having to recount your work every two minutes.
Finally, you will need a sharp tapestry needle with a small eye. Since you are working with fine thread, a standard yarn needle will be too blunt and bulky to weave in your ends. Proper finishing is what separates an amateur project from a professional crochet accessory. Tucking those ends away neatly is the final, crucial step in completing your Strawberry Fields Bracelet Crochet – Tutorial.
3 Step-by-Step Stitch Guide for Strawberry Fields Bracelet Crochet – Tutorial
The actual construction of the Strawberry Fields Bracelet Crochet – Tutorial begins with the green vine. You will typically start by crocheting a base chain that matches your wrist circumference. A common technique is to work a series of slip stitches and chains to create a sturdy but flexible cord. This acts as the “soil” from which your strawberries and leaves will eventually grow.
Next comes the “Leaf Row.” In this part of the Strawberry Fields Bracelet Crochet – Tutorial, you will use chain loops or picot stitches to create small green bumps. These represent the calyx of the strawberry. It’s important to keep these stitches tight; if they are too loose, the strawberry won’t sit flush against the vine, and your crochet bracelet might look a bit disorganized or floppy.
Now, we introduce the red thread for the strawberry stitch. This is usually done by joining the red yarn into the center of your green “leaf.” You will work a 5-dc popcorn stitch or a cluster stitch. To do this, work 5 double crochets into the same space, pull your hook out, re-insert it into the first dc, and pull the loop through. This creates that iconic 3D strawberry shape that defines the Strawberry Fields Bracelet Crochet – Tutorial.
Once the berry is formed, you’ll switch back to green to “close” the top and move to the next section of the vine. This color work crochet requires a bit of patience. The “float” (the yarn carried behind the work) should not be too tight, or it will bunch up the bracelet. Keeping a relaxed but firm tension is the secret to a professional-looking Strawberry Fields Bracelet Crochet – Tutorial result.
Repeat the process until you have reached your desired length. Most adult wrists require between 5 to 8 strawberries, depending on the spacing. As you move through the Strawberry Fields Bracelet Crochet – Tutorial, try on the piece frequently. Remember that adding a clasp or button will add about half an inch to an inch of length, so don’t over-crochet the main body of the bracelet.
The final step in the stitching process is the border and closure. Many creators like to add a final row of reverse single crochet (the crab stitch) along the edges of the vine to give it a finished, “store-bought” look. Following the Strawberry Fields Bracelet Crochet – Tutorial to the letter ensures that your dimensions stay true and your crochet jewelry remains a piece you are proud to wear or sell.
4 Expert Tips for Finishing Your Strawberry Fields Bracelet Crochet – Tutorial
Once the stitching is done, the Strawberry Fields Bracelet Crochet – Tutorial isn’t quite over. Blocking is a step many beginners skip, but it is vital. Because crochet can curl, especially with fine thread, you should pin your bracelet down to a foam board and lightly steam it. This sets the stitches and ensures your strawberry fields stay flat and beautiful instead of twisting around your wrist.
If you find that your strawberries are looking a bit “flat” or losing their shape, you can add a tiny drop of fabric stiffener to the back of each berry. This helps the 3D crochet effect hold up even after weeks of wear. Just be careful not to use too much, or the crochet bracelet will become scratchy and uncomfortable against the skin, defeating the purpose of a soft handmade accessory.
For the closure, I highly recommend a button closure using a small, vintage-style flower button. This complements the Strawberry Fields Bracelet Crochet – Tutorial perfectly. Simply crochet a small loop of chains at one end of the bracelet and sew the button to the other. It’s secure, easy to put on by yourself, and adds another layer of “cottagecore” charm to the botanical design.
Let’s talk about SEO for crafters. If you are making this to sell on platforms like Etsy, use the terms from this Strawberry Fields Bracelet Crochet – Tutorial in your listing. Keywords like “Handmade Strawberry Bracelet,” “Crochet Fruit Jewelry,” and “Summer Crochet Trends” are essential for getting your work seen by the right audience. High-quality photos of the bracelet being worn will also increase your conversion rates significantly.
Durability is key, so always double-knot your thread ends before weaving them in. Because thread is slippery, it can come undone more easily than wool. Use a tiny dab of clear fabric glue on the final knot for extra security. This ensures that your hard work on the Strawberry Fields Bracelet Crochet – Tutorial doesn’t unravel the first time someone accidentally snags the bracelet on a sweater.
Lastly, don’t be afraid to customize! The beauty of the Strawberry Fields Bracelet Crochet – Tutorial is that it is a template. You can add tiny yellow beads to the red berries to act as “seeds,” or use a variegated green thread for the leaves to give them more depth. The more you personalize your crochet projects, the more unique and “you” they become, which is the whole point of the crafting community.
FAQ – Frequently Asked Questions
What is the best yarn for the Strawberry Fields Bracelet Crochet – Tutorial?
The best choice is Size 10 mercerized cotton thread. It provides the necessary stitch definition and durability for jewelry. Avoid fuzzy yarns or thick wools, as they will obscure the delicate strawberry stitch details.
How long does it take to complete this tutorial?
For an intermediate crocheter, the Strawberry Fields Bracelet Crochet – Tutorial usually takes about 1 to 2 hours. Beginners might take a bit longer as they get used to the color changes and working with a smaller hook.
Can I wash my crocheted strawberry bracelet?
Yes, but you should do it carefully. Hand wash in cool water with a mild detergent and lay it flat to dry. Do not wring it out, as this can distort the 3D crochet strawberries and stretch the vine.
Is this pattern suitable for beginners?
If you know the basic stitches (chain, single crochet, double crochet), you can definitely attempt the Strawberry Fields Bracelet Crochet – Tutorial. The only “tricky” part is the popcorn stitch, but with a little practice, it becomes very repetitive and easy to master.
How do I adjust the size for a child?
To make a smaller version of the Strawberry Fields Bracelet Crochet – Tutorial, simply reduce the number of foundation stitches and the number of strawberry repeats. You can also use a slightly smaller hook (like a 1.0mm) to scale down the entire piece.
What other items can I make with this strawberry stitch?
Once you’ve mastered the Strawberry Fields Bracelet Crochet – Tutorial, you can apply the same logic to make matching earrings, a necklace, or even a cute decorative trim for a summer hat or the hem of a denim skirt.
Conclusion
In conclusion, the Strawberry Fields Bracelet Crochet – Tutorial is more than just a craft project; it is a gateway into the intricate and rewarding world of crochet jewelry.
Throughout this article, we have explored the essential materials, the specific stitch techniques like the popcorn and cluster stitches, and the expert finishing touches that turn a simple piece of thread into a work of art. By focusing on mercerized cotton, maintaining consistent tension, and utilizing proper blocking techniques, you can create a durable and stunning accessory that captures the essence of summer.