The Windowpane Crochet Tote – Pattern has become a beloved project for crafters looking to blend practicality with beauty.
This modern, minimalist crochet tote showcases a structured and elegant design that mimics the appearance of a classic windowpane grid.
It’s not only a stylish accessory but also a functional bag that can be used for everyday errands, beach days, or weekend markets.
What makes the Windowpane Crochet Tote – Pattern especially appealing is its clean lines and openwork texture, making it lightweight yet sturdy. This crochet project is beginner-friendly, offering simplicity in stitches while producing a professional finish. Whether you’re new to crochet or have years of experience, this tote is a perfect addition to your handmade collection.
In this article, we’ll explore how to create your own Windowpane Crochet Tote – Pattern, what materials you’ll need, step-by-step instructions, customization options, and expert tips to get the most out of your project. Let’s dive in and bring this timeless tote to life.
1. What is a Windowpane Crochet Tote?
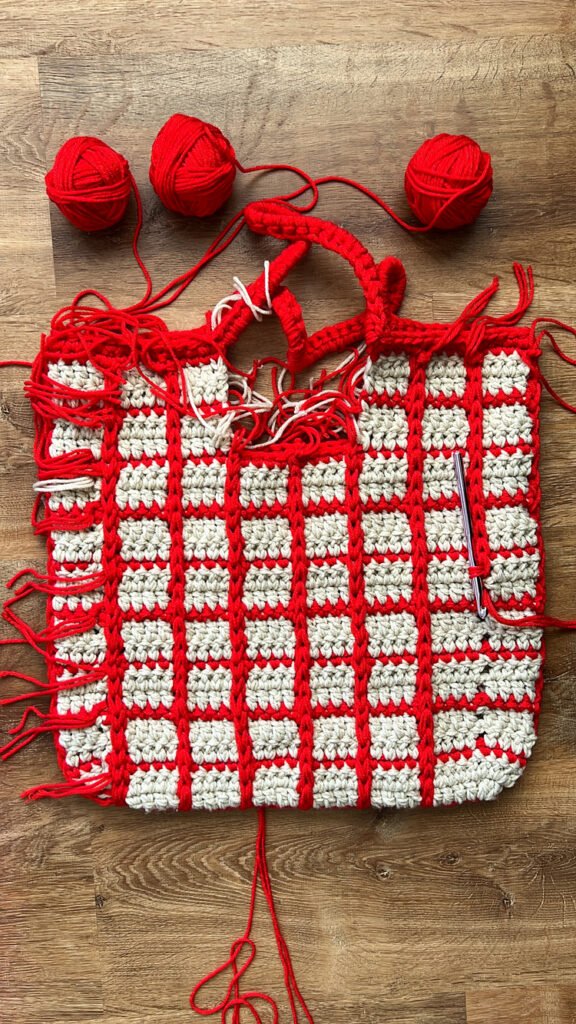
The Windowpane Crochet Tote gets its name from its unique, grid-like structure that resembles a windowpane. This design is created using a combination of open spaces and solid stitches, giving the tote a geometric and airy look that’s perfect for warm-weather wear or fashionable layering.
Unlike dense crochet bags, the windowpane pattern offers ventilation, visual interest, and versatility. It’s ideal for those who appreciate handcrafted aesthetics but also want something that’s modern and functional. Many crocheters choose to line their tote bags for extra support, while others embrace the openwork design as-is.
This tote typically uses basic stitches such as chains, single crochet, and double crochet, making it accessible to beginners. The key to success lies in maintaining even tension and consistent spacing to highlight the grid pattern effectively.
A Windowpane Crochet Tote – Pattern is often worked from the bottom up or in panels that are seamed together, depending on your preferred construction method. This flexibility allows for creative freedom and a chance to modify the tote to suit your individual taste.
From boho chic to minimalist modern, the windowpane design complements many styles. You can play with yarn colors to create contrast or stick with a solid neutral for a clean, classic finish.
Crafting a Windowpane Crochet Tote also serves as a great introduction to garment construction and can help build confidence for more advanced projects. It’s satisfying, quick to make, and endlessly customizable.
2. Materials and Tools You’ll Need
To begin your Windowpane Crochet Tote – Pattern, gathering the right materials is essential. A well-prepared project leads to better results and a more enjoyable crochet experience overall. Here are the essentials you’ll need to create your tote:
- Yarn: A sturdy, non-stretchy yarn is ideal. Cotton yarn is highly recommended for totes due to its durability and ability to hold shape. Look for a worsted weight (medium 4) cotton yarn.
- Hook: A hook that matches your yarn’s recommended size—typically a 4.5mm to 5.5mm crochet hook for worsted weight yarn—will give you the best structure. You may need to adjust based on your personal tension.
- Scissors: A sharp pair of yarn scissors ensures clean cuts and a polished finish on your tote.
- Tapestry Needle: Useful for weaving in ends and seaming panels, the tapestry needle is a must-have for any crochet project.
- Stitch Markers: These help you keep track of row starts, ends, and increases—especially helpful in maintaining symmetry in your tote’s structure.
- Optional Lining Materials: If you want to line your bag, lightweight cotton fabric and a sewing needle (or machine) will be useful. Lining adds strength and helps prevent stretching over time.
Once you have your materials ready, take a few minutes to create a gauge swatch. This helps ensure your finished tote will match the desired size and structure. Many patterns for the Windowpane Crochet Tote also include a gauge recommendation.
Choosing quality materials not only improves the look of your final project but also ensures it will last. A tote bag should be both beautiful and durable, especially if it will carry weight or be used regularly.
3. Step-by-Step Guide to the Windowpane Crochet Tote – Pattern
Creating a Windowpane Crochet Tote – Pattern is surprisingly simple once you break it down. While patterns may vary, the general structure remains similar. Below is a common method to construct the tote:
1. Start with the Base
Create a solid foundation using single crochet or half-double crochet stitches. This base acts as the support for your tote and determines its overall size. A rectangle or square base is most common.
2. Build Up the Body
Work upward in the round or in rows, alternating between chain spaces and double crochets to create the open windowpane effect. This creates the grid-like pattern that gives the tote its signature look.
3. Create Uniform Windows
Count your chains and stitches carefully to ensure the windows are evenly spaced. Use stitch markers if needed to maintain alignment and symmetry across rows.
4. Form the Handles
Once the body reaches your desired height, you can crochet sturdy straps directly onto the tote. Use tighter stitches like single crochet or even reinforce with two strands of yarn to add strength.
5. Finishing Touches
Finish the top edge with a clean border—often a round or two of single crochet. This creates a neat appearance and helps stabilize the shape of your tote.
6. Weave in Ends and Block
Secure all yarn tails with a tapestry needle and gently block your tote if needed. Blocking helps define the shape and stretch of the piece, making it look polished and professional.
Remember to refer back to the Windowpane Crochet Tote – Pattern as you work to maintain accuracy. If your pattern includes a diagram or chart, follow it closely to replicate the design correctly.
4. Customizing Your Crochet Tote
One of the best things about the Windowpane Crochet Tote – Pattern is its adaptability. You can easily tailor the project to your needs, style, or skill level. Here’s how you can personalize your tote:
1. Color Choices
Pick bold colors for a statement piece or stick with neutrals for a minimalist look. Striped yarn or color-blocking can add dimension and fun to the simple design.
2. Size Adjustments
Change the number of stitches in the foundation chain or add more rows to make the tote larger or smaller. This flexibility is great for adapting the pattern for different purposes—from mini purses to large market bags.
3. Yarn Substitutions
Experiment with different yarn fibers like jute, bamboo, or blends for a unique texture and feel. Keep in mind that some yarns may stretch more than others, especially with weight.
4. Add Lining or Closures
A fabric lining can give your bag more structure and durability. You can also add snaps, zippers, or magnetic closures for extra functionality.
5. Embellishments
Add a handmade tassel, wooden buttons, or crochet flowers to personalize your tote. These small details make your creation stand out and reflect your individual taste.
6. Reuse and Sustainability
Make your tote eco-friendly by using recycled yarn or repurposed fabric for lining. This not only helps the planet but gives your project added meaning.
By customizing your Windowpane Crochet Tote, you transform a basic pattern into something that truly represents your creativity and purpose. Whether you’re gifting it or using it for yourself, it will be one-of-a-kind.
Frequently Asked Questions (FAQ)
Q1: Is the Windowpane Crochet Tote suitable for beginners?
Yes! This pattern uses basic stitches like chain, single crochet, and double crochet, making it a great option for new crocheters looking to learn a new technique.
Q2: How long does it take to make the Windowpane Crochet Tote?
The time depends on your experience and the size of the tote, but on average, it takes between 4 to 8 hours over a few sessions.
Q3: Can I machine wash my crochet tote?
It depends on the yarn used. If using 100% cotton, it’s generally safe to machine wash on a gentle cycle. However, hand washing and air drying is always safest to preserve the tote’s shape.
Q4: Do I need to line the tote?
No, lining is optional. The open design works well as-is, but lining adds extra support if you plan to carry smaller items or heavier contents.
Q5: Can I sell the totes I make from this pattern?
Yes, many pattern designers allow for handmade items to be sold, but it’s courteous to credit the original pattern source if applicable. Always check the specific pattern license.
Q6: What size should the finished tote be?
The standard size is approximately 14 inches wide by 12 inches tall, but this can vary based on the pattern and your adjustments.
Conclusion
The Windowpane Crochet Tote – Pattern is more than just a stylish accessory—it’s a versatile, functional, and rewarding project that suits crafters of all levels. We’ve covered what makes this pattern unique, the materials you’ll need, a step-by-step construction guide, and ways to personalize your design. Whether you’re making it for yourself, a gift, or even for sale, this tote is sure to impress.
We’d love to hear your thoughts! If you’ve tried this pattern or plan to, please leave a sincere review and share any suggestions or customizations you’ve made. Your feedback helps build a stronger crafting community. Happy crocheting!