
The Easy Pot Handles and Lid Holder fabric – Tutorial is exactly what you need to transform your time in the kitchen from a chaotic, burn-prone experience into a smooth, stylish, and incredibly safe culinary adventure. Every passionate home cook knows the sudden panic of grabbing a searing hot metal handle or trying to balance a steaming lid while checking on a simmering sauce. Standard store-bought oven mitts are often too bulky, clumsy, or plain boring, which is why making your own custom kitchen accessories is such a game-changer for modern households.
If you have been looking for a practical, rewarding sewing project that combines everyday functionality with a wonderful touch of personal style, this Easy Pot Handles and Lid Holder fabric – Tutorial will guide you through every single step of the process. You do not need to be a professional tailor or own an expensive, top-tier sewing machine to find success with this project; even a absolute beginner can achieve beautiful, professional-looking results in less than an hour. By choosing your own heat-resistant materials and vibrant patterns, you can create something that perfectly matches your unique kitchen decor.
Throughout this comprehensive Easy Pot Handles and Lid Holder fabric – Tutorial, we will dive deep into the best materials to use for thermal protection, the exact cutting measurements required for a perfect fit, and the simple assembly techniques that ensure long-lasting durability. Not only will these handmade items protect your fingers from painful burns, but they also make incredibly thoughtful, eco-friendly gifts for birthdays, housewarming parties, or holiday baskets. Let’s grab our fabric scissors, thread our machines, and discover just how simple and satisfying it is to craft these essential kitchen helpers from scratch.
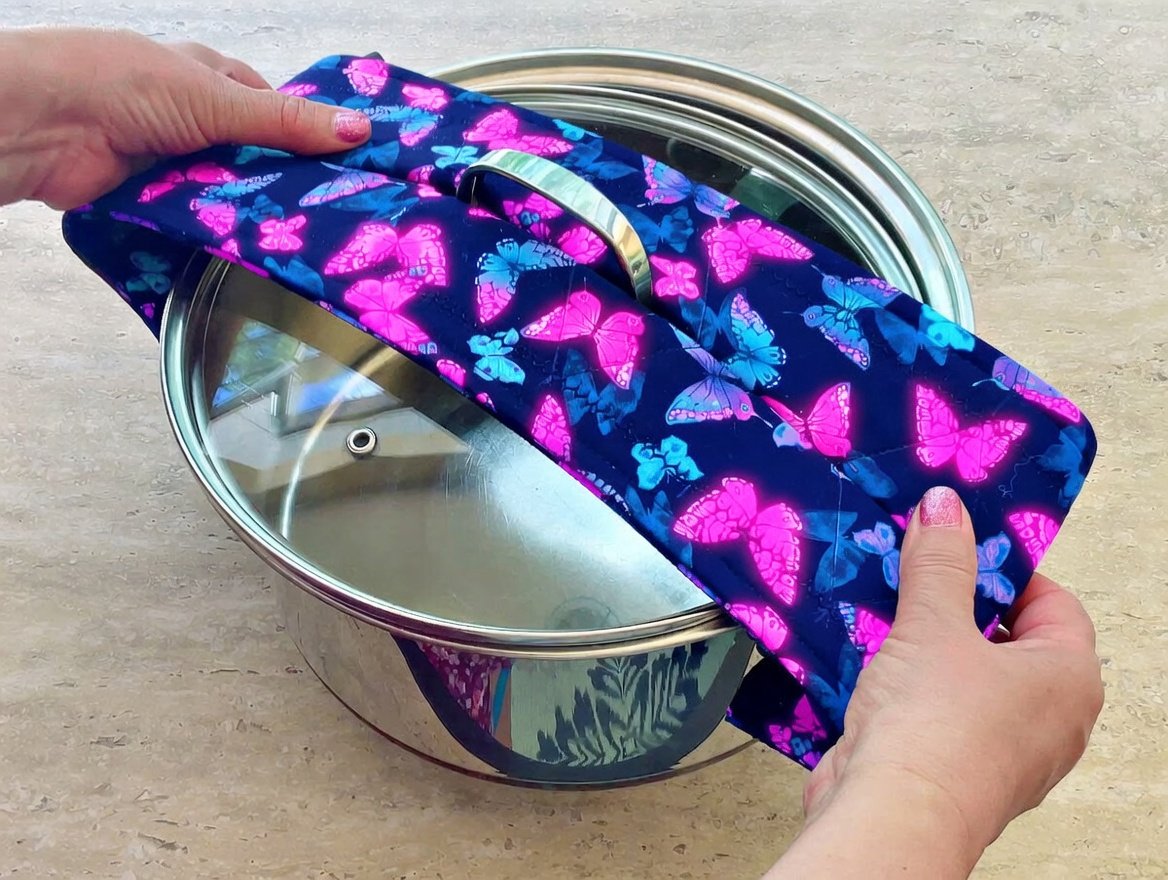
1. Choosing the Right Materials for Ultimate Heat Resistance and Safety
When embarking on this Easy Pot Handles and Lid Holder fabric – Tutorial, your absolute top priority must always be safety, which means selecting the correct fabrics and internal lining materials. Traditional synthetic fabrics like polyester, nylon, or acrylic should be avoided at all costs because they can easily melt when exposed to high temperatures, potentially causing severe burns or damaging your cookware. Instead, always opt for 100% natural cotton fabric for both the exterior and interior layers, as it breathes well and handles intense kitchen heat beautifully without degrading.
To provide a truly reliable barrier against the blistering heat of cast iron skillets and boiling pot lids, you need a specialized internal thermal lining. A layer of high-quality Insul-Bright or a similar brand of needle-punched, insulated material with a metallized polyester film is highly recommended because it actively reflects heat energy back toward its source. To make your pot handles and lid holders even safer, it is best practice to pair this reflective lining with a layer of traditional 100% cotton batting, giving your hands a comfortable, cushioned grip.
Before you begin cutting into your beautiful new fabrics, it is an essential rule of sewing to pre-wash and dry all of your cotton materials completely. Pre-washing guarantees that any natural fabric shrinkage happens before you sew the pieces together, preventing your final product from warping or distorting the very first time you throw it into the washing machine. This quick preparatory step ensures that your finished kitchen accessories retain their perfect shape, tight stitching, and reliable heat protective qualities for many years to come.
Matching your sewing thread to the heat-resistant nature of your fabric is another subtle but vital detail that can make or break your final product. You should always utilize a sturdy 100% cotton thread for assembly, as synthetic threads can weaken, snap, or melt under continuous exposure to hot pot handles. Investing in good quality thread ensures that your structural seams remain completely intact, even when subjected to heavy daily wear and tear in a bustling family kitchen.
Beyond the core fabrics, you will also want to gather a few fundamental sewing notions to make the entire crafting process go as smoothly as possible. A reliable fabric marker, a sharp rotary cutter, a self-healing cutting mat, and plenty of sewing clips or heavy-duty pins are absolutely essential for keeping the thick, insulated layers from shifting while you sew. Having these reliable tools laid out on your workspace beforehand will save you time and prevent unnecessary frustration.
Lastly, don’t be afraid to let your personal style shine through when picking your outer cotton fabric patterns, as these accessories will be on display in your home. You can choose vibrant floral prints to add a pop of color to a neutral kitchen, or opt for sleek, minimalist geometric patterns that match a modern aesthetic. By carefully combining high-grade thermal functionality with your favorite visual designs, you create a kitchen tool that is both highly practical and beautiful to look at.
2. Step-by-Step Cutting Guide and Fabric Preparation Techniques
The secret to achieving professional results with this Easy Pot Handles and Lid Holder fabric – Tutorial lies entirely within the precision of your initial fabric cuts and careful layout planning. For a standard slip-on pot handle sleeve, you will generally need to cut two rectangles of outer fabric measuring roughly 6 by 3 inches, along with matching pieces for the lining and insulation. For the circular lid holder, a diameter of about 5 to 6 inches is typically ideal for covering standard pot knobs comfortably without leaving excess hanging fabric.
When working with thick, multi-layered sandwiches of insulated batting, standard fabric pins can sometimes bend or cause unwanted distortion in your precise measurements. This is why many experienced crafters prefer using sturdy quilting clips, which hold the dense layers firmly together without piercing or damaging the protective internal metallic film. Ensuring that all your edges are perfectly aligned before you even sit down at your sewing machine will prevent uneven seams and shifting later on.
If you are planning to make multiple sets of these handy kitchen tools, it is incredibly efficient to create a reusable cardboard template for both the handle sleeve and the lid holder. Drawing your shapes onto a thick piece of cardstock or recycled shipping boxes allows you to quickly trace the exact dimensions onto your fabric with a water-soluble fabric pen. This method guarantees absolute consistency across all your pieces, which is especially helpful if you are crafting a matching set for a holiday gift.
Once all your individual fabric, batting, and thermal lining pieces are cut to size, it is time to stack them in the correct sequence for assembly. For a standard quilted finish, place your outer fabric face down, layer the cotton batting on top, follow with the insulated lining, and finish with your interior lining fabric face up. This strategic arrangement ensures that the heat-reflecting properties of the specialized insulation are positioned correctly to protect your hands from the hot cookware.
To make the actual sewing process much easier and prevent the thick layers from bunching up under your presser foot, take a moment to gently press the stacked pieces with a warm iron. Be careful not to use excessive heat directly on any exposed insulated lining, as you want to preserve the structural integrity of the internal metallic fibers. A quick, gentle press helps settle the fabrics together, flattening the sandwich out and making it much more manageable to guide through the machine.
Finally, double-check that your fabric scissors or rotary blades are exceptionally sharp before trimming away any minor imperfections or uneven edges from your stacked layers. Clean, crisp edges are much easier to finish with a clean seam or a bias tape binding, resulting in a sleek product that looks like it was bought from a high-end boutique. Taking these extra few minutes to prepare your fabric pieces meticulously sets a rock-solid foundation for a completely stress-free sewing experience.
3. Stitching the Pieces Together with Maximum Structural Durability
Now that your fabric layers are beautifully organized, it is time for the most exciting part of our Easy Pot Handles and Lid Holder fabric – Tutorial: bringing everything together at the sewing machine! Begin by selecting a slightly longer stitch length than usual, around 3.0mm, which helps your machine needle glide smoothly through the dense, thick layers of insulation and cotton. Slow, steady sewing is key here, as rushing through heavy fabrics can cause skipped stitches, uneven tension, or even a broken needle.
To give your new accessories that classic, high-end look while securing the inner layers permanently, consider adding some simple quilting stitches across the surface of the fabric. You can easily sew a basic grid pattern or a few parallel diagonal lines across the stacked rectangles and circles before doing the final assembly. This quilting step prevents the internal cotton batting from shifting around or bunching up when you inevitably wash your pot holders in the future.
When sewing the long sides of your pot handle sleeve together, always remember to leave one short end completely open so it can easily slide onto your cookware handles. Use a strong backstitch at the beginning and the very end of your seams to lock the threads firmly in place, as these opening points will experience a lot of stretching and pulling during daily use. A reinforced seam ensures your handmade sleeve won’t split open when you are lifting a heavy, hot pot.
For the circular lid holder, adding a small, matching fabric loop or a sturdy cotton ribbon to the top center is an incredibly smart and convenient design choice. This simple addition allows you to easily hang the holder on a nearby kitchen hook, keeping it within arm’s reach whenever you are busy cooking at the stove. Simply sandwich the raw ends of your loop securely between the fabric layers before sewing the final perimeter seam, ensuring it is locked tightly into place.
Once your main structural seams are completed, it is highly recommended to trim away any excess bulky fabric from the corners and curved edges using a pair of pinking shears. Trimming the bulk allows the item to turn right-side out much more smoothly, creating crisp, sharp corners on your handle sleeves and perfectly smooth, round curves on your lid holders. Be careful not to cut too close to your actual structural stitches, leaving a safe margin of about an eighth of an inch.
Turn your projects right-side out through the openings, using a blunt turning tool or a chopstick to gently push out the corners until they are nice and sharp. Give the entire project one final, thorough press with your iron to flatten the seams completely, and then topstitch around the open edges for an incredibly polished, professional finish. Your beautiful, custom-made creations are now officially ready to protect your hands and upgrade your daily cooking routine!
4. Pro SEO Tips and Best Practices for Fabric Crafting Content
To ensure that your amazing version of this Easy Pot Handles and Lid Holder fabric – Tutorial reaches as many passionate crafters and home cooks as possible online, applying modern search engine optimization is essential. Start by integrating relevant alt text on every single image you upload to your blog post, describing exactly what is happening in the step-by-step photos using your primary keywords. Search engines cannot see pictures, so clear descriptions help your tutorial appear in popular image search results.
Another highly effective strategy for boosting your visibility is to structure your written content using clear, logical headings that make it incredibly easy for readers to scan. Utilizing appropriate H2 and H3 tags that incorporate variations of your target keyword helps search engine crawlers understand the structure and depth of your guide. Breaking your text down into short, digestible paragraphs also keeps your readers engaged for longer, reducing bounce rates and signaling to Google that your content is highly valuable.
Incorporate high-quality, relevant internal links throughout your post to connect this guide with other related sewing or kitchen DIY projects on your website. For example, you could link to a previous tutorial on making matching kitchen aprons, custom oven mitts, or eco-friendly reusable unpaper towels. This internal linking structure creates a cohesive web of content that encourages visitors to explore more of your site, improving your overall search ranking over time.
Don’t forget to optimize your meta description and page title to entice users to click on your link when they see it on a search engine results page. A compelling meta description should be under 160 characters, contain your main keyword naturally, and clearly explain the wonderful benefits of reading your specific tutorial. A title like “Easy Pot Handles and Lid Holder fabric – Tutorial: Step-by-Step DIY Guide” is perfect for capturing organic search traffic.
Engaging with your audience in the comments section of your blog post is another fantastic, often overlooked way to boost your site’s natural search engine performance. When readers ask questions about fabric choices or machine settings, responding with helpful, keyword-rich answers adds fresh, updated text to your page, which search engines love. A lively, active community section tells search algorithms that your content is relevant, authoritative, and deeply trusted by real users.
Finally, make sure your website is fully optimized for mobile devices, as the vast majority of crafters will likely be reading your tutorial on a phone or tablet right at their sewing tables. Fast page loading speeds, clear fonts, and easily clickable buttons ensure a fantastic user experience that keeps people coming back for more. Combining top-tier, humanized crafting advice with these smart technical strategies will position your tutorial for long-term online success.
Frequently Asked Questions (FAQ)
Can I use regular polyester batting for this project?
No, it is highly recommended to avoid standard polyester batting because polyester is a form of plastic that can easily melt when exposed to the intense heat of hot metal handles. Always use 100% natural cotton batting paired with a specialized heat-reflective lining like Insul-Bright to ensure your hands remain completely safe from burns.
How do I wash my handmade pot handle sleeves and lid holders?
Because these items are crafted from 100% cotton fabric and high-quality insulated layers, they are completely machine washable. Simply toss them into your washing machine with your regular kitchen towels on a gentle, warm cycle, and tumble dry on low heat or lay them flat to air dry to preserve their shape.
What sewing machine needle size should I use for these thick layers?
Since you will be sewing through multiple layers of cotton fabric, cotton batting, and insulated lining, a standard thin needle might bend or snap. It is best to use a heavy-duty denim or quilting needle, specifically a size 90/14 or 100/16, which can easily pierce through thick layers without skipping stitches.
Can these fabric pot holders be used inside a hot oven?
No, these fabric pot handle sleeves and lid holders are strictly designed for stovetop use to protect your hands while moving pots or lifting lids. They should never be left on a pot or pan while it is inside a hot oven, as prolonged exposure to direct oven heat can scorch the cotton fabric.
Is this project suitable for an absolute beginner at sewing?
Yes, absolutely! This project is an incredibly wonderful choice for beginners because it uses straight seams, simple cuts, and requires only a very basic understanding of a sewing machine. It is a quick, rewarding project that helps you practice sewing through thicker layers without any overwhelming complexity.
Conclusion
In this comprehensive Easy Pot Handles and Lid Holder fabric – Tutorial, we have covered every single detail necessary to create beautiful, highly practical, and incredibly safe kitchen accessories completely from scratch.
From selecting the absolute best 100% natural cotton fabrics and specialized heat-resistant thermal linings to executing precise fabric cuts and mastering the structural stitching, you now have all the tools needed for success. These custom creations are perfect for upgrading your own home cooking experience or gifting to your favorite foodies and loved ones.