Fabric Basket – Tutorial: If you are looking for a creative, practical, and incredibly rewarding sewing project, learning how to create a beautiful storage solution with a comprehensive fabric basket tutorial is the perfect way to spend your afternoon. Organizing our homes can often feel like a never-ending task, but when you combine functionality with handmade charm, decluttering becomes an absolute joy. Fabric baskets are versatile, durable, and completely customizable, allowing you to match your existing home decor while clearing up the mess in style.
Whether you are a seasoned sewist with years of experience or a complete beginner holding a needle for the first time, mastering a fabric basket tutorial will elevate your crafting skills. These handy containers can be used in almost every room of your house, from holding yarn scraps in your craft room to organizing toiletries in the bathroom or even acting as a beautiful planter cover for your indoor greenery. The best part about this project is that it requires minimal materials, making it a fantastic stash-buster for those leftover fabric pieces you have been hoarding.
In this detailed fabric basket tutorial, we are going to walk through every single step required to build a sturdy, beautiful, and professional-looking basket from scratch. We will explore the best materials to use, how to properly interface your fabric to ensure it stands upright, and the exact sewing techniques that yield clean, crisp corners. Grab your sewing machine, select your favorite coordinating prints, and let us dive into the wonderful world of handmade fabric storage solutions.
1. Choosing the Right Materials for Your Fabric Basket
When embarking on a fabric basket tutorial, the selection of your textiles plays a massive role in the final look and durability of your project. For the exterior, you want a fabric that can handle daily wear and tear while showcasing a beautiful design. Heavyweight cotton, canvas, duck cloth, and even upcycled denim are spectacular choices for the outer shell because they provide natural structure and resilience.
For the interior lining, a standard quilting cotton is usually the preferred choice among craft enthusiasts worldwide. Choosing a contrasting color or a subtle geometric print for the inside adds an unexpected pop of joy whenever you look inside your finished container. The lining fabric should be smooth and lightweight enough to not add excessive bulk to your seams during the construction process.
Structure is the secret ingredient that transforms a floppy piece of cloth into a functional container, which is why a fabric basket tutorial always emphasizes interfacing. Fusible fleece or heavy-duty woven interfacing like Pellon SF101 are absolute game-changers for this specific project. Without proper stabilization, your basket will simply collapse under its own weight, losing its charm and utility.
Before cutting into your precious textiles, it is always highly recommended to pre-wash and iron your fabrics thoroughly. Pre-washing prevents any future shrinkage issues, especially if you plan on washing your organizational bins down the road. Ironing ensures that your cuts are completely accurate, which is crucial for achieving perfectly symmetrical dimensions.
You will also need a few basic sewing notions that you likely already have in your creative workspace or craft room. A sharp rotary cutter, a self-healing cutting mat, a long acrylic ruler, high-quality polyester thread, and plenty of sewing clips are essential. Pins can sometimes distort thick layers, so sturdy sewing clips are highly recommended when assembling these specific structural items.
Finally, consider adding unique personal touches to your project, such as sturdy leather handles, cotton webbing straps, or delicate lace trim. Handles not only make the basket much more portable and functional but also give it an incredibly professional, boutique-quality finish. Now that your materials are gathered and prepped, you are fully ready to move on to the next phase.
2. Cutting Your Fabric Pieces with Total Precision
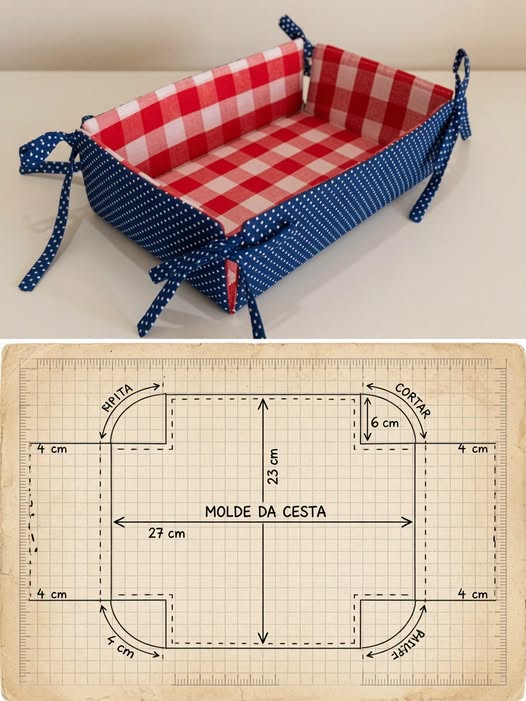
Accurate cutting is the absolute foundation of any successful sewing project, and this fabric basket tutorial is certainly no exception to that rule. To create a standard medium-sized organizational bin, you will need to cut two identical rectangles for the outer fabric and two for the lining. A fantastic starting size for a versatile, multi-purpose basket is 12 inches wide by 10 inches high.
Once your main fabric pieces are cleanly cut, you must cut your structural interfacing to match the exact dimensions of your outer panels. If you prefer an extra-sturdy container that holds its shape rigidly even when completely empty, you can cut interfacing for the lining pieces as well. Taking your time during this preparation stage guarantees that all your edges align flawlessly later on.
After cutting your rectangles, it is time to prepare for the boxed corners, which give the basket its three-dimensional depth. Using your acrylic ruler and a fabric marking pen, draw a small square at both bottom corners of all four fabric panels. For our suggested dimensions, a 2-inch by 2-inch square cut out of the corners works beautifully.
Carefully use your fabric shears to cut along the lines you just drew, removing the small squares from the bottom corners completely. Your fabric pieces will now resemble an inverted ‘T’ shape or have a distinct notch missing from the lower edges. This simple technique is the magic secret to creating a flat, sturdy base for your storage bin.
If you are incorporating fabric or webbing handles into your design, this is also the ideal moment to cut them to your desired length. Two pieces of cotton webbing measuring roughly 6 inches each will provide comfortable, functional handles for a basket of this specific scale. Keep these smaller pieces close by, as they will be basted onto the exterior shell very shortly.
Double-check all your measurements one last time against your cutting mat before moving forward to the actual construction and assembly phase. Precision at this stage prevents uneven seams, lopsided corners, and general frustration during the sewing process. With your pieces perfectly prepped, we can now heat up the iron and begin assembling the structure.
3. Fusing the Interfacing and Sewing the Main Body
The first step in the actual assembly of our fabric basket tutorial involves applying the vital structural stabilization to your chosen textiles. Place your outer fabric panels wrong-side up on your ironing board, and position the fusible side of the interfacing directly on top. Press firmly with a hot, damp iron according to the manufacturer’s specific instructions, ensuring a flawless bond.
Once the interfacing is securely fused and has cooled down completely, place the two outer panels right sides together, matching all the edges perfectly. Secure the sides and the bottom edge using your sewing clips, leaving the top open and the corner cut-outs untouched. Stitch along the two sides and the bottom using a standard half-inch seam allowance.
Repeat this exact same sewing process for your two lining panels, placing them right sides together and clipping the edges securely. However, there is one crucial modification required here: leave a 3-inch to 4-inch opening in the middle of the bottom seam. This unsewn gap is absolutely vital, as it will allow you to turn the entire project right-side out later.
Be sure to backstitch securely at the beginning and end of every single seam to prevent the stitches from unraveling during handling. Once the main seams are sewn, press the seam allowances open with your iron to reduce overall bulk at the corners. This small step makes a massive difference in achieving sharp, clean lines on your finished container.
Now, it is time to box the corners by pulling the front and back fabric panels apart at one of the open corner notches. Flatten the opening so that the side seam aligns perfectly with the bottom seam, creating a straight horizontal line. Clip this newly formed edge securely, ensuring the internal seams are pressed flat against one another.
Stitch across this flattened edge with a half-inch seam allowance, backstitching heavily at both ends for maximum durability. Repeat this boxing process for the remaining corner of the exterior shell, and then perform the exact same steps on the lining. You will instantly see your flat fabric transform into two distinct, beautiful three-dimensional box shapes.
4. Assembling Your Basket and Adding the Finishing Touches
We have officially reached the most exciting stage of our fabric basket tutorial, where all our prepared elements finally come together into one piece. Take your exterior basket shell and turn it right-side out, gently pushing out the corners to reveal its true shape. Keep your lining piece turned wrong-side out, keeping the raw seam allowances visible on the exterior.
If you are using handles, baste them onto the right side of the exterior basket now, centering them on the opposite sides. Position the handles facing downwards toward the bottom of the basket, alignment raw edges with the top raw edge of the container. Tack them securely in place using a quick quarter-inch seam allowance to keep them from shifting.
Next, insert the right-side-out exterior basket completely inside the wrong-side-out lining piece, ensuring the right sides of both fabrics are touching. Align the side seams of the exterior basket perfectly with the side seams of the interior lining, clipping around the entire top perimeter. Ensure your handles remain tucked neatly between the two layers of fabric.
Take your project to the sewing machine and stitch completely around the top circular rim using a precise half-inch seam allowance. Take your time during this step, rotating the basket slowly around the free arm of your machine to maintain a perfectly straight line. Double-check that you have caught all layers of fabric, interfacing, and handles securely in the seam.
Locate the opening that you intentionally left in the bottom seam of your lining fabric earlier during the construction process. Reach inside that opening, grab the exterior fabric firmly, and gently pull the entire basket through the gap to turn it right-side out. This process is often affectionately called “birthing the basket” in the sewing community.
Tuck the raw edges of the lining opening inward, pressing them flat, and topstitch the gap closed using a very narrow seam allowance. Push the lining down inside the exterior shell, press the top edge beautifully with your iron, and finish with a crisp topstitch around the entire upper rim. Your gorgeous, sturdy handmade storage bin is now officially complete and ready to use.
Frequently Asked Questions (FAQ)
What is the best fabric to use for a sturdy fabric basket?
To achieve a rigid, durable container, heavy fabrics like cotton canvas, duck cloth, denim, or upholstery fabric work best for the exterior. For the lining, standard quilting cotton is ideal. The true secret to sturdiness, however, lies in using high-quality fusible fleece or heavy stabilizer attached to the fabric layers.
Can I wash my completed handmade fabric basket?
Yes, you can absolutely wash your basket if you pre-washed your fabrics before cutting them to prevent shrinkage. It is recommended to hand wash or use a gentle machine cycle with cool water, then reshape the basket and let it air dry completely. Give it a quick press with a warm iron to restore its crisp shape.
How do I make the basket stiffer if it keeps collapsing?
If your container is too floppy, you can add an extra layer of ultra-firm sew-in stabilizer or heavy fusible peltex to the exterior panels. Alternatively, using a layer of fusible fleece on the outer fabric combined with a firm woven interfacing on the lining fabric will provide maximum structural support.
What size should I make the boxed corners for a larger container?
The size of your boxed corners directly determines the ultimate depth and width of your basket’s base. A larger 3-inch or 4-inch square cut-out will create a wider, deeper base but will reduce the overall height of the walls. You can easily adjust the square dimensions to customize the proportions to your needs.
Do I absolutely need a sewing machine to complete this project?
While a sewing machine makes this project significantly faster and ensures highly durable seams, you can technically complete it by hand. If sewing by hand, use a strong backstitch with heavy-duty thread to ensure the structural seams can handle the weight of items placed inside the finished bin.
Conclusion
In this comprehensive fabric basket tutorial, we have successfully explored how to transform simple pieces of cloth and interfacing into a beautiful, functional, and durable storage container.
From selecting the perfect combination of durable exterior textiles and vibrant cotton linings to precisely cutting your panels and mastering the art of boxed corners, you now possess the core skills needed to create organizational bins of any size. This project perfectly demonstrates how intentional preparation and proper stabilization can yield professional, store-quality results right from your home sewing space.