Gossip Owls – Tutorial is your ultimate guide to crafting one of the most charming, whimsical, and popular amigurumi projects in the crafting community today. Whether you are an experienced crocheter looking for a delightful new project or a passionate beginner eager to expand your stitching repertoire, creating these expressive little birds is an absolute joy. In this comprehensive guide, we will break down every single step, ensuring you master the techniques required to bring these conversational creatures to life while optimizing your crafting workflow for beautiful, professional results.
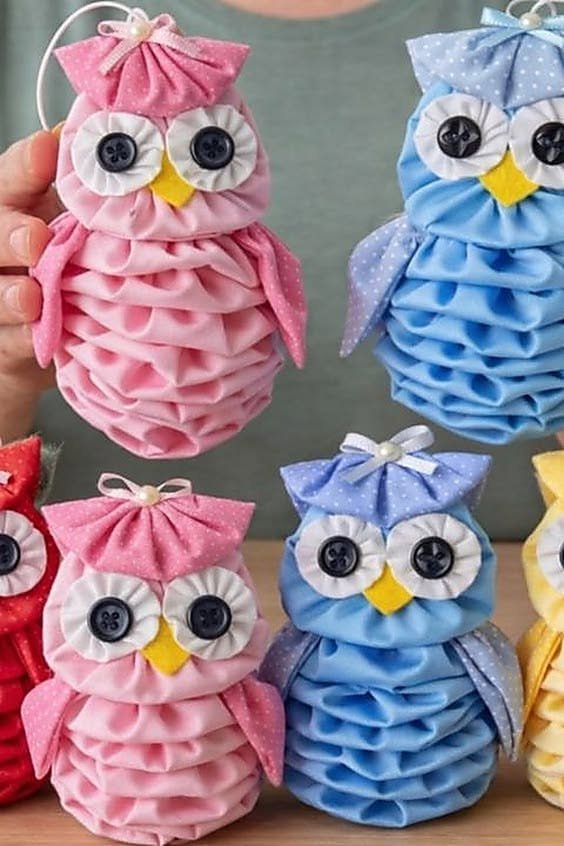
If you have been searching for a project that combines creativity, storytelling, and textile art, the Gossip Owls – Tutorial is precisely what you need. These unique characters get their name from their large, expressive eyes and side-glancing expressions, making them look as if they are whispering secrets or sharing the latest office gossip with one another. Beyond being incredibly fun to make, they serve as fantastic gifts, highly sellable items at local craft fairs, and stunning decorative pieces for nurseries, bookshelves, or cozy living room corners.
As we dive deep into this Gossip Owls – Tutorial, you will discover that the beauty of this project lies in its versatility and room for personalization. By modifying your yarn choices, color combinations, and facial placements, you can give each owl an entirely unique personality and quirky demeanor. Grab your favorite crochet hook, select your most vibrant yarn scraps, and let’s explore the step-by-step process of creating these iconic feathered friends from scratch, keeping your stitches tight and your creativity flowing.
1 Understanding the Anatomy of a Gossip Owl
Before diving headfirst into the stitches, it is essential to understand the structural design that makes this Gossip Owls – Tutorial so distinctive and beloved worldwide. Unlike traditional, perfectly symmetrical bird patterns, these specific owls rely heavily on exaggerated facial features and asymmetrical eye placement to convey their iconic “gossiping” look.
The main body of the owl is typically worked from the bottom up in a continuous spiral, creating a sturdy, seamless base that allows the toy to sit upright. By focusing on a clean, solid foundation, you ensure that the delicate details added later will sit perfectly flat and maintain their intended proportions.
To capture the true essence of the Gossip Owls – Tutorial, the eyes must be prominent, multi-layered circles that cover a significant portion of the upper body. These layers usually consist of a dark pupil, a bright iris, and a crisp white outer border, which work together to create depth and a comical sense of awareness.
Another critical component discussed in this Gossip Owls – Tutorial is the distinct shape of the wings and the chest feathers, which are often textured using specialized stitches like the crocodile stitch or simple shell stitch variations. These textures mimic real feathers while adding an undeniable tactile quality to your finished plush toy.
Choosing the right materials is paramount for achieving the best results, so we highly recommend using a high-quality mercerized cotton yarn or a soft acrylic blend that offers excellent stitch definition. A smaller hook size than what the yarn label recommends will also help keep your stitches incredibly tight, preventing the stuffing from peeking through.
Ultimately, mastering the anatomy of these birds allows you to experiment freely with sizes, ranging from tiny keychain miniatures to large, huggable throw pillows. Once you grasp how the body, eyes, and beak interact to create an expression, the creative possibilities for your owl flock become absolutely endless.
2 Essential Materials and Tools for the Project
To successfully follow along with this Gossip Owls – Tutorial, gathering the correct tools beforehand will save you immense time and ensure a stress-free crafting experience. The cornerstone of any successful amigurumi project is your yarn selection, and for these expressive birds, contrasting colors are your absolute best friend.
We recommend selecting three main yarn shades for the body, a bright white and a deep black for the dramatic eyes, and a vibrant orange or yellow for the sharp little beak. Utilizing medium-weight worsted yarn is ideal for beginners, as it allows you to see your loops clearly and maintain consistent tension throughout.
An ergonomic crochet hook is another non-negotiable tool that will keep your hands comfortable during long stitching sessions as you work through this Gossip Owls – Tutorial. A size 2.5mm or 3.0mm hook pairs wonderfully with worsted yarn, ensuring the tight fabric structure needed to hold the internal polyester fiberfill securely.
Speaking of stuffing, always opt for premium premium polyester fiberfill, which provides a plush yet firm structure that will not clump up when the owl is washed. Stuffing your amigurumi correctly is an art form in itself, requiring a gentle hand to distribute the material evenly into every corner.
You will also need a few essential notions, including a sharp pair of embroidery scissors, a wide-eyed tapestry needle for seamless assembly, and several locking stitch markers. Because this Gossip Owls – Tutorial relies heavily on working in continuous rounds, markers are indispensable for keeping track of your starting points.
Lastly, having safety eyes as an alternative to embroidered pupils can add a beautiful, glossy finish to your project, though embroidery remains the safest choice for infant toys. With your workspace organized and your materials laid out neatly, you are fully prepared to take on the physical construction of your new crafting masterpiece.
3 Step-by-Step Stitching Guide for the Body and Face
Now, let us get into the heart of our Gossip Owls – Tutorial by breaking down the exact stitching sequence required to shape the body and assemble the iconic face. You will want to begin by creating a magic ring, which is the foundational technique for almost all circular amigurumi projects, preventing any unwanted holes at the base.
Work six single crochet stitches into the magic ring, pull the tail tightly to close the center, and place your stitch marker in the final loop. From here, you will systematically increase your stitches in each round, expanding the circle evenly until the base matches the desired width of your owl.
Once the base is established, transition into straight rounds without any increases to build up the height of the body, watching your tension closely. This section of the Gossip Owls – Tutorial is perfect for experimenting with color changes, creating beautiful stripes or variegated patterns that resemble natural bird markings.
As you reach the upper portion of the body, you will begin a series of gradual decreases to gently taper the shape toward the head. Before closing the top entirely, pause to insert your polyester fiberfill, packing it firmly but carefully so the fabric stretches slightly without exposing the internal stitches.
The face assembly is where the magic truly happens, requiring you to crochet two large white outer eye circles and stitch them side-by-side onto the upper face. To achieve the signature side-glance detailed in this Gossip Owls – Tutorial, sew the dark pupils near the inner or outer edges of the white circles rather than centering them perfectly.
Complete the look by embroidering a small, upside-down triangle between the eyes using your orange yarn to form the beak, and add subtle tufts of yarn to the top corners of the head for ears. Secure all loose yarn tails internally, weaving them back and forth through the body stuffing to ensure they never unravel over time.
4 Pro Tips for Perfect Assembly and Customization
Finishing your project with a professional flourish is the ultimate goal of this Gossip Owls – Tutorial, separating handmade crafts from beautifully polished art pieces. When sewing the various components together, always use the mattress stitch or a seamless whipstitch, pulling the yarn firmly but gently to hide the joins.
Pinning your pieces in place using long sewing pins before committing with a needle is a fantastic trick that ensures your wings and eyes do not shift out of alignment. Step back and look at your owl from different angles to confirm that the expression is exactly as quirky and full of personality as you desire.
Customization is another area where the Gossip Owls – Tutorial truly shines, allowing you to add personal touches like tiny bowties, crocheted flowers, or miniature hats. You can also brush the cheeks gently with real pink cosmetic blush or chalk pastel to give your owl an adorable, rosy-cheeked look.
For those looking to create a themed set, consider matching your yarn choices to specific seasons, such as using pastel tones for spring or deep burgundies and forest greens for autumn. You can even mix yarn textures, combining smooth cotton for the face with a fluffy bouclé yarn for the body to simulate real, downy feathers.
If you plan to sell your creations, branding your work with a small, customized fabric tag sewn onto the back or side seam adds incredible perceived value. Collectors and customers adore knowing the story behind their handmade items, and a well-made owl with a distinct name and personality card is highly irresistible.
Remember that practice makes perfect, so do not feel discouraged if your first attempt looks a bit asymmetrical or unique. The charm of the Gossip Owls – Tutorial lies within the individual quirks of each bird, making every single completed project a completely original character to be celebrated.
Frequently Asked Questions
What is the best type of yarn to use for this owl project?
The ideal yarn for this specific project is either a 100% mercerized cotton or a premium low-pill acrylic blend in a worsted or sport weight. Cotton provides exceptional stitch definition and structural rigidity, which helps the character maintain its shape and keeps the facial details looking crisp and well-defined over time.
How do I prevent my stuffing from showing through the stitches?
To keep the internal fiberfill hidden, you should drop down one or two hook sizes from what is recommended on your yarn label. This creates a dense, tight fabric structure that holds the stuffing inside firmly, even when the amigurumi is handled, squeezed, or washed regularly.
Can beginners successfully complete this tutorial?
Yes, this project is highly accessible to ambitious beginners who understand basic crochet stitches such as the magic ring, single crochet, increases, and decreases. The straightforward construction allows you to focus on mastering your tension while practicing essential assembly and embroidery techniques.
How long does it take to complete one finished owl?
On average, a single owl takes between two to four hours to complete from start to finish, depending heavily on your individual crocheting speed and experience level. Because it is a relatively quick project, it is highly rewarding and perfect for weekend crafting sessions or last-minute gift-making.
Is this specific pattern safe for babies and toddlers?
If you are gifting this toy to an infant or young toddler, it is best to embroider the eyes and facial details directly onto the body using yarn rather than using plastic safety eyes. Embroidered details completely eliminate any potential choking hazards, making the finished toy entirely safe for all age groups.
Conclusion
In conclusion, this Gossip Owls – Tutorial provides you with all the foundational knowledge, step-by-step techniques, and creative inspiration needed to craft your very own collection of expressive, whimsical bird companions.
From understanding the unique, asymmetrical facial anatomy to selecting the perfect tools and executing flawless assembly, you now possess the skills to bring these charming characters to life with ease.