Patchwork chicken – Tutorial is a wonderful project for those looking to combine creativity with a touch of farmhouse charm in their home decor. Crafting a patchwork chicken is more than just a sewing exercise; it is an opportunity to dive into the art of textile assembly and scrappy quilting while creating a functional piece of art that can serve as a kitchen weight, a doorstop, or a simple decorative softie. This patchwork chicken tutorial is designed to guide you through every snip and stitch, ensuring that even beginners can achieve a professional and heartwarming result.
The beauty of a patchwork chicken – tutorial lies in its versatility and the ability to use up those smaller fabric scraps that have been piling up in your craft room. By following this comprehensive guide, you will learn how to select the right fabric patterns, master the assembly process, and finish your project with a polished look that rivals boutique handmade goods. Whether you are making this for yourself or as a thoughtful gift, the process of patchwork sewing allows for endless personalization through color and texture.
As we move through this patchwork chicken – tutorial, we will focus on high-quality sewing techniques and SEO-optimized crafting tips to help your own blog or project stand out. Understanding the fundamentals of quilt block construction and stuffed toy assembly is crucial for a successful outcome. We will break down the materials needed, the step-by-step construction, and the final decorative touches that bring your fabric poultry to life. Get your sewing machine ready and let’s begin this creative journey together.
1. Selecting Materials for Your Patchwork Chicken – Tutorial
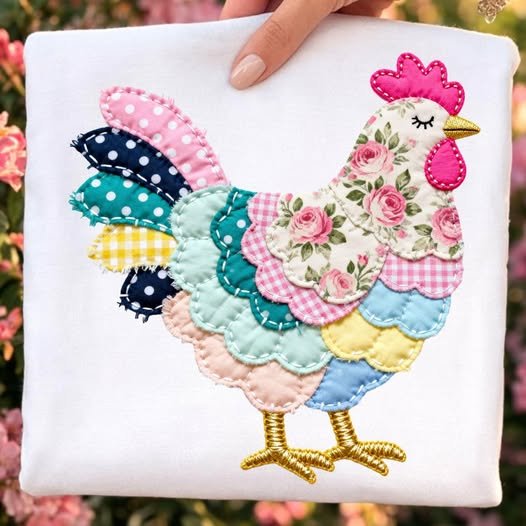
When starting a patchwork chicken – tutorial, the first step is gathering high-quality cotton fabrics. Selecting a variety of prints, such as florals, ginghams, and polka dots, adds character and visual depth to your chicken. Ensure your fabric scraps are ironed flat before cutting to maintain precision throughout the quilting process.
The choice of interfacing or stabilizer is also vital for the patchwork chicken – tutorial. Using a light fusible fleece can give your chicken a soft, structured feel, helping it hold its shape once stuffed. This is especially important if you plan on using your patchwork chicken as a functional pincushion or heavy doorstop.
You will also need coordinated thread and a sharp rotary cutter. High-quality polyester or cotton thread ensures that the seams of your patchwork chicken remain durable over time. A cutting mat and a transparent quilting ruler are essential tools for achieving the straight lines required for this sewing project.
For the filling, this patchwork chicken – tutorial recommends a mix of polyester fiberfill and something heavier like crushed walnut shells or dried beans if you want weight. The fiberfill provides the loft and softness, while the weighted base ensures the fabric chicken sits upright on your counter or shelf.
Don’t forget the small details like felt scraps for the comb and wattle, and black beads or safety eyes for the face. These tiny elements are what transform a simple triangle pouch into a charming patchwork chicken. Having these ready will make the assembly phase of our tutorial much smoother.
Lastly, ensure you have a good fabric marking pen or tailor’s chalk. Marking your seam allowances and turning points is a key part of any patchwork chicken – tutorial to avoid lopsided results. Proper preparation is the foundation of a handmade masterpiece that you can be proud to display or sell.
2. Preparing and Cutting Your Fabric Scraps
The core of our patchwork chicken – tutorial begins with the “scrappy” look that makes patchwork so appealing. You should cut your fabric squares into consistent sizes, such as 5-inch charms, to ensure they align perfectly. Precision in the cutting stage is what separates an amateur project from a professional quilted chicken.
Layout your squares in a grid to visualize the color balance. A good patchwork chicken – tutorial tip is to alternate between dark and light values to make the patchwork pattern pop. This visual contrast is a hallmark of traditional American quilting and adds a rustic, folk-art vibe to your project.
Once your layout is decided, it is time to join the fabric pieces. Using a standard 1/4-inch seam allowance is standard for this patchwork chicken – tutorial. Consistency here ensures that all your corners meet up correctly, which is vital when you eventually fold the fabric into its final pyramid shape.
Pressing your seams is a non-negotiable step in this patchwork chicken – tutorial. Always press your seams to one side or open to reduce bulk at the intersections. A well-pressed quilt top lies flatter and is much easier to sew when you transition to the 3D assembly part of the project.
If you are following this patchwork chicken – tutorial to create a larger hen, simply scale up the size of your initial squares. You can also experiment with half-square triangles (HSTs) to add more geometric complexity to the wings or body. The flexibility of patchwork design allows for incredible artistic expression.
Before moving to the next stage, double-check that your pieced fabric forms a perfect rectangle or square depending on the specific chicken pattern you are using. Trimming the edges with a rotary cutter ensures that the final sewing lines are straight, leading to a much cleaner patchwork chicken silhouette.
3. Assembling the Body and Adding Details
Now we reach the most exciting part of the patchwork chicken – tutorial: bringing the bird to life. Fold your pieced fabric right sides together and sew along the designated edges, leaving an opening for turning. This triangular construction is the secret to the patchwork chicken’s unique and stable shape.
Before you close the main seams, you must insert the felt comb and beak. Place these pieces pointing inward so that when you flip the fabric chicken right-side out, they pop out in the correct positions. This hidden seam technique is a staple of stuffed toy making and is clearly explained in this tutorial.
Once the features are pinned in place, sew the remaining side of your patchwork chicken. Be sure to backstitch at the beginning and end of each seam to provide extra strength. A patchwork chicken – tutorial should always emphasize durability, especially if the item will be handled frequently or used by children.
Carefully clip the corners of your sewn fabric to remove excess bulk. This allows for sharp, crisp points at the tail and head of your patchwork chicken. Turning the project right-side out through the small gap requires patience, but using a turning tool or a chopstick can help push out those stubborn corners.
After turning, give your patchwork chicken a final press with the iron. This sets the seams and prepares the fabric body for stuffing. Even at this stage, you can see the patchwork pattern taking shape, showcasing the beautiful textile art you have created through this step-by-step tutorial.
Now, it is time to add the stuffing. Start with small clumps of poly-fill, pushing them into the furthest corners of the patchwork chicken. If you are adding weight, pour in your poly-pellets or rice at the very end so they settle at the bottom, giving your chicken a sturdy base to sit on.
4. Final Touches and Finishing Techniques
The final stage of our patchwork chicken – tutorial involves closing the turning gap and adding decorative flair. Use a ladder stitch (also known as an invisible stitch) to close the opening. This hand-sewing technique ensures that the seam is hidden, maintaining the professional look of your handmade chicken.
With the body closed, you can now attach the bead eyes. If this patchwork chicken is intended for a child, consider using embroidery thread to sew on “French knot” eyes instead of beads for safety. This patchwork chicken – tutorial prioritizes both aesthetics and safety in handicraft design.
You might choose to add quilt stitching to the body of the chicken. Running a simple topstitch or “big stitch” quilting line along the seams can emphasize the patchwork nature of the project. This extra detail adds a layer of artisanal quality that is highly valued in the crafting community.
Consider adding a small ribbon loop to the tail or head if you want to hang your patchwork chicken as an ornament. These small customizations make the patchwork chicken – tutorial adaptable for different seasons—imagine a group of these in Easter pastels or autumn oranges!
To truly master the patchwork chicken – tutorial, practice making them in various sizes. A “mother hen” and several “chicks” made from matching fabric sets create a beautiful tiered display. This DIY project is perfect for creating handmade kitchen decor that feels warm and inviting.
Finally, take a moment to admire your work. You have successfully navigated the patchwork chicken – tutorial, moving from raw fabric scraps to a finished textile sculpture. Sharing your results on social media with crafting hashtags is a great way to connect with other quilting enthusiasts and show off your new skills.
FAQ: Frequently Asked Questions about Patchwork Chickens
What is the best fabric for a patchwork chicken?
The best fabric for this patchwork chicken – tutorial is 100% quilting cotton. It is easy to sew, holds its shape well, and comes in an endless variety of prints. You can also use recycled denim or linen for a more rustic look.
Do I need a sewing machine to complete this tutorial?
While a sewing machine makes the process much faster, you can certainly complete a patchwork chicken by hand using a strong backstitch. It is a great portable project for hand-sewing fans.
How do I make my patchwork chicken stand up?
To ensure your fabric chicken stands upright, fill the bottom third with a heavy material like dried rice, poly-pellets, or clean sand. Use a funnel to pour the weights in before adding the soft fiberfill to the top.
Can I wash my patchwork chicken?
If you use polyester stuffing and cotton fabric, you can gently spot clean the surface. However, if you used organic weights like rice or beans, you should never submerge the chicken in water, as the contents will spoil or swell.
What size should the fabric squares be?
In this patchwork chicken – tutorial, we recommend starting with 5-inch squares. However, you can use 2.5-inch strips for a “log cabin” style patchwork or large 10-inch squares for a chunky doorstop version.
Is this project suitable for beginners?
Yes! The patchwork chicken is one of the most beginner-friendly quilting projects because it uses simple straight seams and a basic geometric shape. It is an excellent way to practice seam alignment and hand-finishing.
Conclusion
In this patchwork chicken – tutorial, we have covered everything from selecting the perfect fabric prints and cutting scraps to the final invisible stitches that bring your creation to life.
You have learned how to structure a 3D fabric object, handle weighted fillings, and add charming details like felt combs and bead eyes. This project is a testament to how sustainable crafting and upcycling can result in beautiful, functional home decor.