Creating a cozy quilt for a little one is one of the most heartwarming projects a quilter can take on. The Baby Four Patch Quilt – Pattern is a timeless favorite for both beginner and experienced quilters alike. This charming pattern is built on simplicity, symmetry, and versatility, making it the perfect choice for baby showers, nursery décor, or keepsake gifts.
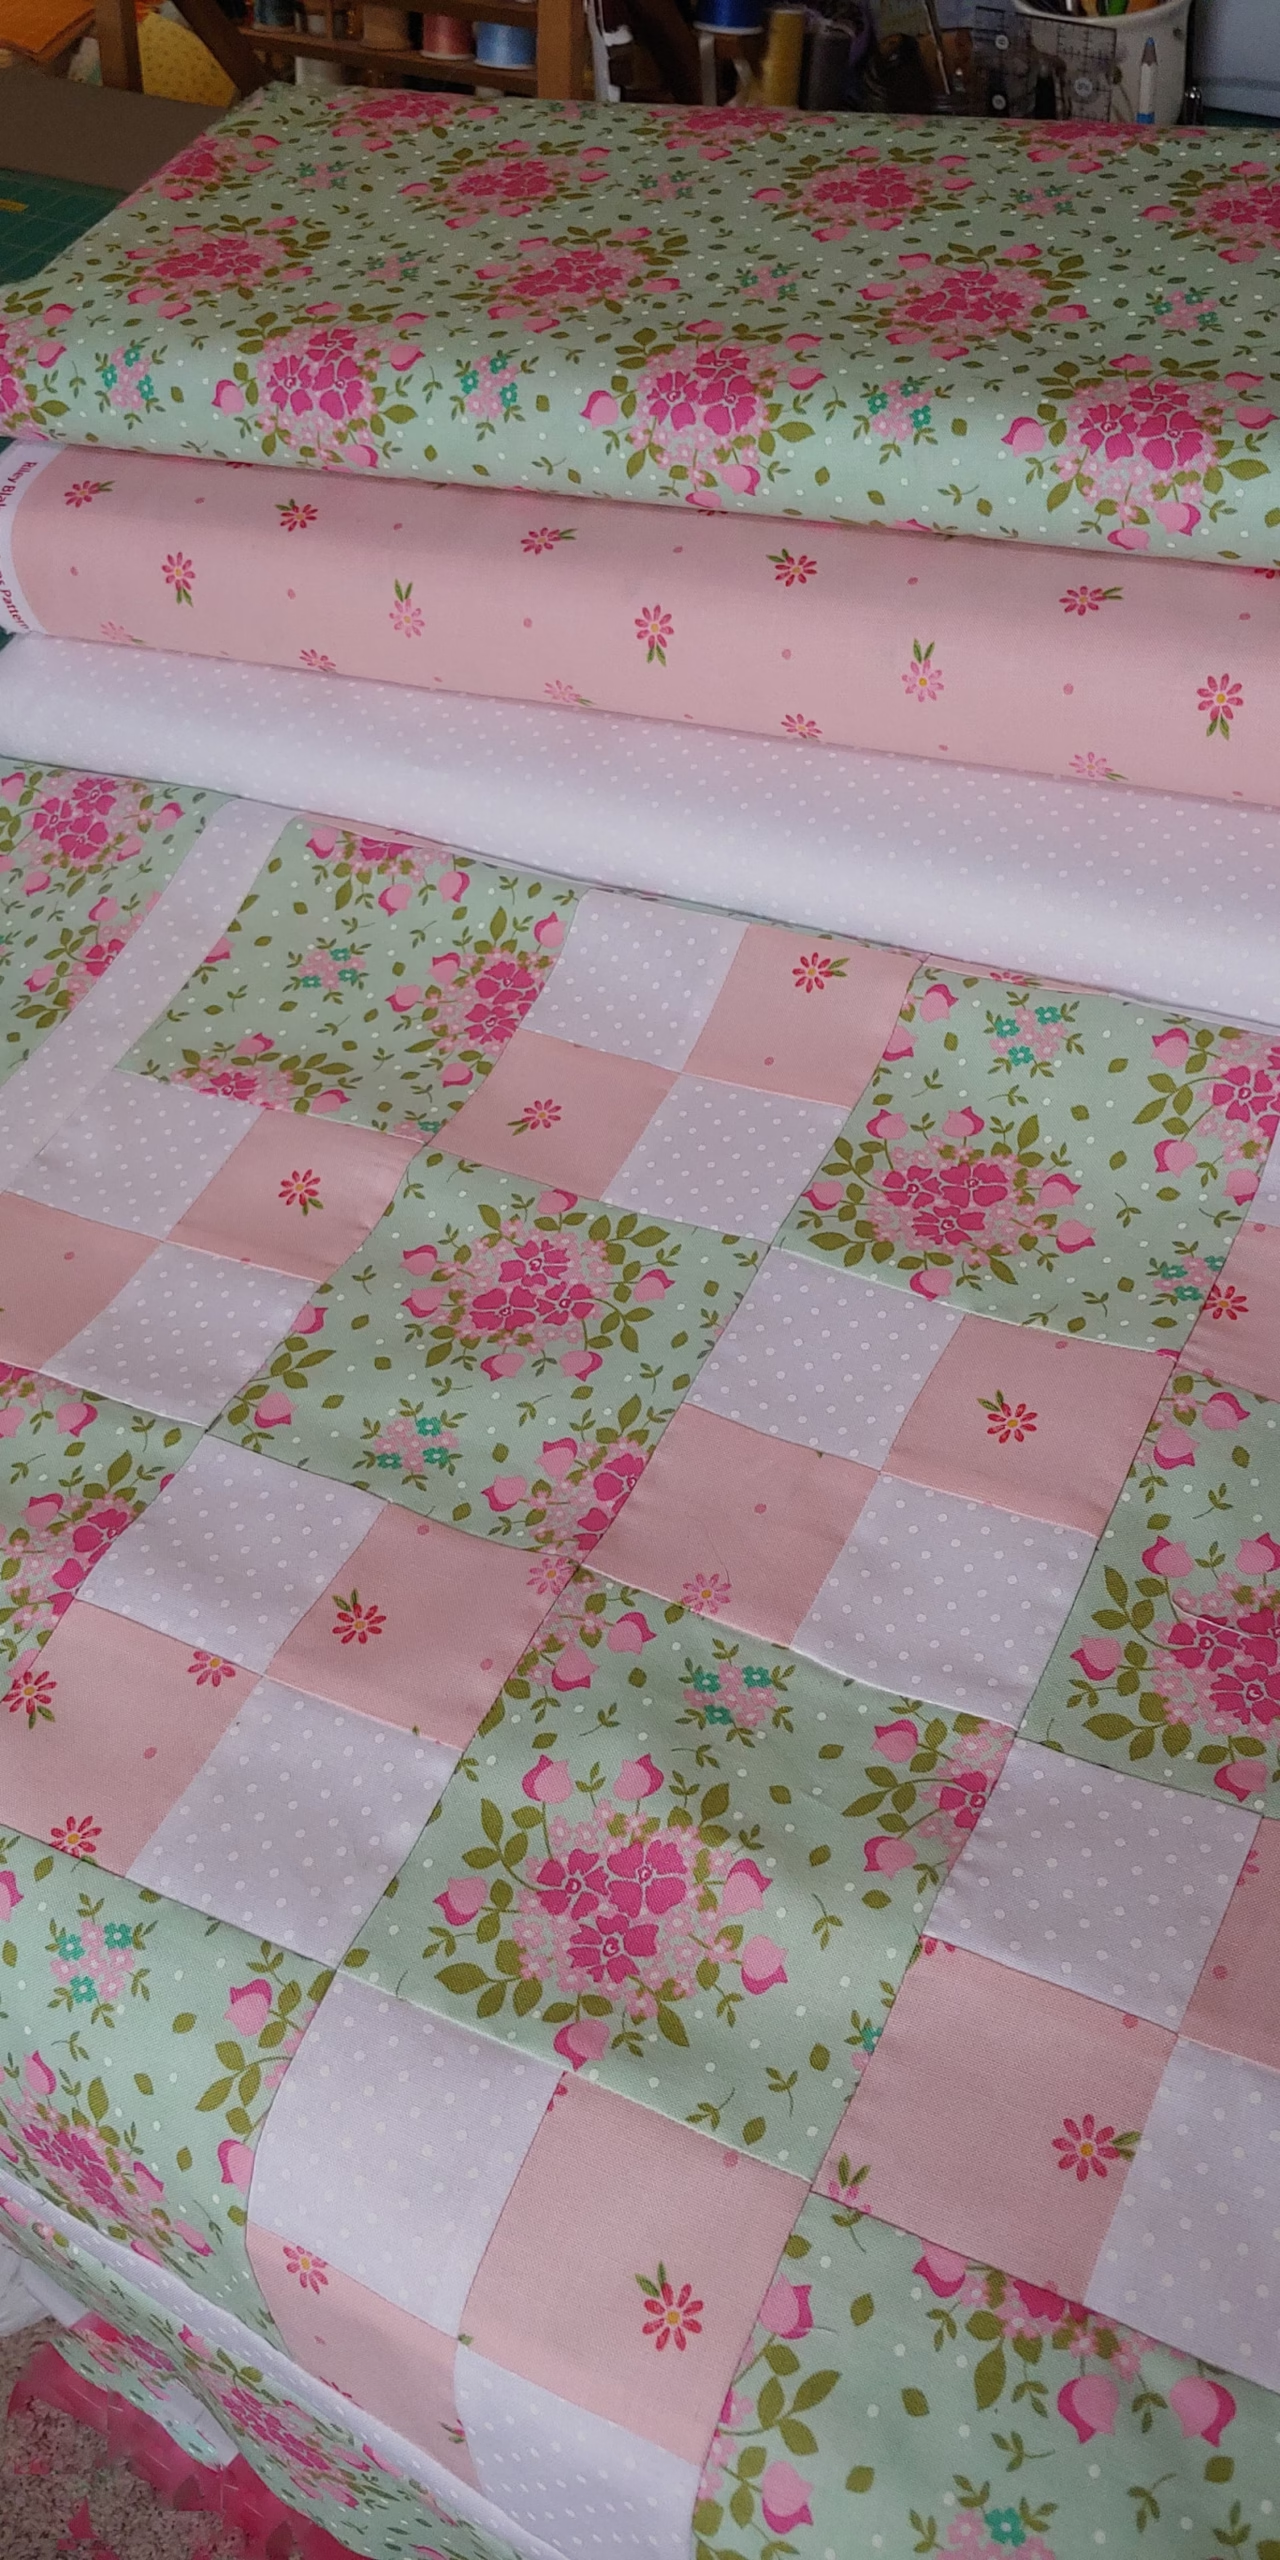
The beauty of the Baby Four Patch Quilt – Pattern lies in its structure—each block is made up of four small squares arranged in a grid. It’s simple, yet full of potential for creativity. Whether you use soft pastels, bright modern prints, or even scraps from your fabric stash, the final result is always adorable and functional.
In this article, you’ll learn everything you need to know about making a Baby Four Patch Quilt – Pattern—from material selection and block construction to layout design, sewing techniques, and creative variations. By the end, you’ll feel confident and inspired to make your very own patchwork quilt for a baby to treasure.
1. Gathering Materials and Planning Your Layout
To start your Baby Four Patch Quilt – Pattern, gather all the essentials. One of the most enjoyable parts of quilting is selecting fabrics, especially when you’re creating something as special as a baby quilt. You can stick to a theme like animals, florals, or geometric shapes, or mix and match for a playful look.
For a standard baby quilt size, aim for dimensions around 36” x 45”. This size is ideal for cribs, strollers, or even tummy time. Each four-patch block typically measures 6″ x 6″ finished, made up of four 3.5″ x 3.5″ squares (including seam allowances). You’ll need about 48 to 56 blocks depending on your layout and desired size.
Choose 4–6 coordinating fabrics to give your quilt balance and variety. It’s helpful to mix solids with prints—too many busy prints can overwhelm the design. High-quality cotton fabric is ideal for durability, breathability, and ease of washing—an important factor for baby items.
You’ll also need batting (a light cotton or bamboo batting works best for a baby quilt), backing fabric, and thread. Make sure your batting and backing are slightly larger than the quilt top for easy trimming and binding later.
Plan your layout in advance. You can alternate light and dark squares for contrast, create diagonal color patterns, or go with a random placement for a scrappy look. Using a design wall or digital quilting planner can help you visualize the final piece.
Lastly, prewash your fabrics if they’re not pre-shrunk. This ensures your finished Baby Four Patch Quilt – Pattern won’t warp or shrink unevenly after its first wash—keeping it looking new for longer.
2. Cutting, Piecing, and Assembling the Quilt Top
Once you’ve chosen your fabrics, the next step is precision cutting. Use a rotary cutter, quilting ruler, and self-healing mat for accurate squares. For a baby-sized quilt, you’ll need around 200–220 squares measuring 3.5″ x 3.5″ each (including 1/4″ seam allowance).
Lay out your squares in pairs to prepare for piecing. To form a four-patch block, stitch two squares together, right sides facing, using a 1/4″ seam. Press the seams toward the darker fabric. Repeat this step to make a second pair, then stitch the two pairs together to form a square block of four.
Take your time pressing your seams—this step makes a huge difference in how neatly your blocks align. Iron the seams either all to one side or open, depending on your preference and how bulky your quilt feels.
After making all your four-patch blocks, lay them out according to your plan. This is where you can adjust placement for color balance and visual interest. Arrange your blocks into rows and begin sewing them together, row by row.
Pin each block before sewing to help seams align. Continue joining rows until the quilt top is fully assembled. Give the entire top a final press to ensure it’s smooth and flat.
At this stage, your quilt top is ready for layering with batting and backing—a process known as “making the quilt sandwich.” This step brings your Baby Four Patch Quilt – Pattern to life and prepares it for quilting and finishing.
3. Quilting Techniques and Binding Options
Now it’s time to quilt! Layer your quilt top, batting, and backing fabric. Secure the layers together using safety pins, quilting spray adhesive, or basting stitches. Make sure everything is smooth with no puckers or wrinkles.
For quilting beginners, simple straight-line quilting is ideal. You can sew along the seams (called “stitch in the ditch”) or add diagonal lines across the blocks for a diamond pattern. These methods are not only beautiful but also easy to manage on a home sewing machine.
If you’re more advanced, consider free-motion quilting with loops, hearts, or meandering lines. This adds a decorative touch and can turn your Baby Four Patch Quilt – Pattern into a true heirloom piece.
Once quilting is complete, trim the edges to square the quilt. Next, prepare your binding. You can buy pre-made bias tape or make your own from coordinating fabric. Cut 2.5” strips, sew them together to form one long strip, and press it in half lengthwise.
Attach the binding to the quilt’s edge using a 1/4″ seam, then fold it over to the back and hand-stitch or machine-stitch in place. Binding gives the quilt a polished look and protects the edges from wear.
Don’t forget to add a personal touch! Include a label with the baby’s name, birth date, or a message from the maker. It’s a sweet and meaningful detail that adds heart to your handmade quilt.
4. Variations and Creative Ideas for Baby Four Patch Quilts
The Baby Four Patch Quilt – Pattern may be traditional, but there are endless ways to make it uniquely yours. One popular variation is using alternating solid and print fabrics to create a checkerboard effect. This enhances contrast and highlights the fabric designs beautifully.
Another creative idea is to sash your blocks. Adding thin strips of fabric between blocks gives the quilt a grid-like appearance and makes each block stand out more. Use a neutral or contrasting color for a dramatic effect.
You can also incorporate applique elements into the quilt. Add cute shapes like stars, hearts, or animals onto some blocks for a playful, whimsical touch that’s perfect for babies.
Consider using gradient or ombre fabric placement, moving from light to dark across the quilt. This adds movement and a modern aesthetic while still using the basic four-patch structure.
For a more textured quilt, alternate four-patch blocks with plain square blocks or even larger squares of whole fabric. This breaks up the pattern and allows for some creative quilting or focal fabric pieces.
Finally, think beyond the crib! The four-patch design also works well for baby bags, changing mats, or wall hangings. You can scale the blocks up or down depending on the project size, making this pattern incredibly flexible.
FAQ: Baby Four Patch Quilt – Pattern
Q1: Is the Baby Four Patch Quilt a good project for beginners?
Yes! The Baby Four Patch Quilt – Pattern is an excellent beginner project. It uses basic squares and straight seams, allowing new quilters to practice essential skills while creating something adorable.
Q2: What size should each square be for a baby four-patch quilt?
A common size is 3.5” x 3.5” (including seam allowance), which results in 6” x 6” finished four-patch blocks. You can adjust this based on your preferred quilt size.
Q3: Can I use fabric scraps for a four-patch quilt?
Absolutely! This pattern is scrap-friendly. Mixing colors and prints gives the quilt a vibrant, patchwork look that’s perfect for babies.
Q4: What’s the best batting for a baby quilt?
Choose a soft, breathable batting like cotton or bamboo. These materials are lightweight, machine washable, and comfortable for babies.
Q5: How should I wash a baby quilt?
Use gentle detergent and a cold wash cycle. It’s best to avoid fabric softeners. Air drying or tumble drying on low keeps the quilt in great condition.
Q6: Can I add embroidery or names to the quilt?
Yes, personalizing your quilt with embroidery or labels adds a special touch. Just be sure to do this before layering the quilt or after quilting to maintain a clean finish.
Conclusion
The Baby Four Patch Quilt – Pattern is a wonderful way to create something beautiful, practical, and meaningful. Its simplicity makes it beginner-friendly, yet it offers endless opportunities for customization and creativity. Whether you keep it classic or add your own twist, the result is always a gift of warmth and love.
We’ve walked through fabric choices, block construction, quilting, and ideas for making your quilt truly special. With just a few materials and a bit of time, you can create a keepsake that will be cherished for years.
If you enjoyed this guide or made your own Baby Four Patch Quilt – Pattern, we’d love to hear from you! Leave a sincere opinion or suggestion in the comments. Your feedback helps other crafters and inspires the creative community.
Happy quilting!
🧵👶