The Carpenter’s Square Block Pattern is a timeless design that has been a staple in quilting for generations.
This pattern is known for its geometric precision and intricate layout, making it a favorite for quilters who want a project that is both visually striking and relatively straightforward to assemble.
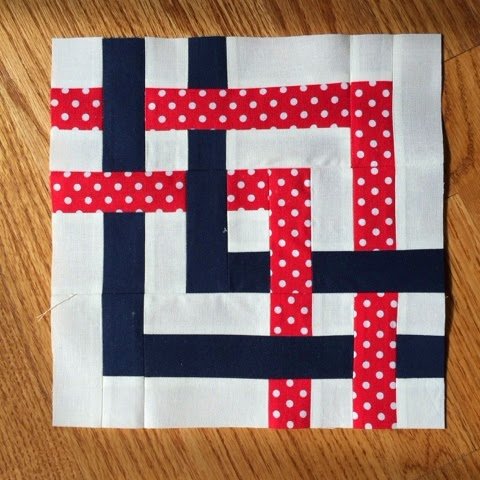
The Carpenter’s Square Block consists of blocks arranged to form a larger square, with each block showcasing sharp angles and clean lines. It’s an ideal pattern for quilters who enjoy playing with color and want a project that showcases both symmetry and creativity.
The beauty of the Carpenter’s Square Block Pattern lies in its versatility. You can create a traditional look by sticking to a limited color palette, or you can modernize it by using bold, contrasting colors. This pattern also allows for endless variations, such as adjusting the block size or experimenting with different fabric types. Whether you’re a beginner or an experienced quilter, the Carpenter’s Square Block will provide you with a satisfying challenge and a finished product that is both functional and aesthetically pleasing.
In this article, we will walk you through the Carpenter’s Square Block Pattern, from the materials you’ll need to the step-by-step instructions to complete your quilt. Whether you’re making a quilt for a special occasion or simply looking for a fun new project, this block pattern offers an exciting and rewarding experience.
1. Materials You Will Need for the Carpenter’s Square Block Pattern
Before you start creating your Carpenter’s Square Block, it’s essential to gather all the necessary materials. Having everything in place will ensure that your quilting experience is smooth and enjoyable. Here’s a list of materials you will need:
1.1 Fabric
The first step in making your Carpenter’s Square Block Pattern is selecting the fabric. For a classic quilt, opt for cotton fabrics, as they are easy to work with and durable. Choose two or more colors for contrast. Traditionally, quilters use a combination of light and dark fabrics, but feel free to get creative with your fabric choices. Remember to use high-quality fabrics that are pre-washed to prevent shrinking after the quilt is completed.
1.2 Rotary Cutter and Cutting Mat
Using a rotary cutter and a cutting mat is the most efficient way to cut the fabric pieces for the Carpenter’s Square blocks. A rotary cutter provides precise, straight cuts, which are essential for making the sharp angles of the blocks. You’ll need to cut squares and triangles in various sizes, so having an accurate cutting mat with clear measurements will help you maintain consistency.
1.3 Quilting Ruler
A quilting ruler is another essential tool. This ruler will help you measure and cut the fabric accurately, ensuring that your blocks are perfectly sized. It is particularly useful for cutting straight lines and trimming the edges of your pieces.
1.4 Thread
For piecing the blocks together, choose a high-quality quilting thread that matches or contrasts with your fabric. It’s best to use a cotton thread for durability, as it blends well with quilting fabrics. If you’re aiming for a subtle appearance, choose a thread color that closely matches your fabric.
1.5 Sewing Machine
A sewing machine will be needed to piece the blocks together. Ensure that your machine is in good working order and is set up with a quarter-inch foot, which is perfect for the precise seam allowance required for this pattern.
1.6 Iron and Ironing Board
An iron and ironing board are essential tools to press your seams open and ensure that your blocks remain flat and smooth. Pressing each seam as you go along will help maintain the crispness and accuracy of your quilt blocks.
With these materials ready, you’re all set to begin creating your own Carpenter’s Square Block Pattern quilt!
2. Step-by-Step Instructions to Make the Carpenter’s Square Block
Now that you’ve gathered your materials, it’s time to start piecing together your Carpenter’s Square Block. The process involves creating a series of smaller squares and triangles that come together to form a larger block with clean lines and sharp angles.
2.1 Cutting the Fabric Pieces
Start by cutting your fabric into the appropriate sizes. You’ll need squares for the center of each block and triangles for the outer edges. The size of your fabric pieces will depend on how large you want each block to be. A typical Carpenter’s Square Block might consist of 12-inch finished blocks, which would require 4.5-inch squares for the center and 2.5-inch squares that will be cut into triangles.
2.2 Assembling the Center Square
Begin by piecing together the center square. Take four of the smaller squares and arrange them in a four-patch configuration, ensuring that the seams are aligned properly. Sew the squares together using a quarter-inch seam allowance, and press each seam open as you go. Once the center square is complete, set it aside for later.
2.3 Making the Triangles
Next, cut the remaining fabric squares into triangles. This can be done by cutting each square diagonally from corner to corner, creating two equal triangles. These triangles will form the outer edges of your Carpenter’s Square Block. Once you’ve cut the triangles, set them aside, ready to be attached to the center square.
2.4 Attaching the Triangles
Now, it’s time to attach the triangles to the center square. Start by placing a triangle on one side of the center square, aligning the edges. Sew it in place, using a quarter-inch seam allowance, and then press the seam open. Continue this process for the other three sides, adding a triangle to each one. As you work, make sure the points of the triangles align with the edges of the center square.
2.5 Adding the Outer Border
Once you’ve attached the triangles, the next step is to add the outer border of the block. This step involves cutting additional strips of fabric to create a final border around the entire block. The width of the strips will depend on the size of your block, but typically, a 1-2 inch strip will be sufficient to frame the Carpenter’s Square Block.
2.6 Pressing and Trimming
Once all the pieces are sewn together, give the block a good press to ensure everything lays flat. Then, use your quilting ruler to trim any excess fabric and make sure the block is perfectly square. Trim all four sides evenly, leaving a quarter-inch seam allowance for assembly with other blocks.
3. Tips for Perfecting Your Carpenter’s Square Block Quilt
Creating a quilt using the Carpenter’s Square Block Pattern can be a rewarding experience, but like any quilt pattern, there are a few tips to help make the process smoother and the finished product more polished.
3.1 Maintain Consistent Seam Allowances
To ensure that your Carpenter’s Square Block pieces fit together perfectly, it’s crucial to maintain a consistent seam allowance throughout the project. A quarter-inch seam allowance is standard for this pattern, so using a quarter-inch foot on your sewing machine will help you achieve this accuracy.
3.2 Press After Each Step
Pressing the seams after each step is key to achieving flat and crisp quilt blocks. This helps reduce bulk and prevents the fabric from becoming distorted. Press the seams open for better accuracy when joining blocks together.
3.3 Use Accurate Cutting Tools
Using a rotary cutter and quilting ruler will help you achieve precise cuts for your blocks. The more accurate your fabric pieces are, the more accurate your finished block will be.
3.4 Experiment with Fabric Choices
While traditional Carpenter’s Square Blocks use two contrasting fabrics, feel free to experiment with different fabric types and colors. Try using floral patterns, bold solids, or even scrap fabrics for a fun twist on the classic design.
3.5 Keep Your Blocks Consistent in Size
As you work through your quilt, make sure each block is the same size. If necessary, trim the blocks to the same dimensions after piecing them together to ensure consistency throughout the quilt.
3.6 Consider Adding Sashing
If you want to add more structure to your quilt, consider adding sashing between the blocks. This adds extra definition and allows the individual blocks to stand out even more.
4. Troubleshooting Common Problems in the Carpenter’s Square Block Pattern
No matter how experienced you are, quilting can sometimes present challenges. Here are some common problems quilters encounter with the Carpenter’s Square Block Pattern and how to fix them:
4.1 Uneven Blocks
If your blocks are coming out uneven, it may be due to incorrect seam allowances. Double-check your seams and make sure you are using a consistent quarter-inch seam allowance throughout the project.
4.2 Missed Corners
If your block’s corners are not aligning properly, make sure that the fabric pieces are cut accurately and that your triangles are sewn on evenly. Pinning the pieces in place before sewing can also help.
4.3 Bulky Seams
If your seams are too bulky, try pressing them open instead of to one side. This will help distribute the fabric evenly and reduce unnecessary bulk in the quilt.
4.4 Irregular Shape
If the quilt block isn’t a perfect square, check the measurements and trim any excess fabric using a quilting ruler and rotary cutter. Always measure before sewing to prevent irregular shapes.
4.5 Difficulty Matching Points
If you’re struggling to match the points of your triangles to the center square, try pinning the pieces before sewing.
This can help you ensure that everything lines up perfectly.
4.6 Fabric Shrinkage
Be sure to pre-wash your fabric to prevent any shrinkage that may occur after the quilt is completed. This will ensure that your quilt maintains its size and shape after washing.
FAQ
1. How long does it take to make a Carpenter’s Square Block quilt?
The time required will depend on the size of the quilt and your skill level. A single Carpenter’s Square Block can take a few hours to complete, and a full quilt may take several days to finish.
2. Can I use any fabric for the Carpenter’s Square Block?
Yes, you can use any fabric you like. However, cotton fabric is preferred due to its durability and ease of use in quilting.
3. What are some variations of the Carpenter’s Square Block Pattern?
You can adjust the size of the blocks, experiment with different fabric combinations, or add borders to create unique variations of the Carpenter’s Square Block Pattern.
4. Can I use the Carpenter’s Square Block for a beginner quilt?
Absolutely! The Carpenter’s Square Block Pattern is beginner-friendly, especially when you follow the step-by-step instructions carefully and practice your piecing techniques.
5. How do I join the blocks together?
Once your blocks are complete, you can join them using sashing or by directly sewing the blocks together, matching the seams as you go.
Conclusion
The Carpenter’s Square Block Pattern is a versatile and beautiful quilt design that will challenge quilters of all skill levels. By following the steps outlined in this article and using the right materials, you can create a stunning quilt that reflects your creativity and dedication to the craft. Whether you’re new to quilting or an experienced quilter, this pattern offers an exciting opportunity to explore new techniques and build your skills.
If you have any thoughts or suggestions, feel free to leave them in the comments section! Happy quilting!