The Double Windmill Quilt Block – Pattern is a captivating and dynamic design that brings energy and motion to any quilt.
Recognized for its swirling, spinning visual effect, this block has earned a place in both modern and traditional quilting circles.
Whether you’re looking to create a bold statement piece or add movement to a more subtle quilt layout, the Double Windmill Quilt Block – Pattern is a perfect choice.
Unlike simpler patterns, the Double Windmill Quilt Block – Pattern introduces complexity through angular cuts and clever color placement. Despite its more intricate look, it’s surprisingly manageable for confident beginners and an engaging challenge for seasoned quilters. The geometric style adds depth and texture, making it a favorite for wall hangings, table runners, and full-size quilts.
In this article, we’ll guide you through the core concepts of the Double Windmill Quilt Block – Pattern, from understanding its construction to choosing fabrics and mastering the layout. You’ll also find ideas for creative variations, along with a detailed FAQ to answer common questions. Using proven SEO techniques and a human-friendly tone, this guide is crafted to inspire and inform.
1. What is the Double Windmill Quilt Block – Pattern?
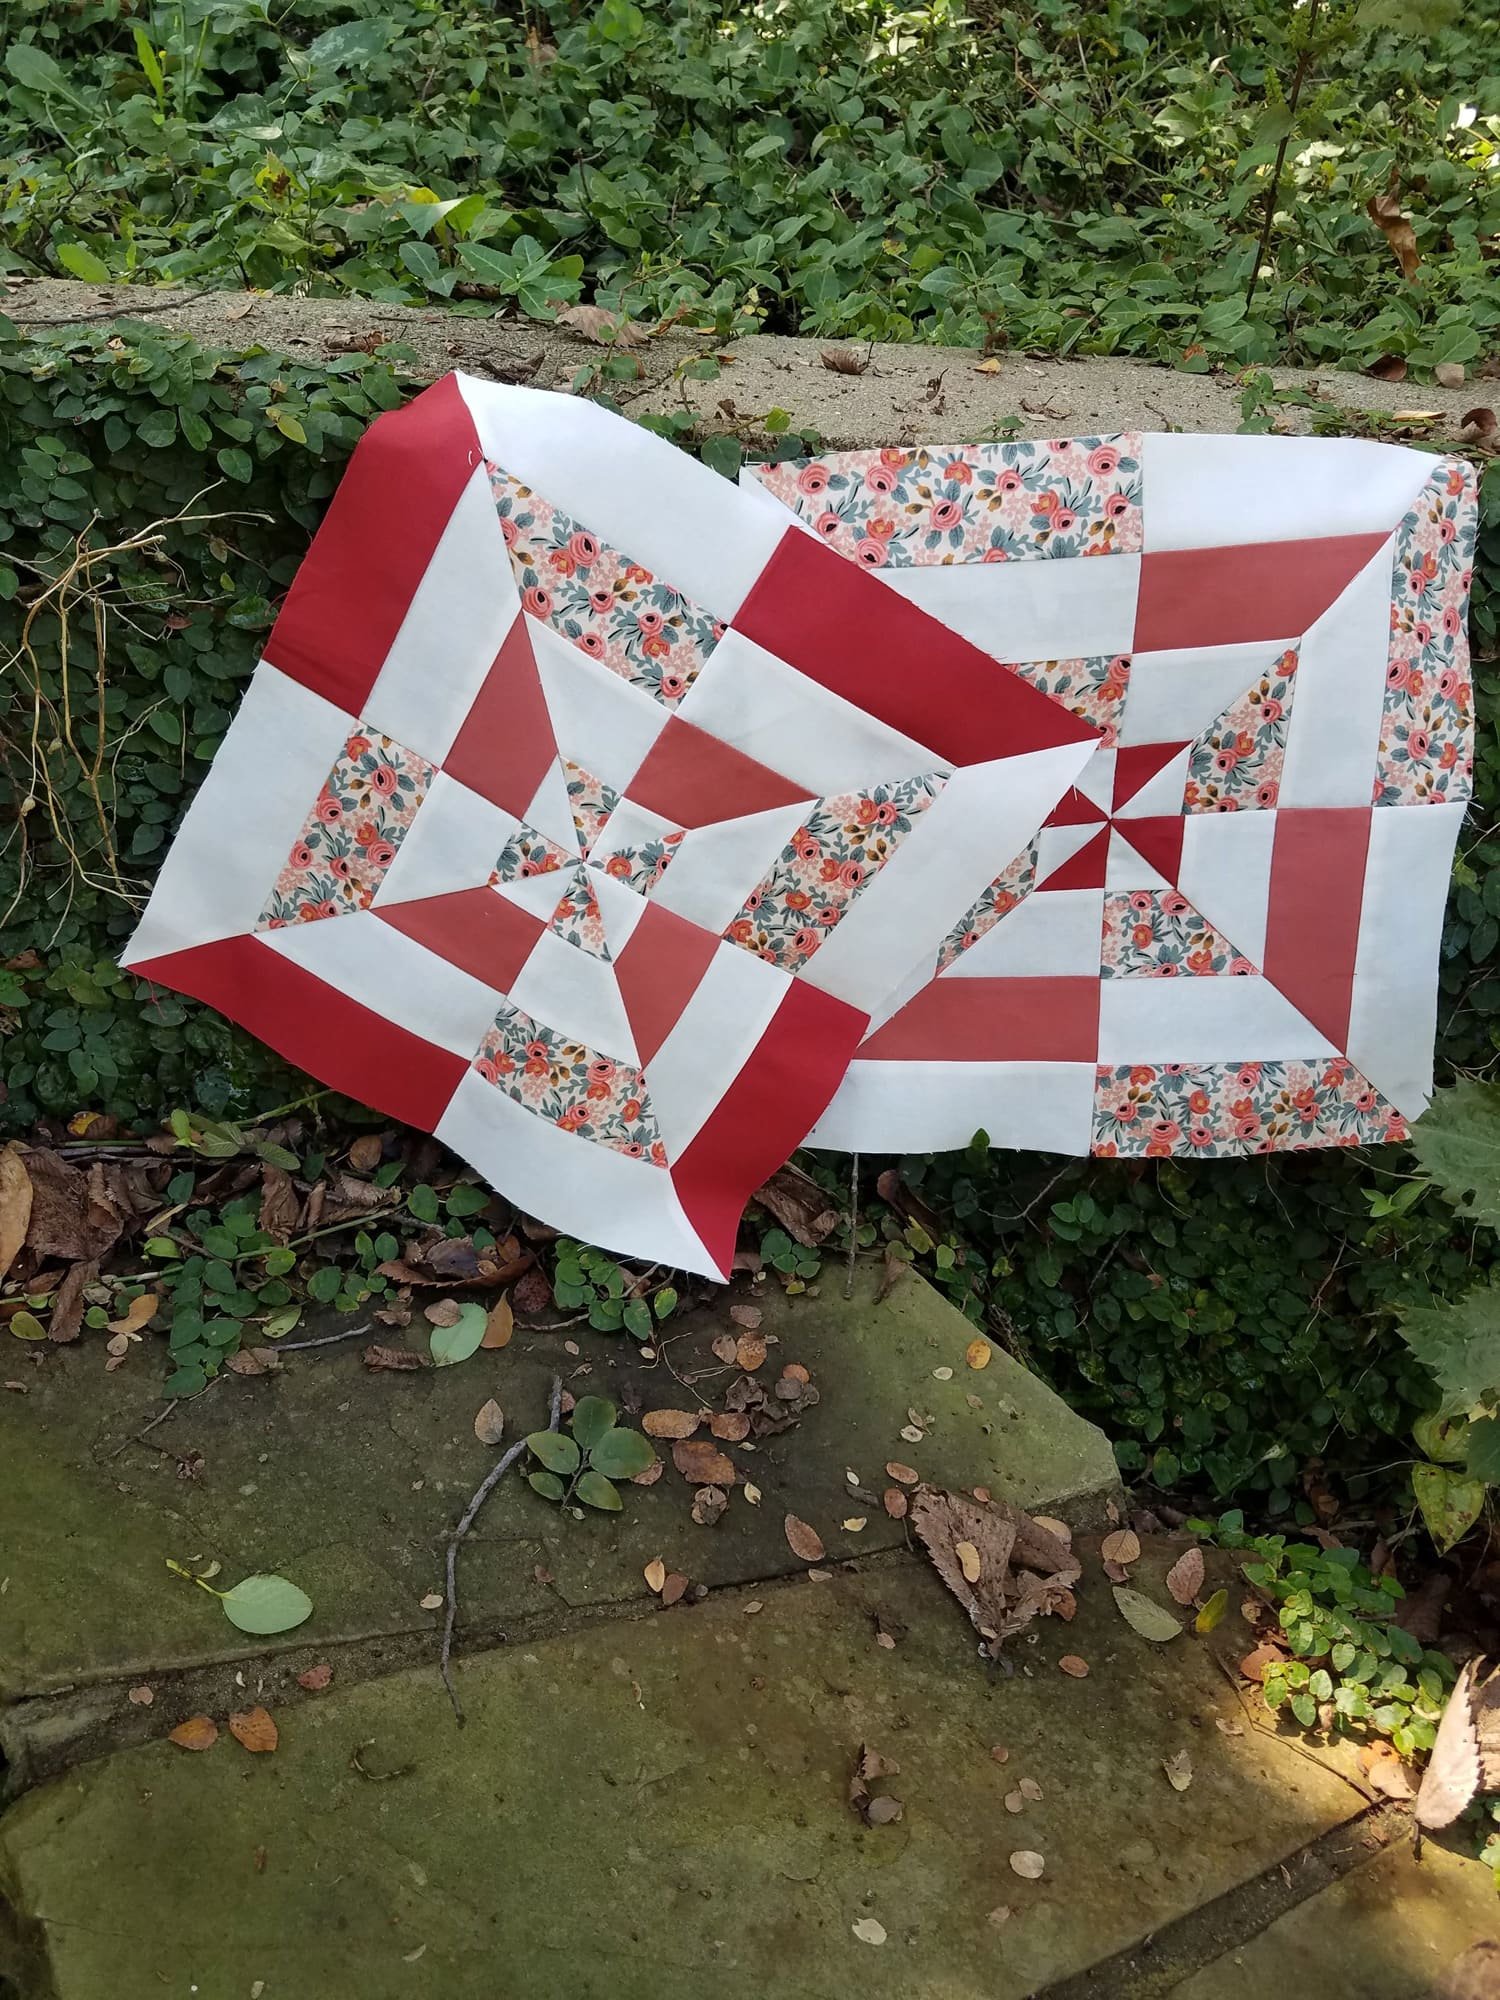
The Double Windmill Quilt Block – Pattern is a variation of the classic windmill block, but with a twist—literally. By doubling the pinwheel effect and rotating triangle units more strategically, the block mimics the motion of two overlapping windmills spinning in unison. This layered look adds complexity and movement to any quilt.
The basic unit consists of four quadrants, each made from half-square triangles (HSTs) and quarter-square triangles (QSTs). These smaller components create the illusion of blades in motion. When pieced together, they form a large central pinwheel with smaller secondary blades that radiate outward.
Despite its visual complexity, the structure of this block is relatively straightforward once broken down. Each quadrant is constructed separately, then joined in a 2×2 grid. The angles and orientation of your triangle pieces are what create the double spin effect that gives this block its name.
This block typically measures 12 inches finished but can be scaled up or down based on your project needs. Its versatility means you can use it as a standalone centerpiece or repeat it in rows to form an energetic quilt top. It’s particularly stunning when paired with high-contrast or gradient fabrics.
One of the best aspects of the Double Windmill Quilt Block – Pattern is its ability to showcase color movement. By strategically placing light and dark fabrics, you can enhance the visual whirl of the pattern. This makes it a great design for experimenting with color theory and fabric placement.
In short, this block combines the fun of piecing with the satisfaction of seeing a striking, professional-looking design come together. Whether you’re making a full-size quilt or just a block for practice, the Double Windmill pattern is a rewarding project.
2. Choosing Fabrics for the Double Windmill Effect
When working with the Double Windmill Quilt Block – Pattern, your fabric choices play a major role in the final look of the block. Because this pattern relies on visual movement, contrasting fabrics will help the windmill blades pop and create the illusion of spinning motion.
Start with a strong color palette. High contrast between your background and blade fabrics is essential for defining the shapes within the block. Black and white, navy and cream, or red and gray are popular combinations that highlight the block’s movement beautifully.
Consider using solid fabrics or small prints for the windmill blades. These help keep the edges sharp and clear. Busy prints can obscure the design, especially in the smaller triangle pieces. Save your bold prints for larger blocks or border accents if you want to maintain clarity.
You can also play with gradients or ombré effects to create a sense of depth. Placing lighter shades toward the center and darker shades toward the outer edges of the windmill blades will make the block appear to recede and rotate simultaneously.
Fabric texture also contributes to the feel of your finished quilt. Lightweight quilting cotton is the most popular choice due to its durability and easy handling. However, for a soft or vintage aesthetic, flannel or linen-cotton blends can add warmth and personality to your project.
Don’t forget to pre-wash and press your fabrics before cutting. This reduces shrinkage and distortion, especially important when working with angled seams like those in this pattern. Clean, crisp fabric will help you get accurate cuts and smooth seams.
Finally, audition your fabric layout using a design wall or digital quilt design app. This helps you visualize how the colors and shapes interact before you start cutting and piecing. It’s much easier to make changes in the design phase than after sewing!
3. Step-by-Step Construction of the Double Windmill Quilt Block
Creating the Double Windmill Quilt Block – Pattern requires precision and planning, but once you understand the sequence, it comes together smoothly. Here’s a basic guide to piecing one 12” finished block.
Begin by cutting your pieces. For each block, you’ll typically need:
- (4) 4.5” squares of Fabric A (main windmill)
- (4) 4.5” squares of Fabric B (secondary blades)
- (4) 4.5” squares of background fabric
- (4) 5” squares of Fabric C (for quarter-square triangles)
- (4) 5” squares of Fabric D (contrast for quarter-square triangles)
Start by making half-square triangles. Pair Fabric A with background fabric. Place right sides together, draw a diagonal line on one square, sew 1/4” on each side, and cut along the line. Press seams open or to one side.
Next, make quarter-square triangles by pairing the HST units with squares of Fabric C and D. Again, sew along a diagonal, cut, and press. You’ll end up with triangle units that form the spinning blades of the windmill.
Layout each quadrant of the block. You’ll want to alternate the HSTs and QSTs so that each section of the windmill flows into the next. The key to a clean look is consistency—make sure the rotation of each piece is mirrored in each quadrant.
Once each quadrant is sewn, press the seams carefully to reduce bulk. Join the quadrants in two rows, then sew the rows together to complete the block. Press the final seams flat for a crisp finish.
Repeat the process to create as many blocks as needed for your quilt size. Remember, the impact of the windmill effect increases when multiple blocks are placed together, so lay them out before assembly to double-check alignment and flow.
4. Creative Uses and Layouts for Your Quilt Project
The Double Windmill Quilt Block – Pattern is visually strong enough to stand alone, but it also offers endless possibilities when used in larger projects. Its dynamic design lends itself to both structured and playful quilt layouts.
One popular idea is to alternate double windmill blocks with solid or simple blocks, such as plain squares or low-volume fabrics. This gives the eye a place to rest and emphasizes the spinning motion of the windmills even more.
Another creative approach is to rotate every other windmill block to create a ripple effect across your quilt. When done with a gradient color scheme, this can simulate waves or vortexes, adding a modern and artistic flair.
You can also use sashing between the blocks. Thin strips of neutral fabric will help separate the complex patterns while maintaining flow. For a bolder look, try sashing with a contrasting fabric to frame each block individually.
Consider using this block for projects beyond bed quilts. The bold lines and symmetry make it ideal for quilted pillows, wall hangings, and even bags. A set of matching double windmill placemats or table runners can instantly elevate your home décor.
If you’re adventurous, incorporate applique or embroidery in the block centers. This adds a personal touch and can soften the geometric nature of the design. Personal initials, dates, or small motifs can make your quilt even more meaningful.
For a truly modern twist, experiment with negative space. Use the windmill block in only part of the quilt and let the rest be solid fabric. This technique adds balance and creates a gallery-style look that many modern quilters love.
FAQ – Frequently Asked Questions About Double Windmill Quilt Block – Pattern
What size is the Double Windmill Quilt Block?
The standard finished size is 12 inches, but you can scale it up or down based on your project. Just make sure to adjust all your triangle pieces proportionally.
Is this pattern suitable for beginners?
It’s best for confident beginners or intermediate quilters. The block involves both half-square and quarter-square triangles, so a good understanding of basic quilting techniques is helpful.
Do I need to pre-wash my fabrics?
Yes, especially if you’re using dark colors that may bleed. Pre-washing also helps reduce shrinkage and ensures your block maintains its shape after quilting.
What is the best fabric type to use?
Quilting cotton is the most recommended. It’s stable, easy to press, and holds up well through repeated sewing and washing.
Can I use this block in a sampler quilt?
Absolutely! The Double Windmill Quilt Block – Pattern makes a great addition to samplers due to its bold and unique design. It adds complexity and contrast.
How many blocks do I need for a full-size quilt?
That depends on your block size and quilt dimensions. For 12” blocks, a 5×7 layout (35 blocks) will give you a quilt roughly 60” x 84”, not including sashing or borders.
Conclusion
The Double Windmill Quilt Block – Pattern is a stunning and dynamic addition to any quilting project. With its layered motion and creative potential, this pattern allows quilters to play with color, fabric, and structure in truly exciting ways. Whether you’re aiming
for a modern aesthetic or paying tribute to traditional designs, this quilt block offers something for everyone.
We hope this guide has helped you understand the process of creating your own Double Windmill block and inspired you to try new layouts and fabric combinations. If you’ve used this pattern or have ideas for how it could be improved, please leave a sincere review or suggestion. Your feedback helps us continue to provide meaningful and useful content for the quilting community. Happy quilting!