The Granny Square Quilt Block – pattern is a classic quilting design that continues to capture the hearts of quilters all over the world.
This quilt block design draws inspiration from the traditional Granny Square, a well-loved pattern in the quilting community.
By utilizing simple fabric squares and straightforward sewing techniques, the Granny Square quilt block can easily become the centerpiece of a beautiful, personalized quilt.
Whether you’re a beginner or an experienced quilter, this pattern offers endless opportunities for creativity.
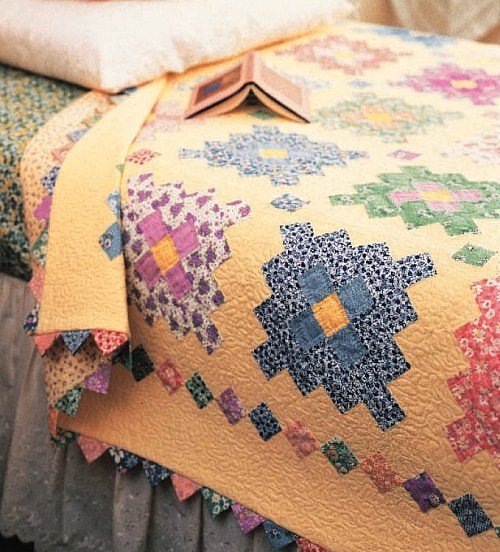
The Granny Square Quilt Block – pattern features a geometric design made up of multiple smaller squares arranged in a square layout. This pattern can be used to create quilts of various sizes, from small decorative pieces to large bed quilts. It is a perfect choice for quilters who appreciate both symmetry and simplicity, as the design allows for numerous variations in color and fabric choices.
In this article, we will guide you through the steps to create your own Granny Square Quilt Block, from selecting materials to sewing and assembling your quilt top. Along the way, we’ll provide tips and tricks to ensure your quilt turns out beautifully.
1. Materials Needed for the Granny Square Quilt Block
Before diving into the quilting process, it’s important to gather the necessary materials to make the Granny Square Quilt Block. Here’s a list of essential supplies you’ll need for this project:
- Fabric: The fabric you choose will determine the overall look of your quilt. Cotton fabric is the best option for quilting due to its durability and ease of use. Select fabrics in a variety of colors and prints for the center and surrounding squares of your Granny Square block. You can mix solid colors with patterns, or use different shades of the same color for a cohesive design.
- Quilting Ruler: A quilting ruler helps you measure and cut your fabric with precision. The most common size is a 6″ x 24″ ruler, which allows you to cut fabric strips and squares accurately. Make sure to have a ruler with grid markings for accurate measurements.
- Rotary Cutter: A rotary cutter is a must-have tool for cutting fabric. It allows you to cut through multiple layers of fabric at once and provides a clean, straight edge. Pair it with your quilting ruler to cut fabric into uniform squares.
- Thread: You’ll need thread to sew your fabric pieces together. A neutral-colored thread, such as white, gray, or beige, works well with most color combinations. Make sure to use quilting thread for durability and strength.
- Sewing Machine: A sewing machine is required to stitch the fabric squares together. Choose a machine with a straight stitch and a quarter-inch foot for accurate seam allowances.
- Iron and Ironing Board: Pressing your fabric and seams is essential for a neat finish. An iron and ironing board will help you flatten the fabric and set the seams, which will prevent any puckering and make your quilt top smooth.
- Safety Pins or Basting Spray: To keep your quilt layers together while you work, use safety pins or basting spray. This will hold the quilt top, batting, and backing fabric in place during the quilting process.
With these tools and materials, you’ll be well-equipped to create a stunning Granny Square Quilt Block.
2. Step-by-Step Guide to Making a Granny Square Quilt Block
Creating a Granny Square Quilt Block is a simple yet rewarding process. Follow these step-by-step instructions to make your own quilt blocks:
- Cut Your Fabric Pieces: The first step is to cut your fabric into squares. A typical Granny Square Quilt Block features a 3×3 grid, meaning you’ll need to cut nine smaller squares. A common size for each square is 4.5″ x 4.5″, which will give you a finished block size of about 12″ x 12″ (after adding seam allowances). Cut enough squares for the center and surrounding parts of the block.
- Arrange the Squares: Lay the fabric squares out in a 3×3 grid. Place the center square in the middle, then arrange the surrounding squares around it. You can choose a uniform color scheme, such as shades of blue, or opt for a more eclectic look with varied patterns and colors. Take time to experiment with the arrangement to ensure that it looks balanced.
- Sew the Squares Together: Once you’ve decided on the layout, it’s time to sew the squares together. Start by sewing the first two squares in the top row, using a quarter-inch seam allowance. Once they are sewn, press the seams flat with an iron. Continue adding the other squares in the top row, then repeat the process for the other two rows.
- Join the Rows: After the squares are sewn into rows, sew the rows together. Carefully align the seams, ensuring that they match up. Once the rows are joined, press the seams again to make sure everything is flat.
- Trim the Block: After assembling your Granny Square Quilt Block, trim the edges to make sure the block is even. Use a rotary cutter and quilting ruler to cut the block down to the correct size, typically 12.5″ x 12.5″ (this allows for seam allowances).
- Repeat for Additional Blocks: If you’re making a larger quilt, repeat these steps to create more Granny Square Quilt Blocks. The number of blocks you need will depend on the size of the quilt you’re making. You can mix and match the colors of each block for a more dynamic quilt top.
Now, you have your Granny Square Quilt Block complete and ready to be used in your quilt.
3. Assembling the Quilt Top
Once you’ve finished making multiple Granny Square Quilt Blocks, you’re ready to assemble them into a quilt top. Here’s how to do it:
- Layout the Quilt Blocks: Lay your quilt blocks out on a flat surface in the desired arrangement. You can opt for a grid layout where all blocks are aligned, or you can get creative and stagger the blocks for a more casual look. Take your time during this step to ensure that the quilt blocks are aligned in a way that you’re happy with.
- Sew the Blocks Together: Begin sewing the blocks together, row by row. Align the edges of each block and sew them using a quarter-inch seam allowance. After each row, press the seams to keep the quilt top smooth.
- Join the Rows: After all the rows are sewn together, join the rows to complete the quilt top. Be sure to match the seams as you sew to ensure that the quilt top is aligned and that all the squares fit together perfectly.
- Press the Seams: After the rows are joined, press the seams once more to ensure everything is flat. This will help the quilt top lie smooth and avoid puckering later on.
- Trim the Edges: If necessary, trim the edges of the quilt top to ensure that all the blocks are even and that the quilt top is square. Use your rotary cutter and quilting ruler for precision.
- Prepare for Quilting: Now that your quilt top is assembled, you can prepare the quilt sandwich by adding batting and backing fabric. Once the layers are ready, you can start quilting.
With these steps, you’ll have a completed quilt top that showcases your beautiful Granny Square Quilt Blocks.
4. Tips for Personalizing Your Granny Square Quilt Block
One of the best parts of quilting is the opportunity to customize your design. Here are some tips to help you personalize your Granny Square Quilt Block:
- Play with Color Combinations: The colors you choose will define the mood of your quilt. For a bright, cheerful quilt, use vibrant colors like reds, yellows, and oranges. For a more subtle and calming quilt, opt for pastel shades or earth tones.
- Add Different Fabrics: Don’t be afraid to mix different fabric types and prints. You can use floral prints, solid colors, or even stripes to create a unique design. Combining different fabric textures can also add an interesting tactile dimension to your quilt.
- Experiment with Layouts: Instead of arranging all your blocks in a strict grid, try different layouts such as offset blocks or a diagonal arrangement. This will give your quilt a more modern or creative feel.
- Include Borders: Adding a border around your quilt can help frame the blocks and give your quilt a finished look. You can use a contrasting fabric or a fabric that complements the colors of the quilt blocks.
- Use Sashing: Sashing is the fabric that separates the quilt blocks and adds structure to the quilt top. You can choose a simple sashing that complements the blocks or a bolder option for a more dramatic effect.
- Add Appliqué: If you want to take your quilt to the next level, consider adding appliqué designs to your blocks. Appliqué can include shapes like flowers, hearts, or even letters to make your quilt truly one-of-a-kind.
These tips will help you create a Granny Square Quilt Block that reflects your personal style and adds flair to your quilt.
FAQ About Granny Square Quilt Block
Q1: What is a Granny Square Quilt Block?
A1: A Granny Square Quilt Block is a square quilt block made up of smaller fabric squares arranged in a grid. It is inspired by the Granny Square pattern often seen in crochet, but adapted for quilting.
Q2: What fabric is best for making Granny Square Quilt Blocks?
A2: Cotton fabric is the best choice for quilting because it’s durable, easy to sew, and comes in a wide variety of colors and prints.
Q3: How do I sew the Granny Square Quilt Blocks together?
A3: Sew the blocks together row by row, and then join the rows together. Be sure to press the seams as you go to keep the quilt top flat.
Q4: Can I make different-sized Granny Square Quilt Blocks?
A4: Yes, you can experiment with different block sizes to create a unique look for your quilt.
Q5: How do I assemble a quilt top from Granny Square Quilt Blocks?
A5: Once you’ve made your blocks, lay them out in your desired layout, sew the blocks into rows, and then join the rows together to complete the quilt top.
Q6: What is the finished size of a Granny Square Quilt Block?
A6: A typical Granny Square Quilt Block is 12” x 12” before adding seam allowances. After adding seam allowances, the block should be trimmed to around 12.5” x 12.5”.
Conclusion
The Granny Square Quilt Block – pattern is a classic and versatile design that can be customized to suit any style. By using simple fabric squares and sewing techniques, you can create beautiful quilt blocks that come together to form a stunning quilt. Whether you’re a beginner or an experienced quilter, this pattern provides endless opportunities for creativity and personalization.
With the materials, instructions, and tips provided in this guide, you’re now ready to start creating your own Granny Square Quilt Blocks. Happy quilting!