The Log Cabin Quilt Block – Pattern is one of the most beloved and iconic patterns in quilting history. Its simple yet symbolic design, resembling the structure of a log cabin with a central square surrounded by strips, has captured the hearts of quilters for generations. Whether you’re a beginner or an experienced quiltmaker, this block offers versatility, tradition, and endless creative possibilities.
What makes the Log Cabin Quilt Block – Pattern so special is its ability to tell a story. The center square traditionally represents the hearth of the home, often sewn in red or yellow to symbolize warmth and light. Each surrounding strip represents the walls built around that center, giving the quilt block a metaphorical and emotional connection to family, comfort, and heritage.
In today’s quilting world, this pattern continues to thrive because of its adaptability. It can be traditional, modern, scrappy, minimal, or bold—depending on your fabric choices and layout. In this article, we’ll explore the origins of the Log Cabin Quilt Block – Pattern, how to make it step by step, creative variations, and common questions about this timeless design.
1. The History and Symbolism Behind the Log Cabin Quilt Block – Pattern
The origins of the Log Cabin Quilt Block – Pattern date back centuries, with deep roots in American and European quilting traditions. Although it rose to prominence in the United States during the Civil War era, some forms of this block design can be found in earlier European textiles as well.
In American history, the Log Cabin quilt became a symbol of patriotism and unity. Many quilts were made using this pattern during the Civil War, and some even included subtle messages to guide those seeking freedom through the Underground Railroad.
The central square often carries symbolic meaning. A red center typically signifies the hearth or fire of the home, while a yellow center might represent the light in the window welcoming family and friends. This symbolism adds emotional depth to the quilting process.
One of the reasons this pattern remained so popular over time is its practicality. It uses small pieces of fabric, making it ideal for using scraps. During times of economic hardship, quilters could still create beautiful, meaningful works from what they had on hand.
Additionally, the Log Cabin block lends itself to a variety of layouts. Depending on how you arrange the blocks, you can create patterns like Barn Raising, Straight Furrows, Fields and Furrows, and Courthouse Steps. Each layout gives the quilt a different visual rhythm.
The historical and symbolic weight of the Log Cabin Quilt Block – Pattern adds emotional value to any quilt made with it. Every time you sew one of these blocks, you’re participating in a centuries-old tradition of storytelling through stitches.
2. How to Make a Log Cabin Quilt Block – Pattern Step by Step
Making a Log Cabin Quilt Block – Pattern is a straightforward process that begins with a central square and continues with building “logs” around it. Whether you’re sewing by hand or machine, the technique remains the same.
Start by selecting your center square. It can be any size, but a common choice is a 2.5” x 2.5” square. This center anchors the design. Choose a color that symbolizes the warmth or light of home—a traditional red or yellow works beautifully, but you can make it your own.
Next, you’ll add logs (strips of fabric) around the center square in a clockwise or counter-clockwise order. These logs are usually uniform in width but grow in length as you move outward. Cut each strip to fit precisely as you add layers.
You’ll typically use light and dark fabrics in alternating sides. This light-dark contrast is what gives the block its dimension and allows larger quilt layouts to display intricate patterns. It’s a great way to play with color value and visual depth.
When sewing, press each seam carefully after attaching a log. Pressing helps the block stay flat and makes subsequent piecing more accurate. A well-pressed block is easier to quilt later and looks more professional overall.
Keep building the block until it reaches your desired size. A standard block might have four to six rounds of logs, but you can adjust based on your project. Most Log Cabin blocks end up square, such as 12” x 12”, but rectangles are also possible.
Finally, trim your block to square it up. This ensures that all your blocks will fit together neatly in the final quilt top. At this point, you can begin planning your layout and thinking about how each block will come together into the final design.
3. Creative Layouts and Variations of the Log Cabin Quilt Block – Pattern
The Log Cabin Quilt Block – Pattern is incredibly versatile. By simply rotating the blocks or changing fabric placement, you can produce dozens of unique designs. Let’s look at some popular layout variations.
Straight Furrows is a classic layout where the blocks are aligned in rows, all facing the same direction. This creates a clean, diagonal stripe effect across the quilt. It’s easy to arrange and ideal for beginners.
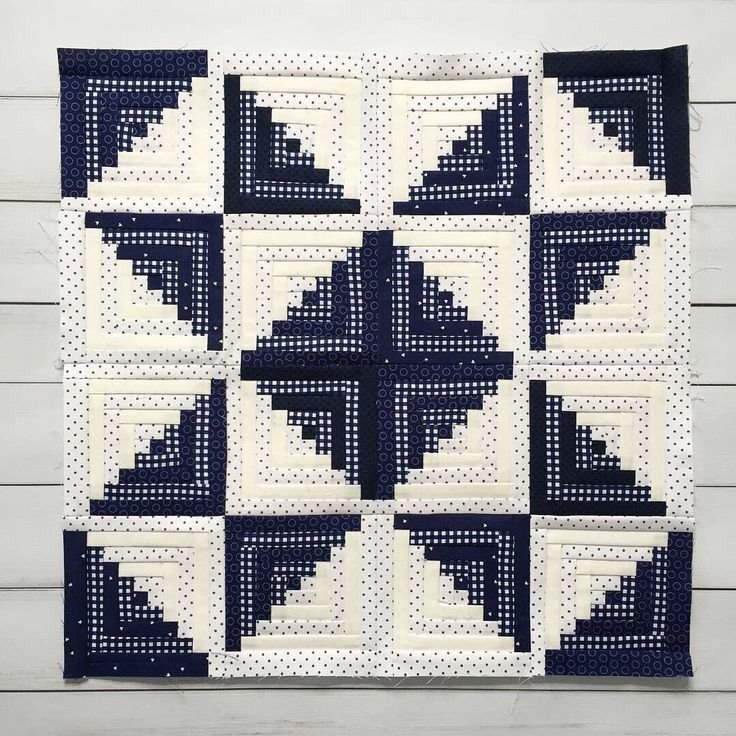
Barn Raising is another favorite. Here, blocks are rotated so that the dark halves form concentric diamonds radiating outward. This layout is striking and adds a sense of movement and depth to the quilt.
Courthouse Steps is a symmetrical variation of the Log Cabin block where logs are added to opposite sides rather than around in a spiral. The result is a more formal, centered design that emphasizes balance and order.
Fields and Furrows alternates the direction of each block to create a zigzag or chevron pattern. This layout is bold and modern-looking, especially when made with high-contrast fabrics.
A fun and modern twist is the Scrappy Log Cabin, where you use completely random fabrics for each log. This is a fantastic way to use up fabric scraps while giving your quilt a joyful, eclectic vibe.
Another variation is the Wonky Log Cabin, where strips are cut and sewn at angles, creating a playful, off-center look. This freeform style is perfect for artistic quilters who love experimenting with color and shape.
4. Tips for Success with the Log Cabin Quilt Block – Pattern
Even though the Log Cabin Quilt Block – Pattern is beginner-friendly, there are some tips that can help you make the most of your experience and create a quilt you’ll be proud of.
Choose fabrics wisely. Contrast is key in this pattern. Pick fabrics with varying values—light and dark—so the structure of the block is visible. Without contrast, your design may look flat or muddled.
Accurate cutting matters. Since this block involves precise strip sizes, take your time with cutting. Use a rotary cutter, ruler, and cutting mat to ensure each strip is even.
Chain piece when possible. This means sewing several pieces in sequence without cutting the thread. It speeds up the process and helps maintain momentum, especially when making multiple blocks.
Press as you go. Always press each seam before adding the next log. This helps your block stay square and keeps the finished quilt looking clean and flat.
Square up your blocks. Before joining them into rows or columns, trim each block to the same size. This ensures your quilt top will go together smoothly and your corners will align properly.
Plan your layout ahead of time. Use a design wall or lay your blocks out on the floor. Moving them around before sewing helps you visualize the final quilt and adjust for color balance or symmetry.
FAQ – Log Cabin Quilt Block – Pattern
Q1: What is the standard size of a Log Cabin quilt block?
Most Log Cabin blocks range from 10” to 14”, depending on the number and width of logs. A common size is 12” x 12”.
Q2: Can I make this pattern using pre-cut fabric like jelly rolls?
Yes! Jelly rolls are perfect for this pattern since the strips are already 2.5” wide—ideal for log widths.
Q3: Is the Log Cabin block beginner-friendly?
Absolutely. It’s one of the best patterns for beginners because of its repetitive nature and easy-to-learn construction.
Q4: Do I need a specific type of fabric?
Quilting cotton is recommended. It’s durable, easy to press, and comes in a wide range of prints and solids for creating contrast.
Q5: What kind of batting and backing go best with Log Cabin quilts?
Use low-loft batting for a classic, flat look or high-loft for added texture. Backing fabric can be plain or pieced depending on your aesthetic preference.
Q6: Can I sew this block by hand?
Yes, although it takes longer. Hand-sewing is a wonderful option for portable projects or those who enjoy slow stitching techniques.
Conclusion
The Log Cabin Quilt Block – Pattern is more than just a design—it’s a piece of history, a creative outlet, and a symbol of warmth and home. Its adaptability, ease of construction, and powerful symbolism make it a staple in every quilter’s repertoire.
From understanding its origins and symbolism to mastering the technique and exploring layout possibilities, we’ve covered everything you need to start or enhance your Log Cabin quilting journey.
Have you made a Log Cabin quilt before? Or are you planning to try it soon? We’d love to hear your thoughts, tips, and experiences in the comments below. Feel free to share your creations or suggest future topics you’d like to see!