The Simple Star quilt block – Pattern is a timeless and versatile design cherished by quilters around the world.
Known for its clean lines and classic aesthetic, this block is the perfect starting point for beginners and a favorite go-to for seasoned quilters looking for a quick yet beautiful project.
With just a few fabric pieces and some basic sewing skills, you can create a star block that shines in any quilt layout.
What makes the Simple Star quilt block – Pattern especially appealing is its adaptability. Whether you’re designing a full quilt, a pillow cover, a wall hanging, or even a table runner, the star block can be scaled and styled to suit a wide variety of projects. It’s also ideal for experimenting with different fabrics, from solids to prints, and allows you to play with color contrast to make each block pop.
This guide will walk you through the fundamentals of the Simple Star quilt block – Pattern, including its design structure, fabric selection tips, piecing techniques, and ideas for finishing your quilt. We’ll also explore creative ways to personalize your star blocks and answer common questions to help you feel confident and inspired.
1. Getting to Know the Simple Star Quilt Block
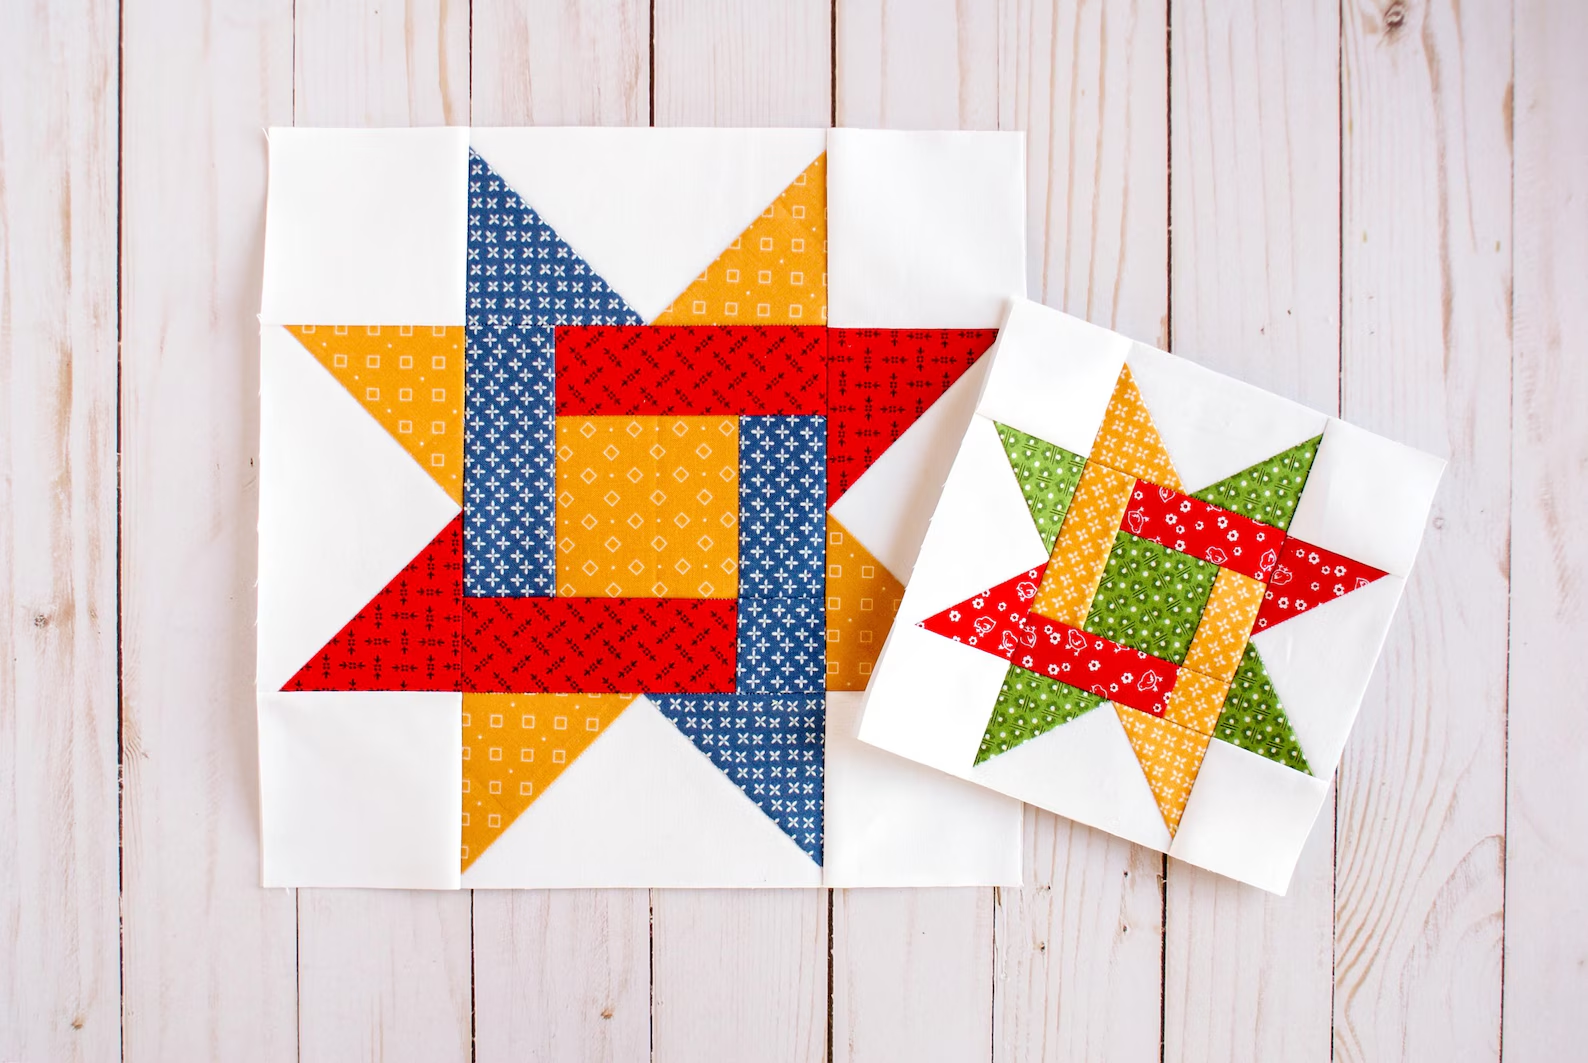
The Simple Star quilt block – Pattern typically features a symmetrical eight-pointed star, made using a combination of squares and half-square triangles (HSTs). This classic motif symbolizes guidance, light, and hope, making it a meaningful addition to any handmade quilt. Its straightforward geometry makes it easy to construct, yet it never fails to leave a lasting impression.
At its core, the block is made up of a 3×3 or 4×4 grid, with a central square surrounded by triangles that form the points of the star. The design may vary slightly depending on the size and variation, but the basic construction remains intuitive and approachable. It’s a great introduction to precision piecing and fabric alignment.
The block is a fantastic canvas for exploring color theory. You can create high-contrast stars using dark and light fabrics, or opt for a soft, harmonious look with tone-on-tone prints. This flexibility makes the Simple Star quilt block – Pattern an excellent learning tool for understanding balance and visual weight in quilt design.
One of the great things about this pattern is how easily it fits into a larger quilt layout. Whether repeated uniformly or mixed with other traditional blocks like the Nine Patch or Flying Geese, the star block offers balance and rhythm. It acts as a visual anchor in more complex quilts or as a standalone feature in minimalist designs.
Even though it’s called “simple,” the star block can be dressed up with borders, sashing, or embellishments like embroidery or fussy-cut centers. This adaptability makes it popular among both traditional quilters and modern makers alike.
Best of all, the pattern scales well. From small 6-inch blocks to large 12-inch or 16-inch formats, the Simple Star quilt block – Pattern maintains its structure and beauty across sizes. This scalability makes it a staple in any quilter’s repertoire.
2. Selecting Fabric and Preparing to Quilt
Choosing the right fabric is one of the most enjoyable parts of creating the Simple Star quilt block – Pattern. The beauty of this block lies in its contrast, so it’s important to select fabrics that clearly differentiate between the star points and the background.
A good rule of thumb is to pair one dominant print or color with a solid or subtle tone. For instance, a navy star on a white background offers high contrast and a classic look. Meanwhile, pastel combinations or low-volume prints create a softer, more understated effect.
Pre-cut fabric bundles like fat quarters or charm packs are perfect for this block. They come in coordinated colorways, saving you the hassle of picking each fabric individually. However, if you enjoy curating your own palette, the star block allows plenty of creative freedom.
When preparing to cut your pieces, be precise. Clean, accurate cuts are essential for matching points and achieving crisp star shapes. Use a rotary cutter, clear quilting ruler, and self-healing cutting mat for best results. Press your fabric before cutting to remove any wrinkles or distortions.
Plan your cutting layout in advance, especially if you’re making multiple blocks. Grouping your cuts by fabric type can save time and help maintain consistency across your quilt. Don’t forget to include a seam allowance—most quilt blocks, including the Simple Star quilt block – Pattern, use a ¼ inch seam.
Finally, organize your pieces before sewing. Layout boards, labeled trays, or even digital mockups can help you visualize the finished block and reduce errors during assembly. A little planning upfront can make the whole process more enjoyable and efficient.
3. Step-by-Step Construction of the Star Block
Building your first Simple Star quilt block – Pattern is a satisfying process. Start by creating the half-square triangles (HSTs), which form the points of the star. To make an HST, place two squares right sides together, draw a diagonal line, sew a quarter-inch seam on either side, and cut along the line. Press open.
Once your HSTs are ready, arrange your fabric pieces into a 3×3 or 4×4 grid, depending on your chosen pattern size. Place the center square in the middle, surround it with your HSTs to form the star points, and use background squares to complete the corners. This is the step where the design really comes to life.
Begin sewing the rows together, one by one. Use a consistent ¼ inch seam throughout and press seams open or to one side based on your preference. Accurate seam allowances will ensure your points line up and the block remains square.
After assembling all rows, sew the rows together to complete the block. Give it a final press and square it up with a rotary cutter if needed. The finished block should lie flat and measure accurately to your desired dimensions.
If you plan to make a full quilt, repeat the process for each block, changing up the fabrics if you like to add variety. Consistent technique and attention to detail will keep your quilt top looking sharp and unified.
Remember to take breaks and enjoy the process. Quilting is as much about relaxation and creativity as it is about precision. Don’t be discouraged by small imperfections—each block is part of a greater story you’re crafting with fabric and thread.
4. Finishing the Quilt and Adding Creative Touches
Once your quilt top is assembled, it’s time to finish your project. Begin by creating the quilt “sandwich”—layering the quilt top, batting, and backing fabric. Smooth out all layers and baste them together with pins or adhesive spray to prevent shifting during quilting.
Choose a quilting method that enhances the Simple Star quilt block – Pattern. Straight-line quilting works well and emphasizes the clean geometry of the design. Free-motion quilting adds texture and personality, allowing you to stitch stars, loops, or swirls.
After quilting, trim the edges of your quilt to square it up. Prepare your binding by cutting strips of fabric, folding them in half, and sewing them to the quilt edges. Attach the binding to the front, then fold it to the back and stitch it in place to give the quilt a finished look.
Adding a label is a wonderful personal touch. Include your name, the date, and maybe a message or quote. This not only marks your accomplishment but also adds a historical note to your handmade piece.
If you’d like to enhance the retro charm or modern flair of your quilt, consider embellishments like appliqué shapes, embroidery, or even buttons sewn into the star centers. Just be mindful of their placement, especially if the quilt will be used frequently or washed often.
Display your finished quilt proudly or wrap it as a heartfelt gift. Whether hung on a wall, draped over a couch, or laid across a bed, your Simple Star quilt block – Pattern creation is a symbol of time, care, and creativity.
FAQ: Common Questions About the Simple Star Quilt Block – Pattern
Q1: What size should I cut my squares for the star block?
A: It depends on your finished block size. For a 12″ block, you might use 4.5″ squares for the center and 5″ squares for HSTs (trimmed to size). Always include ¼ inch seam allowances.
Q2: Is the Simple Star quilt block – Pattern good for beginners?
A: Yes! It’s ideal for learning piecing techniques, half-square triangles, and block assembly. Many beginners start with this pattern.
Q3: Can I use scraps to make this block?
A: Absolutely. Scraps are perfect for this pattern, especially if you enjoy a scrappy or patchwork look. Just ensure fabrics contrast well for the star to stand out.
Q4: How many blocks do I need for a full quilt?
A: That depends on the block size and quilt dimensions. For example, sixteen 12-inch blocks make a 48″ x 48″ quilt before borders.
Q5: What fabric types work best?
A: 100% cotton quilting fabric is recommended. It’s easy to sew, presses well, and is widely available in many prints and colors.
Q6: Should I prewash my fabric?
A: Prewashing is optional but helps prevent shrinkage and color bleeding. It’s especially wise if you’re combining light and dark fabrics.
Conclusion
The Simple Star quilt block – Pattern is a beautifully classic design that every quilter should try at least once. With its balanced layout, ease of construction, and room for creative expression, it’s a perfect project whether you’re just starting your quilting journey or adding to your growing collection.
From fabric selection and cutting to assembly and finishing, we’ve covered the essential steps to help you confidently complete your own star block quilt. Along the way, you’ll sharpen your quilting skills and create something that reflects your personal style and effort.
We’d love
to hear from you—share your thoughts, feedback, or tips about your experience with the Simple Star quilt block – Pattern. Your insights can help others, and your creativity just might inspire someone else to start quilting too. Happy sewing!