A Teacup Block Quilt – Pattern is a delightful and charming design that has captured the hearts of quilters around the world.
This pattern offers a whimsical and versatile look, perfect for creating quilts that bring warmth and character to any room.
Whether you’re new to quilting or an experienced quilter, the Teacup Block Quilt provides endless possibilities to get creative with fabric choices, colors, and embellishments.
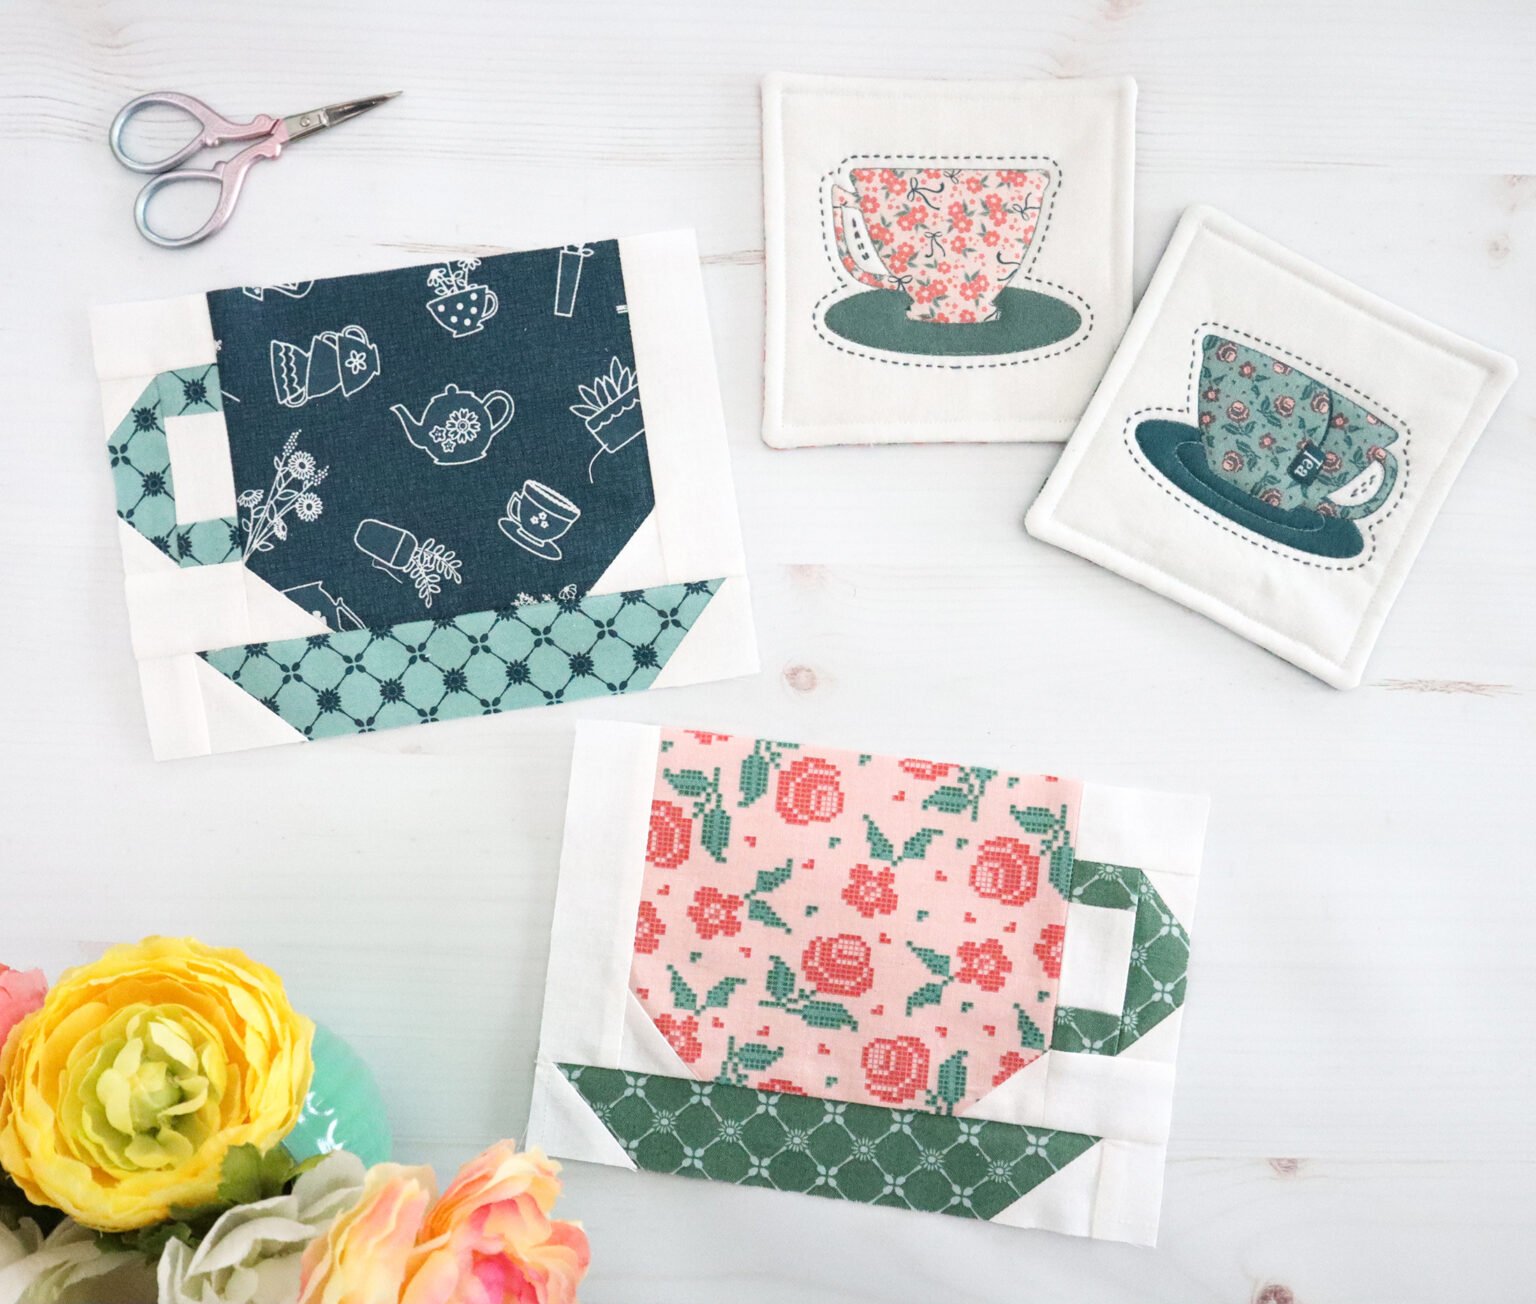
The beauty of the Teacup Block Quilt – Pattern lies in its simplicity and adaptability. The block itself is made up of geometric shapes that form the outline of a teacup, giving it a cozy and inviting appearance. Quilters can experiment with different fabrics, from floral prints to solids, to create unique designs that fit their personal style. This pattern is particularly ideal for tea lovers, those looking to add a touch of nostalgia to their quilt, or anyone who enjoys the process of creating beautiful, handmade items.
In this guide, we will walk you through everything you need to know to create your own Teacup Block Quilt. From the materials you’ll need to the steps for assembling the blocks, we’ll cover it all to ensure your quilting project is a success. So, grab your sewing supplies, and let’s dive into the world of teacups and quilts!
1. Materials Needed for the Teacup Block Quilt
Before starting your Teacup Block Quilt – Pattern, it’s important to gather all the necessary materials. Having everything ready will make the quilting process smoother and more enjoyable.
- Fabric: The fabric you choose plays a huge role in the overall look of your quilt. For a Teacup Block Quilt, you’ll need various fabrics for the teacup, the background, and possibly accents like flowers or a saucer. The teacup itself typically looks great with soft pastel colors, bold prints, or vintage patterns. You can also add some contrast with vibrant fabrics for the background or the teacup handle.
- Quilt Batting: Quilt batting is an essential material that adds softness and warmth to your quilt. Choose a batting that is compatible with the fabric you are using. Cotton batting is a popular choice for quilts, but you may also opt for polyester or wool batting depending on your desired finish.
- Thread: For piecing and quilting, use high-quality thread that matches or contrasts with your fabric. Cotton quilting thread is a popular choice due to its strength and ability to hold up over time.
- Rotary Cutter and Cutting Mat: These tools are indispensable for cutting fabric into precise shapes. A rotary cutter will allow you to make clean, accurate cuts for all your quilt pieces. Make sure to use a self-healing cutting mat to protect your surface and keep the blade sharp.
- Quilting Ruler: A quilting ruler ensures your fabric pieces are cut evenly and straight. The ruler will also help you measure and cut angles precisely for your Teacup Block Quilt.
- Needles: You’ll need a quilting needle, usually a size 90/14, to help stitch through multiple layers of fabric. It’s important to use the right needle to avoid damaging your fabric or breaking the thread.
Once you have these materials ready, you can begin the exciting process of creating your Teacup Block Quilt. Having everything organized from the start will save you time and frustration as you work through the steps.
2. Step-by-Step Instructions for the Teacup Block Quilt
Now that you’ve gathered all your materials, it’s time to dive into the fun part—assembling your Teacup Block Quilt – Pattern! Follow these step-by-step instructions to create your own beautiful teacup blocks.
- Cut the Fabric Pieces: Start by cutting the fabric pieces according to the pattern instructions. You’ll need pieces for the teacup body, handle, and the background. Make sure to cut everything accurately using a rotary cutter and quilting ruler. You may also need smaller pieces for accent details, such as flowers or ribbons.
- Piece the Teacup Body: Begin by piecing together the main body of the teacup. This will typically involve a few different shapes, such as triangles and rectangles, to form the sides and base of the cup. Take your time to ensure that each piece is sewn with a quarter-inch seam allowance.
- Assemble the Teacup Handle: The handle of the teacup is one of the most distinctive features of this quilt block. Cut a piece of fabric for the handle and sew it into the desired shape. The handle can be curved or angular, depending on the style you prefer. Attach the handle to the body of the teacup once the two pieces are ready.
- Sew the Background: Next, sew the background fabric to your teacup piece. This is where you can get creative with your design. Choose a fabric that complements the teacup and gives your block a balanced look. This step can also include adding a saucer or additional decorative details to the background.
- Press the Seams: After each step, be sure to press your seams. Pressing is important for creating neat, flat seams that make your quilt block look professional. Use a hot iron and press the seams open to avoid any puckering in the fabric.
- Final Assembly: Once all your pieces are pieced together, assemble the entire block by stitching the teacup and background together. Be sure to line up the edges carefully and sew with precision. Once completed, press the entire block to smooth out any wrinkles.
You now have your first Teacup Block Quilt ready to go! Repeat these steps to create multiple blocks if you want to make a full quilt. You can arrange the blocks in various patterns, such as a grid or an offset design, depending on your personal preference.
3. Tips for Perfecting Your Teacup Block Quilt
Creating the perfect Teacup Block Quilt takes practice, but with a few tips, you’ll be well on your way to making a quilt that will be admired for years to come.
- Use High-Quality Fabric: The fabric you choose will greatly impact the finished quilt. Opt for quilting cotton, which is durable and easy to work with. Choose fabrics with complementary patterns and colors for a cohesive look.
- Take Your Time with Precision: Accuracy is key when quilting. Take your time to cut your fabric pieces accurately, and be sure to use a quilting ruler for straight edges. Precise stitching will make your quilt look clean and professional.
- Experiment with Different Fabrics: Don’t be afraid to mix different fabrics in your Teacup Block Quilt. Try using a combination of floral prints, solids, and stripes for a more eclectic and visually interesting design. The variety in fabric choices will add texture and depth to your quilt.
- Add Decorative Details: You can add extra flair to your teacup by using applique or embroidery to decorate the teacup or background. Adding flowers, tea leaves, or even a few whimsical teabags can enhance the overall design and make the quilt truly unique.
- Press After Each Step: Pressing your seams as you go is essential to achieving a crisp, clean quilt block. Use an iron to press the seams open or to the side to reduce bulk and help your block lie flat.
- Use a Quilting Foot: For smoother stitching and more even seams, use a quilting foot on your sewing machine. This foot is designed to help you stitch through multiple layers of fabric, making the process easier and more accurate.
With these tips, you’ll be able to create a Teacup Block Quilt that showcases your creativity and quilting skills.
4. Creative Ideas for Using the Teacup Block Quilt
Once you’ve completed your Teacup Block Quilt, the possibilities for incorporating it into your home décor or gifting it to loved ones are endless. Here are a few creative ideas for using your quilt blocks:
- Full-Size Quilt: The most common use for the Teacup Block Quilt – Pattern is to make a full quilt. You can make a quilt of any size, from a small lap quilt to a large bed quilt. Arrange the blocks in rows and columns for a classic quilt layout or experiment with diagonal or irregular patterns.
- Pillows: Use individual teacup blocks to create charming throw pillows. These can make a lovely addition to your living room or bedroom, adding a touch of whimsy and warmth to your space.
- Wall Hangings: A Teacup Block Quilt also makes a great wall hanging. Frame one or several blocks to create a unique, tea-themed display for your kitchen, dining room, or any other space in your home.
- Table Runners: Incorporate your teacup blocks into a cozy table runner. This can be a lovely addition to your dining table, especially for a tea party or casual afternoon gathering.
- Aprons and Accessories: For a fun twist, consider using the Teacup Block Quilt for smaller accessories like aprons, tea towels, or even a tote bag. This is a great way to incorporate quilting into everyday items that can be used or gifted.
- Baby Quilts: The Teacup Block Quilt – Pattern can also be adapted for a baby quilt. Soft pastel fabrics and sweet designs make this an ideal choice for a baby shower gift or nursery decoration.
By exploring these creative uses for your Teacup Block Quilt, you can add a charming touch to your home or create thoughtful handmade gifts for friends and family.
Frequently Asked Questions (FAQ)
1. What fabrics are best for making a Teacup Quilt Block?
Cotton fabrics are the best choice for making a Teacup Block Quilt due to their durability, ease of use, and availability in a wide variety of colors and patterns. You can mix and match different fabrics to create unique effects.
2. Can I make a smaller Teacup Block Quilt?
Yes, you can scale down the size of the block by adjusting the pattern dimensions. However, be sure to adjust the seam allowances and cutting measurements accordingly.
3. How do I make my Teacup Block look more realistic?
To make your Teacup Block Quilt more realistic, consider adding appliqué details such as flowers, tea bags, or decorative stitching. Using a variety of fabrics for texture and contrast can also help create a more lifelike design.
4. How do I piece together multiple Teacup Blocks?
When piecing together multiple Teacup Blocks, be sure to align the edges carefully and sew with a consistent seam allowance. You can arrange the blocks in rows or experiment with other layouts, such as diagonal patterns or offset designs.
5. What is the best way to quilt the Teacup Quilt?
You can quilt the Teacup Block Quilt using hand quilting, machine quilting, or longarm quilting. The choice depends on your preference and the type of finish you want. Free-motion quilting can add an extra level of creativity to the design.
Conclusion
In this article, we’ve covered everything you need to know about making a Teacup Block Quilt – Pattern. From gathering materials to following the step-by-step instructions, you now have the knowledge to create a beautiful and charming teacup quilt. Whether you’re making a full quilt, a set of pillows, or a table runner, the Teacup Block Quilt offers endless possibilities for creativity and personalization.
We hope this guide has inspired you to start your own Teacup Block Quilt project. Feel free to leave a comment with your thoughts, questions, or suggestions. We’d love to hear about your quilting journey! Happy quilting!