The Tile Puzzle Variation Quilt Block – Pattern is an exciting and creative design that offers a wonderful way to explore quilting techniques.
This pattern combines different geometric shapes and colors to form an intricate yet visually stunning quilt block.
It is perfect for both beginners and experienced quilters who enjoy working with detailed designs. By using the Tile Puzzle Variation Quilt Block – Pattern, you can create a quilt that’s not only functional but also a beautiful work of art.
This quilt block is based on the traditional tile puzzle theme, where different shapes and colors are arranged to create a visually appealing and cohesive design. The variation in the pattern adds a layer of complexity, making it a fun challenge for quilters who want to take their skills to the next level. With the right tools and a little patience, you can make a quilt that showcases your creativity and dedication to the craft.
In this article, we will walk you through the steps needed to make a Tile Puzzle Variation Quilt Block – Pattern. Whether you’re looking to make a whole quilt or just a few blocks for a project, understanding the basics of this pattern will help you create stunning quilts that reflect your style and skill. By the end of this guide, you’ll feel confident in your ability to tackle this beautiful quilt block and customize it to suit your needs.
1. Understanding the Basics of the Tile Puzzle Variation Quilt Block
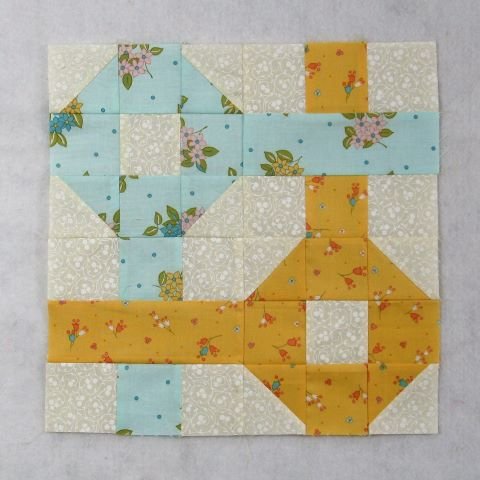
The first step in making a Tile Puzzle Variation Quilt Block – Pattern is understanding its fundamental structure. The block is made up of several smaller shapes, usually squares, triangles, and sometimes diamonds, that are carefully pieced together to form the final design. The key to mastering this quilt block lies in understanding the layout and how each piece fits into the overall pattern.
1.1. The Geometry of the Tile Puzzle Block
At its core, the Tile Puzzle Variation Quilt Block – Pattern is a geometric design. The pieces typically involve right-angled triangles and squares, which come together to form a grid-like pattern. The design often alternates between solid and patterned fabric, creating a visual effect that mimics the look of a tile puzzle. Understanding these geometric principles will help you visualize how the blocks fit together when assembling your quilt.
1.2. Choosing Fabric for the Block
Choosing the right fabric is crucial for any quilt, especially when working with a design like the Tile Puzzle Variation Quilt Block – Pattern. You can either use solid colors for a bold, minimalist design or experiment with various prints for a more dynamic effect. Make sure that the colors contrast well enough so that each piece stands out, but don’t be afraid to mix and match patterns to add visual interest.
1.3. Cutting the Pieces
The next step is to accurately cut all the pieces needed for the block. For the Tile Puzzle Variation Quilt Block – Pattern, you will need to cut squares and triangles in the correct measurements. Using a rotary cutter and cutting mat ensures precision and helps you avoid any uneven edges. Take your time during this step to ensure that all your pieces are cut accurately.
1.4. Creating the Tiles
Once your pieces are cut, you’ll begin piecing them together. The Tile Puzzle Variation Quilt Block – Pattern typically involves stitching the smaller shapes into rows or sections, then combining them into a larger block. The key is to maintain accuracy when piecing the shapes together, ensuring that the final result is neat and aligned. The puzzle-like design comes to life as the tiles are joined, forming a beautiful pattern.
1.5. Assembling the Block
After creating individual tiles, the next step is to sew them together into a complete quilt block. The Tile Puzzle Variation Quilt Block – Pattern may involve multiple rows of different tiles, and each row must be sewn together with careful precision. It is helpful to press your seams as you go to ensure that the fabric lies flat and the block stays even.
1.6. The Finished Product
Once all the pieces are sewn together, you will have a completed Tile Puzzle Variation Quilt Block. You can repeat this process to create a whole quilt, or use the block as part of a larger design. The beauty of this pattern lies in its versatility, as it can be customized to suit any quilting project.
2. Step-by-Step Instructions for Making the Tile Puzzle Variation Quilt Block
Now that we’ve covered the basics, let’s dive into the step-by-step instructions for making a Tile Puzzle Variation Quilt Block – Pattern. Whether you’re making just one block or an entire quilt, following these steps will help you achieve the desired result.
2.1. Gather Your Materials
Before starting, gather all your materials. For a Tile Puzzle Variation Quilt Block, you’ll need fabric (both solid and patterned), a rotary cutter, cutting mat, ruler, pins, a sewing machine, and thread. You’ll also need a quilting pattern or measurements for cutting your pieces.
2.2. Cutting Your Fabric
Using your ruler and rotary cutter, cut the fabric into the necessary shapes. For this pattern, you’ll likely need a mix of squares and triangles, but be sure to follow your specific quilt pattern for the exact measurements. Accuracy is key in this step to ensure your pieces fit together seamlessly.
2.3. Sewing the Smaller Pieces
Once your fabric is cut, start by sewing the smaller pieces together. Begin with sewing the squares and triangles into smaller units, paying close attention to seam allowances. Press each unit as you go to keep everything aligned.
2.4. Assembling the Rows
Once you’ve sewn together the individual smaller pieces, start assembling them into rows. The Tile Puzzle Variation Quilt Block – Pattern typically involves multiple rows of different shapes. Align the seams carefully as you sew, ensuring that each row fits perfectly into the next.
2.5. Join the Rows
After you have assembled all the rows, it’s time to join them into a complete block. Pin the rows together carefully, making sure the edges match up precisely. Once pinned, sew the rows together, and press the seams flat as you go to create a neat, finished block.
2.6. Completing the Quilt Block
After joining the rows, your Tile Puzzle Variation Quilt Block is complete! You can now move on to additional blocks if you’re making a larger quilt, or you can add borders and sashing if desired. Make sure to press your block one final time before incorporating it into your quilt design.
3. Tips and Tricks for Perfecting Your Tile Puzzle Variation Quilt Block
Making a Tile Puzzle Variation Quilt Block – Pattern is a rewarding process, but it can also be a little challenging. Here are some tips to help you achieve the best results.
3.1. Use a Consistent Seam Allowance
Maintaining a consistent seam allowance throughout your block is essential for achieving precise and professional-looking results. Always measure your seam allowance before beginning to ensure consistency.
3.2. Press Your Seams
Pressing your seams as you go is crucial for creating smooth, flat blocks. Be sure to press your seams open or to one side, depending on the instructions in your pattern.
3.3. Double-Check Measurements
Before cutting or sewing any fabric, always double-check your measurements. Even small discrepancies in size can result in pieces that don’t fit together as planned.
3.4. Experiment with Color Combinations
The Tile Puzzle Variation Quilt Block – Pattern can be customized with a variety of color combinations. Don’t be afraid to experiment with different hues and patterns to create a unique look. Consider using a mix of contrasting colors for a bold design or complementary tones for a more subtle effect.
3.5. Practice Precision Cutting
Precision cutting is key to ensuring that your pieces fit together perfectly. Use a rotary cutter, ruler, and cutting mat for the most accurate cuts. If necessary, trim any uneven edges to maintain the integrity of the block.
3.6. Take Your Time
The Tile Puzzle Variation Quilt Block can be intricate, so don’t rush through the process. Take your time to ensure that each piece is sewn accurately, and remember that quilting is as much about the process as it is about the final product.
4. Creative Ways to Use the Tile Puzzle Variation Quilt Block
Once you’ve mastered the Tile Puzzle Variation Quilt Block – Pattern, you can incorporate it into a variety of creative projects.
4.1. Full Quilts
The most common use for the Tile Puzzle Variation Quilt Block is, of course, creating a full quilt. By making multiple blocks and arranging them in a cohesive design, you can create a quilt that’s both beautiful and functional.
4.2. Pillow Covers
You can use the Tile Puzzle Variation Quilt Block as a decorative element for pillow covers. Whether you make one block or multiple, it’s an easy way to add some handmade charm to your home décor.
4.3. Table Runners and Placemats
Incorporate the Tile Puzzle Variation Quilt Block into a table runner or placemats for a stunning centerpiece during meals. The geometric design will add a modern touch to any dining space.
4.4. Wall Hangings
Turn your quilt blocks into unique wall hangings by arranging them in a beautiful pattern and hanging them on your walls. This is an excellent way to showcase your quilting skills.
4.5. Tote Bags and Pouches
Use the Tile Puzzle Variation Quilt Block to make personalized tote bags or pouches. These items make wonderful gifts and are a great way to showcase a smaller, functional version of your quilt block.
4.6. Baby Quilts
The Tile Puzzle Variation Quilt Block is perfect for baby quilts, as its small size and vibrant patterns make it both practical and adorable. Choose soft, baby-friendly fabrics for a comfortable and charming quilt.
FAQ: Common Questions About the Tile Puzzle Variation Quilt Block
1. What fabric is best for the Tile Puzzle Variation Quilt Block?
Cotton fabric is the most commonly used fabric for quilting. It’s easy to work with and holds its shape well. You can also experiment with other fabrics like linen or flannel for different effects.
2. Can I make a larger Tile Puzzle Variation Quilt Block?
Yes, you can adjust the size of the block by increasing the size of the individual tiles. Simply scale up the measurements for each piece to create a larger block.
3. How do I choose colors for the Tile Puzzle Variation Quilt Block?
Choose colors that contrast well with each other to make the pattern stand out. You can use solid colors for a modern look or mix in patterned fabrics for more texture and interest.
4. How do I keep my seams accurate when quilting?
Use a consistent seam allowance and press your seams as you go. You can also use quilting rulers and guides to ensure that your seams are straight and evenly spaced.
5. Can I make the Tile Puzzle Variation Quilt Block by hand?
Yes, you can make the block by hand if you prefer. Hand-piecing allows for a more traditional approach to quilting, but it may take longer than using a sewing machine.
6. How do I finish a quilt with Tile Puzzle Variation Quilt Blocks?
Once you have completed all your blocks, arrange them in a pattern you like, sew them together, and add a quilt border. Then, quilt the layers together and finish with a binding.
Conclusion
In this article, we’ve explored how to create the Tile Puzzle Variation Quilt Block – Pattern and provided tips and tricks to help you master this intricate quilt block. From selecting fabric to piecing together the tiles, we’ve covered the essential steps for crafting a beautiful quilt block. We also shared creative ways to incorporate this pattern into various projects.
We hope this guide has inspired you to create your own quilt blocks. Feel free to leave your thoughts, suggestions, and feedback in the comments below. Happy quilting!