If you’re looking for a bright, cheerful way to bring summer into your home decor, the Watermelon Placemat and Table Runner – pattern is a charming project to start with.
Combining practical quilting techniques with fun, seasonal design, this pattern is ideal for both beginners and experienced quilters.
Using watermelon-inspired colors and shapes, it captures the essence of sunny days and picnics, adding a handmade touch to your dining area.
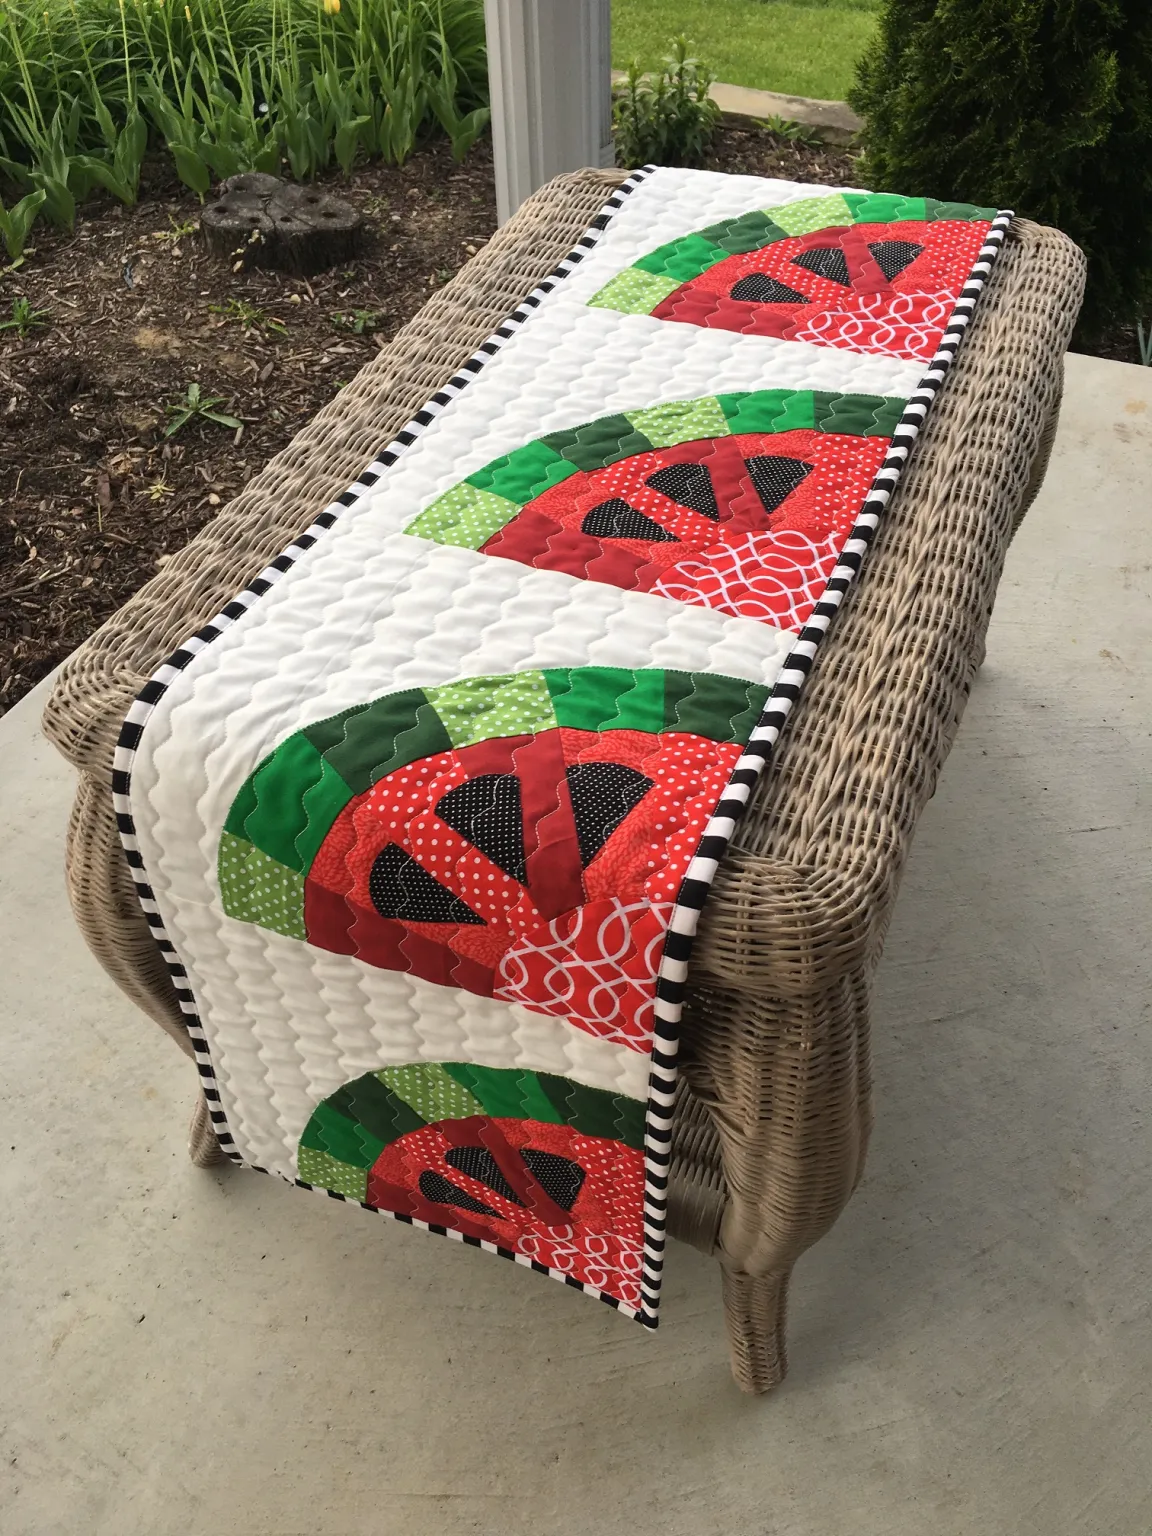
The Watermelon Placemat and Table Runner – pattern typically features vibrant reds, deep greens, and crisp whites to mimic the look of real watermelon slices. The runner and placemats can be customized in size, making them suitable for any table or setting. This quilting project is not just decorative—it’s functional and can become a centerpiece during summer gatherings or even serve as a thoughtful gift.
This article will walk you through everything you need to know to get started with your Watermelon Placemat and Table Runner – pattern. From materials and cutting instructions to assembly tips and final touches, we’ll cover each part in detail. Along the way, we’ll also offer helpful suggestions to personalize your quilt and make it truly your own.
1. Choosing the Right Materials and Colors
The first step in making a beautiful Watermelon Placemat and Table Runner – pattern is selecting your materials. Fabric quality, color scheme, and texture are crucial to bringing the design to life and ensuring durability.
Start with a vibrant red fabric to represent the flesh of the watermelon. You can opt for solid colors or look for prints that feature subtle variations to mimic real fruit texture. Patterns with small black dots can even double as watermelon seeds.
Next, choose a deep green fabric for the watermelon rind. Stripe or mottled green patterns work well here and add a realistic touch. Some crafters use a lighter green or white strip between the red and green to mimic the inner rind layer.
For the backing and background, go with a neutral fabric like white, cream, or soft gray. This ensures the bold watermelon shapes stand out and don’t compete with the surrounding fabric.
You’ll also need quilt batting to give the placemat and runner some thickness and structure. Choose cotton or polyester batting depending on your preference for softness and warmth.
Don’t forget about binding fabric—this wraps the edges and adds a polished finish. You might use the same green as the rind or introduce a contrasting color like black to make it pop.
Finally, gather essential quilting tools: rotary cutter, self-healing mat, quilting ruler, sewing machine, pins, and matching threads. Having the right tools from the beginning makes the process smoother and more enjoyable.
2. Cutting and Piecing the Watermelon Quilt Design
With your materials ready, it’s time to begin cutting and piecing your Watermelon Placemat and Table Runner – pattern. Accurate cutting and layout are key to achieving a professional-looking final product.
Start by cutting your red fabric into wedge or triangle shapes to resemble watermelon slices. Depending on the pattern, you might use paper piecing templates or freehand cutting for a more organic look.
Next, cut your green fabric strips to serve as the rind. These will be attached to the curved or straight edges of the red slices. Consider adding a thin white strip between the red and green to mimic the color transition in real watermelon.
Prepare the background fabric by cutting rectangles or squares large enough to accommodate each watermelon wedge. This background will serve as the base for the quilt top.
Once your pieces are cut, start piecing the watermelon wedges onto the background fabric using a ¼-inch seam allowance. Press your seams as you go for crisp, flat blocks.
Arrange your pieced blocks into a layout that fits your desired placemat and table runner size. You can create a single central watermelon slice or alternate slices facing different directions.
Once you’re happy with the layout, sew your blocks together. Press the entire quilt top and prepare for the next step: layering and quilting.
3. Quilting and Finishing the Project
Now that the quilt top is complete, it’s time to assemble and quilt your Watermelon Placemat and Table Runner – pattern. This stage adds texture, durability, and visual appeal.
First, make a quilt sandwich by layering your top, batting, and backing fabric. Smooth out all layers and use safety pins or temporary spray adhesive to hold them together.
Choose your quilting design—you might opt for simple straight-line quilting, echo quilting around the watermelon shapes, or even free-motion quilting with swirls or seed patterns.
Start quilting from the center and work your way outward to avoid bunching or puckering. Take your time and ensure even stitching across all layers.
After quilting, it’s time to trim the edges of your placemat and table runner. Make sure everything is square and the corners are sharp for a professional finish.
Next, attach the binding. Fold it over the edges and sew it in place using a decorative stitch or invisible hand-stitching. Miter the corners neatly for a polished appearance.
Finally, give the finished quilt pieces a final press and inspect for any loose threads or missed stitches. Your watermelon-themed placemat and table runner are now ready to brighten up your table.
4. Customization Ideas and Practical Uses
One of the joys of the Watermelon Placemat and Table Runner quilt – pattern is how easy it is to customize. Whether you’re aiming for a whimsical picnic vibe or a sleek, modern look, there are countless ways to personalize your project.
Try using different color schemes—instead of traditional red and green, experiment with pink, lime, or even blue hues for a fun twist. Just make sure the colors contrast well.
Add embellishments like embroidery or applique. You can stitch in watermelon seeds, vines, or even summer-themed words like “Sweet” or “Fresh.”
If you’re handy with a Cricut or other cutting machine, you can add heat-transfer vinyl designs or fabric paint for added detail.
Consider making matching accessories like napkin rings, coasters, or even a wall hanging. These extras can tie the whole theme together for seasonal decorating.
You can also adjust the size of the placemats and table runner depending on your needs. Make mini placemats for kids, or a longer runner for a buffet table.
Lastly, think about gifting your finished set. Handmade quilted table decor makes a thoughtful and personalized housewarming or summer hostess gift.
FAQ – Watermelon Placemat and Table Runner – Pattern
What skill level is needed for this quilt pattern?
The Watermelon Placemat and Table Runner – pattern is suitable for confident beginners and intermediate quilters. Basic sewing and piecing skills are needed.
Can I make this quilt without a sewing machine?
Yes, but it will take significantly longer. A sewing machine speeds up the process and ensures sturdier seams, especially for multiple quilted layers.
How long does it take to complete the project?
Depending on your experience, it may take between 6 to 12 hours total—broken into sessions for cutting, piecing, quilting, and binding.
What size should the placemats and table runner be?
Standard placemats are about 12″x18″, and table runners typically range from 12″x36″ to 14″x72″. Customize according to your table dimensions.
Can I wash my quilted placemats and runner?
Yes. Use cold water and a gentle cycle. Lay flat or hang dry to preserve the shape and prevent shrinking.
Where can I find the Watermelon Placemat and Table Runner – pattern?
You can find downloadable patterns on quilting websites, Etsy, and through quilting magazines or blogs. Some offer printable templates for easier cutting.
Conclusion
The Watermelon Placemat and Table Runner – pattern is a delightful way to bring the spirit of summer into your home with handmade charm. From selecting the right fabrics to piecing together vibrant watermelon slices, this project is both fun and functional. With plenty of opportunities for customization, it’s a great way to show off your quilting skills or learn new techniques.
We hope this guide has inspired you to try your hand at quilting this playful and seasonal pattern. If you’ve made your own version or have tips and suggestions for other crafters, please leave your honest opinion and ideas in the comments below. Happy quilting!