Dive into the world of creative jewelry making with this ultimate Crochet Fish Bracelet – Tutorial, designed to help you craft a stunning, wearable piece of art. If you love unique, handmade accessories that carry a touch of whimsical charm, you are in the perfect place. This comprehensive guide will take you step-by-step through the process of creating a beautiful, ocean-inspired accessory using basic yarn and a hook. Whether you want to make a special gift for a friend, add a fun item to your online craft shop, or simply expand your stitching skills, this project offers the ideal blend of simplicity and creativity.
Jewelry making with yarn has taken the crafting community by storm, and it is easy to see why. Unlike traditional metal or beaded jewelry, a fabric-based accessory feels incredibly soft against the skin, making it comfortable for everyday wear. By following this detailed Crochet Fish Bracelet – Tutorial, you will learn how to transform simple stitches into a structured, eye-catching design that mimics the fluid movement of aquatic life. This project is highly customizable, allowing you to experiment with different yarn weights, vibrant color gradients, and unique closures to match your personal style perfectly.
Mastering this specific pattern is a fantastic milestone for any fiber artist looking to explore micro-crafting. Because a wristband requires very little material, it serves as an excellent stash-buster for utilizing those beautiful leftover scraps of yarn you have been saving. Throughout this text, we will cover everything from selecting the right materials to finishing your edges like a seasoned professional. Get your tools ready, find a comfortable seat, and let us dive straight into the techniques that will make your handmade jewelry stand out from the crowd.
1. Essential Materials for Your Crochet Fish Bracelet – Tutorial
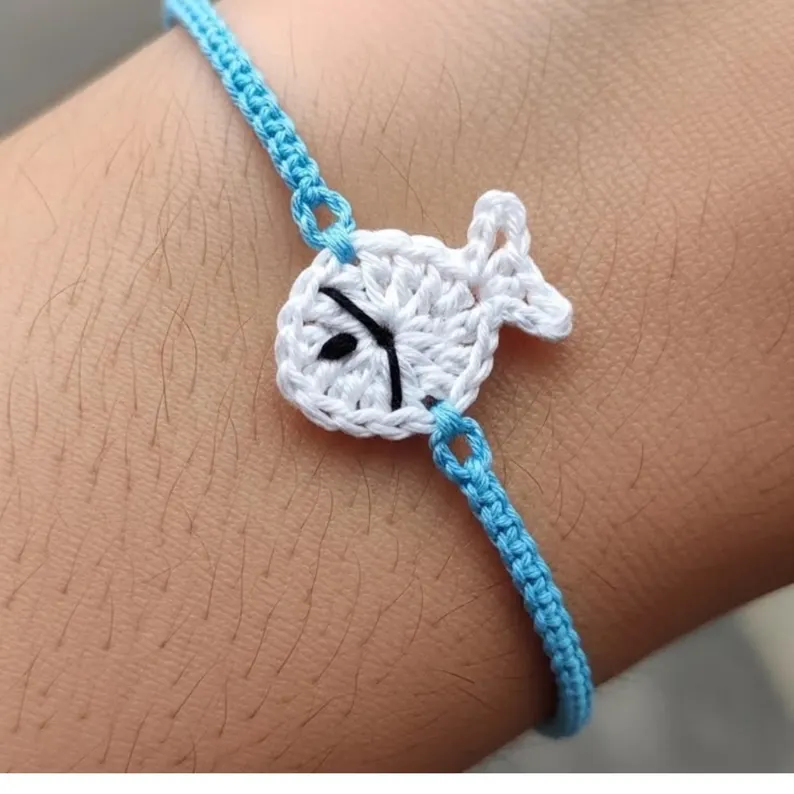
Before you begin twisting your yarn, gathering the correct supplies is crucial for achieving a neat, professional finish. For this specific Crochet Fish Bracelet – Tutorial, you will want to select a high-quality embroidery floss or a size 10 mercerized cotton yarn. Standard acrylic yarn can be too bulky for delicate wristwear, whereas cotton provides the crisp stitch definition required to make the aquatic design pop. Choosing a vibrant aquatic color palette, such as deep blues, bright teals, or coral oranges, will instantly give your project an authentic oceanic feel.
Your hook selection is just as critical as your choice of fiber. A small steel hook, ranging between 1.25 mm and 1.75 mm, works best for lightweight cotton threads. Working with a smaller hook ensures that your stitches remain tight and dense, preventing the accessory from stretching out of shape over time. If you tend to tension your yarn very tightly, you might want to opt for the larger end of that scale to keep your hands from cramping during the process.
In addition to your primary yarn and hook, you will need a few basic notions to complete the assembly. A sharp pair of embroidery scissors is necessary for making clean cuts without fraying the delicate cotton strands. You will also need a sturdy tapestry needle with an eye large enough for your thread but small enough to weave into tight stitches. Having these basic tools within arm’s reach ensures a smooth, uninterrupted crafting session from start to finish.
To elevate the overall aesthetic of your handmade jewelry piece, consider incorporating small embellishments like glass seed beads or tiny black beads for the eyes. Adding beads requires a very fine sewing needle or a method for pre-strung beads onto your working thread before you start stitching. These small additions provide a beautiful sparkle and a touch of realism to your aquatic creation.
Choosing the right closure system will determine how easy your finished item is to put on and take off. You can opt for a traditional metal lobster claw clasp attached with jump rings, or you can create a completely textile-based closure using loops and buttons. For a completely seamless, rustic look, extending the starting and ending yarn tails into braided ties is a popular and adjustable solution.
Taking the time to organize your workspace with bright, direct lighting will make tracking your stitches significantly easier. Fiber jewelry requires precision, and squinting at dark threads can quickly lead to skipped loops or uneven tension. Once you have your cotton thread, appropriate hook, scissors, needle, and chosen closures laid out, you are fully prepared to advance to the core stitching steps.
2. Step-by-Step Stitch Guide for the Aquatic Pattern
Every successful fiber project relies on a strong foundation, and this Crochet Fish Bracelet – Tutorial begins with a simple slip knot and a basic chain sequence. The initial chain determines the base length of your accessory, so you should measure your wrist beforehand to ensure an accurate fit. Keep your chains uniform and moderately loose, as tight foundation chains can cause the edges of your finished band to curl awkwardly.
To form the distinct shape of the aquatic motif, you will employ a combination of standard stitches increasing in height. You will start with a single crochet to create a tapered point, gradually moving up to a half double crochet and a double crochet to build the wider body section. This strategic progression of stitch heights creates a beautiful, natural curve that beautifully mimics the silhouette of a swimming creature.
As you work across the row, maintaining consistent tension is the secret to achieving a symmetrical pattern. When transitioning between short stitches and taller stitches, avoid pulling too tightly on your working loop, which can compress the design and ruin the fluid shape. Relax your hands and let the hook dictate the height of each loop for a clean, even texture throughout the entire band.
Once the main body segment is complete, it is time to shape the tail section using dramatic decreases or contrasting clusters. By working multiple stitches into a single space and then rapidly decreasing in the following rows, you can create a distinct fin-like flair. This clever manipulation of basic geometric shapes is what gives the accessory its recognizable, playful charm without requiring overly complex techniques.
If you want to add an extra layer of depth, you can work your stitches exclusively into the back loops of the previous row. This simple modification creates a raised ridge effect across the surface of the fabric, which beautifully resembles natural scales glistening in the water. It is an incredibly easy way for beginners to elevate the texture of their work without needing to learn advanced master stitches.
After completing the final row of your pattern, secure your working thread by pulling it completely through the last loop to create a firm knot. Leave a generous tail of at least six inches before cutting the yarn, as this extra length will be essential for weaving in ends or attaching your hardware. Take a moment to gently stretch and smooth your work flat to admire the shape you have just constructed.
3. Customizing Colors and Sizing for the Perfect Fit
One of the greatest joys of following this Crochet Fish Bracelet – Tutorial is the endless room for personalization and artistic expression. Wrist sizes vary drastically, so learning how to adapt a pattern to fit children, teenagers, and adults perfectly is an invaluable skill. To alter the size, simply add or subtract stitches in the repeating body sections of the pattern while keeping the decorative head and tail sections identical.
Color selection plays a massive role in setting the overall mood and style of your final accessory. For a subtle, sophisticated daytime look, you can choose monochromatic neutral tones like cream, slate gray, or soft beige. If you prefer a bold, energetic aesthetic that screams summer fun, try utilizing variegated yarn that automatically changes colors as you stitch to create a beautiful rainbow effect.
Understanding the drape and elasticity of your chosen fiber will prevent your hard work from sagging after a few days of wear. Cotton thread has minimal stretch, which is ideal for maintaining the structure of the intricate motifs over time. If you decide to use a bamboo or silk blend yarn for a luxurious sheen, keep in mind that these fibers stretch more, so you may want to craft the band slightly shorter than your actual wrist measurement.
Incorporating metallic threads into your work is another brilliant way to add custom flair and high-end appeal to your jewelry line. Holding a thin strand of gold or silver blending filament together with your main cotton thread introduces a gorgeous, subtle shimmer throughout the piece. This technique makes your accessory sparkle beautifully whenever it catches the sunlight, mimicking the reflection of water.
For those who enjoy a bohemian or festival style, crafting multiple bands in coordinating color schemes allows you to create a trendy stacked look. You can make three or four thin bands using different shades of the same color family and wear them together simultaneously. This layering technique adds wonderful visual depth and transforms a simple individual piece into a complete fashion statement.
Always remember to document your custom adjustments in a notebook or digital log as you experiment with different sizes and modifications. Writing down the exact number of rows and stitch counts you used ensures you can replicate your successful designs easily in the future. This level of consistency is particularly important if you plan to sell your completed creations or gift matching sets to family members.
4. Professional Finishing Techniques and Assembly
The difference between an amateur craft project and a boutique-quality accessory often comes down to how well you execute the final assembly steps. Once your stitching is done, you will likely have a few loose yarn tails dangling from the ends of your work. Using your blunt tapestry needle, carefully weave these loose ends horizontally through the dense center of your stitches, changing directions twice to lock the threads firmly in place.
Blocking your finished textile jewelry is a highly recommended step that many beginners mistakenly skip. To block your work, gently dampen the fabric with cool water, press out the excess moisture in a clean towel, and pin the piece flat onto a foam mat. Allow it to air dry completely in this position to set the stitches, sharpen the edges, and smooth out any natural curling.
If you are using a textile-based closure, now is the time to construct your buttonhole loop or braid your ties securely. For braided ties, attach three equal strands of yarn to the end of the band, braid them tightly to your desired length, and secure the bottom with a firm overhand knot. This method provides an adjustable fit that accommodates various wrist sizes easily without needing metal components.
For a more modern, commercial finish, attaching traditional jewelry hardware like metal ribbon crimps or jump rings is an excellent path to take. Use a pair of flat-nose pliers to gently clamp a metal ribbon end over the fabric edge, ensuring it grips the sturdy cotton stitches securely. Once the crimp is locked in place, you can easily attach a standard lobster clasp and an extension chain using open jump rings.
To ensure your handmade creation lasts for years to come, it is wise to treat the finished piece with a fabric stiffener or a water-resistant spray. This optional step helps the delicate cotton fibers retain their crisp, geometric shape even during humid weather or light daily hand washing. Simply mist the piece lightly after blocking and let it cure fully before wearing it out into the world.
Now that your edges are woven, your fabric is beautifully blocked, and your hardware is firmly attached, your accessory is officially complete. Give the entire piece a final inspection to ensure there are no stray loops or loose threads sticking out anywhere. You now possess a gorgeous, custom accessory ready to be worn with pride or packaged up beautifully as a thoughtful, handmade gift.
Frequently Asked Questions (FAQ)
What is the best yarn type for creating handmade bracelets?
The absolute best option for delicate fiber jewelry is size 10 mercerized cotton thread or standard embroidery floss. These options provide incredible stitch definition, do not fray easily, and offer a comfortable feel against the skin. Regular acrylic or wool yarns are generally too fuzzy and bulky for creating crisp, intricate jewelry details.
How do I wash and maintain my fabric accessory over time?
To keep your jewelry piece looking brand new, hand wash it gently in cool water using a mild soap or delicate detergent. Avoid twisting or wringing the fabric, as this can distort the fine stitches and ruin the shape. Instead, lay the item flat on a clean towel and allow it to air dry completely away from direct sunlight.
Can a total beginner complete this jewelry project successfully?
Yes, absolutely. This pattern relies entirely on fundamental techniques such as the slip knot, chain stitch, single crochet, and double crochet. Because the project is very compact, it serves as an excellent, low-risk playground for beginners to practice maintaining even tension and learning how to read basic stitch structures.
How can I make sure the band fits perfectly without slipping off?
The most reliable method is to measure your wrist tightly with a flexible tape measure before you begin stitching. Craft your foundation chain to match that exact length, keeping in mind that cotton yarn will stretch just a tiny bit with regular wear. Using an adjustable braided tie system or a metal extension chain also provides great flexibility.
Do I need to use fabric stiffener on the finished piece?
While utilizing a fabric stiffener is not mandatory, it is highly recommended if you want your accessory to maintain a flat, crisp shape over long periods of wear. If you choose not to use a stiffener, your stitches will simply feel softer and drape more like a traditional fabric band around your wrist.
Conclusion
In summary, this Crochet Fish Bracelet – Tutorial has guided you through the entire creative journey of making an exquisite, ocean-themed accessory from scratch.
We explored the ideal materials to use, learned how to manipulate basic stitch heights to form a fluid silhouette, discussed easy customization options for sizing, and mastered professional finishing techniques. By focusing on tension and utilizing high-quality cotton thread, you can easily create beautiful, durable jewelry pieces that display your unique artistic flair.