
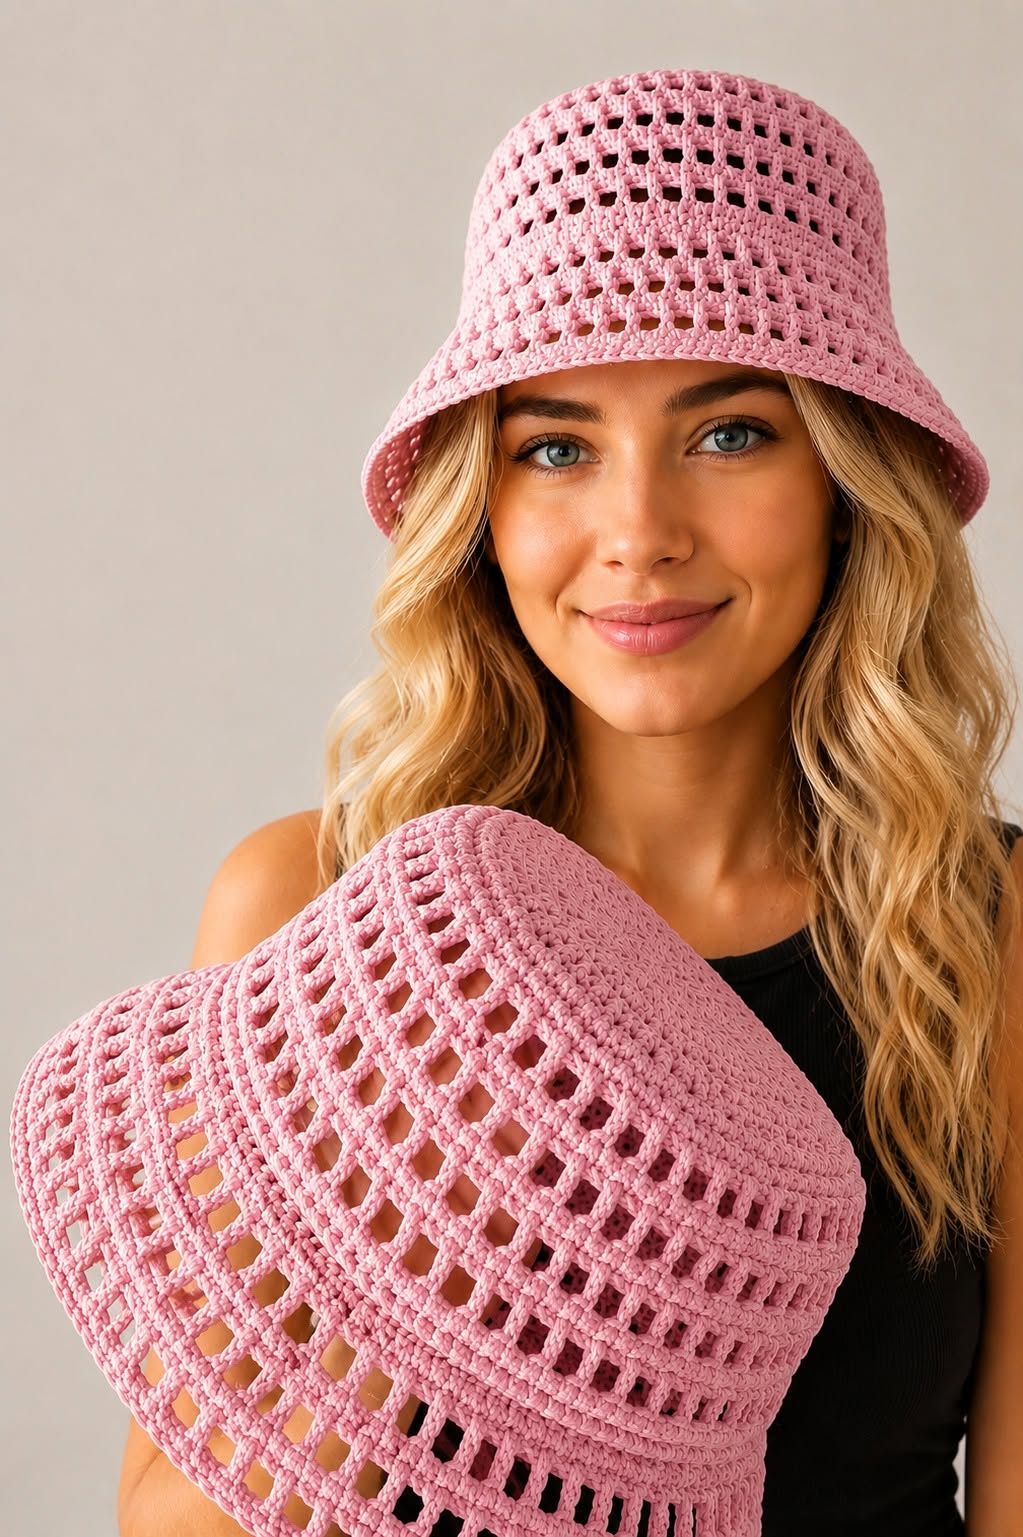
How to Crochet a Hat Pattern is one of the most rewarding projects for beginners and experienced crocheters alike. A beautifully crafted crochet hat is practical, stylish, and surprisingly easy to customize. Whether you want to make a lightweight summer bucket hat like the one shown or create a cozy accessory for cooler weather, learning How to Crochet a Hat Pattern opens endless creative possibilities. Throughout this guide, you’ll discover each stage of the process using standard U.S. crochet terminology while building confidence with every stitch.
Crochet hats have remained popular because they combine functionality with artistic expression. You can experiment with different yarn fibers, stitch combinations, colors, and brim styles while creating a hat that reflects your personality. A breathable openwork design is especially popular for spring and summer because it allows airflow while protecting your face from the sun. Even simple stitches can create elegant textures when repeated consistently, making this project enjoyable for crocheters of every skill level.
One of the best things about making your own crochet hat is the freedom to personalize every detail. You can adjust the crown size, modify the depth, widen the brim, or even add decorative flowers, ribbons, or contrasting borders. This flexibility allows you to create a truly unique accessory while practicing essential crochet techniques. By following this complete tutorial, you will understand not only how to complete the project but also why each construction step is important for achieving a professional result.
Choosing Materials and Preparing Your Crochet Hat
Selecting the correct materials is the foundation of a successful How to Crochet a Hat Pattern project. Cotton yarn is an excellent choice for warm-weather hats because it provides structure while remaining breathable. Mercerized cotton offers beautiful stitch definition and creates a polished appearance that highlights openwork designs.
For this pattern, use a worsted weight cotton yarn along with a 4.5 mm to 5 mm crochet hook, depending on your personal tension. You may also need stitch markers, scissors, a yarn needle for weaving in ends, and a measuring tape to check your progress throughout the project.
Before beginning, measure the head circumference of the intended wearer. Adult sizes generally range between 21 and 23 inches (53–58 cm). Since crochet fabric stretches slightly, your finished crown should measure slightly smaller than the actual head circumference for a comfortable fit.
Creating a small gauge swatch before starting is highly recommended. Although many crocheters skip this step, checking your gauge helps ensure the finished hat will fit properly and prevents disappointment after many hours of work.
Review the basic U.S. crochet abbreviations you’ll use throughout this project. Common stitches include ch (chain), sl st (slip stitch), sc (single crochet), hdc (half double crochet), dc (double crochet), and st (stitch). Becoming familiar with these abbreviations makes following any crochet pattern much easier.
Finally, prepare a comfortable workspace with good lighting. Crochet is much more enjoyable when your yarn flows smoothly, your hook feels comfortable in your hand, and your stitches remain easy to see. Taking a few minutes to organize your materials will make the entire experience more relaxing.
Step-by-Step Instructions for Crocheting the Hat Crown
Begin your How to Crochet a Hat Pattern by creating a magic ring. This technique produces a tightly closed center that looks far more polished than starting with several chains joined into a circle. Work twelve double crochet stitches into the ring before pulling it closed securely.
Join the round with a slip stitch and begin increasing evenly. Add twelve stitches every round until the crown reaches approximately 6½ to 7 inches (16.5–18 cm) in diameter for an average adult size. Consistent increases ensure the crown remains perfectly flat without curling or rippling.
Once the crown reaches the correct diameter, stop increasing. Continue crocheting one stitch into each stitch around to build the sides of the hat. This transition naturally creates the bucket shape without requiring complicated shaping techniques.
To create the airy mesh appearance shown in the inspiration photo, alternate double crochet stitches with chain spaces. A simple repeat of one double crochet followed by one chain and skipping one stitch creates an attractive open lattice that is lightweight and fashionable.
Maintain even tension while working each round. Loose stitches may cause the hat to stretch excessively, while tight stitches reduce flexibility. Checking your measurements every few rounds helps ensure the hat remains proportional from top to bottom.
Continue working the body until the hat reaches approximately 8½ to 9 inches (22–23 cm) from the center of the crown. At this stage, the hat should comfortably cover the head while leaving enough room for the brim.
Creating the Brim and Adding Professional Finishing Details
The brim gives structure and personality to your How to Crochet a Hat Pattern. Begin by replacing the mesh stitch with solid rounds of double crochet or half double crochet. This transition creates stability before expanding the brim outward.
Increase gradually every few stitches around the brim. Small, evenly spaced increases encourage the brim to flare gently rather than folding downward. Depending on your desired look, you may continue increasing for three to six rounds.
If you prefer a more dramatic bucket hat style, continue widening the brim until it measures approximately 2½ to 3½ inches (6–9 cm). For a subtle brim, stop increasing sooner and work one or two final rounds without increases.
A decorative edging can significantly enhance the finished appearance. Reverse single crochet, crab stitch, picot edging, or a simple slip stitch border all provide clean professional finishes while strengthening the edge against stretching.
After completing the final round, fasten off the yarn, leaving a tail approximately 6 inches (15 cm) long. Use a yarn needle to weave the end securely through several stitches on the inside of the hat to prevent unraveling during use.
Lightly steam block or wet block the finished hat according to your yarn manufacturer’s recommendations. Blocking evens out the stitches, improves the drape, and helps the brim maintain its intended shape while giving the entire project a refined appearance.
Tips for Customizing Your Crochet Hat Pattern
One of the greatest advantages of learning How to Crochet a Hat Pattern is the ability to customize every detail. Experiment with pastel colors, vibrant summer shades, earthy neutrals, or bold color blocking depending on your personal style and wardrobe.
Different stitch combinations create completely different textures. Instead of the traditional mesh design, consider shell stitches, puff stitches, V-stitches, or crossed double crochet stitches for unique visual interest while maintaining the same overall construction.
Adding stripes is another simple way to personalize your project. Alternate colors every few rounds or create an ombré effect by gradually transitioning between similar shades. Cotton yarn displays color changes beautifully while maintaining excellent stitch definition.
Decorative accessories also transform the appearance of your hat. Crochet flowers, leaves, bows, wooden buttons, leather labels, or removable ribbons provide endless opportunities for personalization without altering the structure of the hat itself.
Once you’ve mastered the basic construction, adapting the pattern for children becomes simple. Reduce the crown diameter, shorten the side section, and create a narrower brim. Following the same construction principles allows you to produce hats in virtually any size.
Practice is the key to improving your crochet skills. Each completed hat helps you develop better stitch consistency, smoother shaping, and greater confidence. Over time, you’ll naturally begin modifying patterns to create original designs that showcase your creativity.
Frequently Asked Questions
Is this How to Crochet a Hat Pattern suitable for beginners?
Yes. The project primarily uses basic crochet stitches and straightforward shaping, making it an excellent introduction to hat construction.
Which yarn works best?
Cotton yarn is ideal for breathable summer hats, while acrylic and wool are better suited for cooler weather versions.
How do I know when to stop increasing the crown?
Measure the crown diameter regularly. For most adult hats, stop increasing when the crown reaches approximately 6½ to 7 inches (16.5–18 cm).
Can I make this hat in different sizes?
Absolutely. Simply adjust the crown diameter, side height, and brim width according to the desired head circumference.
Why is my hat curling?
Curling usually indicates insufficient increases in the crown or stitches that are too tight. Check your gauge and increase pattern.
Why does my hat ripple?
Ripples often occur because too many increases were added. Reducing the number of increase stitches usually corrects the issue.
Can I wash my finished crochet hat?
Yes. Follow the washing instructions recommended for your yarn. Cotton hats are generally machine washable on a gentle cycle, while wool may require hand washing.
How long does it take to complete?
Most crocheters finish this project within one to three days depending on experience, stitch complexity, and available crafting time.
Conclusion
Learning How to Crochet a Hat Pattern is a rewarding way to build your crochet skills while creating a practical and stylish accessory. In this guide, you learned how to select the right materials, crochet a properly shaped crown, build the body using breathable mesh stitches, create a structured brim, and finish your project with professional techniques. You also discovered several customization ideas that allow you to make each hat unique through color choices, stitch patterns, and decorative details.
With patience and regular practice, you’ll soon feel comfortable adapting this pattern to create hats for every season and every member of your family. Every finished project helps improve your stitch consistency and confidence, making future crochet projects even more enjoyable.